HOW TO Share Your App Layouts in Online Galleries
Posted on under Scrapbooking With Apps, TUTORIALS
Welcome back to another Scrapbooking with Apps tutorial. Let’s talk web sharing! Whether you want to share to social media sites or an online scrapbooking gallery, we’ve got you covered. You’ve just created a Project Life App layout and you’re so proud of yourself for figuring out this app scrapping thing. Naturally, you want to share with your scrappy friends and family! But how? It’s easier than you might think. Follow along with the screenshots below and check out the video at the bottom of this post for more info!
How to Share App Layouts on Social Media
First, let’s talk social media. Begin by making sure you are logged in to your social media accounts on the same device you are scrapping with. Update all of your scrapbooking and social media apps before walking through the process with me. Smart phones and tablets easily connect to your social media via your scrapbooking apps with just a few taps. Sharing a layout straight from the Project Life App or the Over App is very easy. Your device walks you through the process step by step and there’s no resizing needed for this type of web sharing.
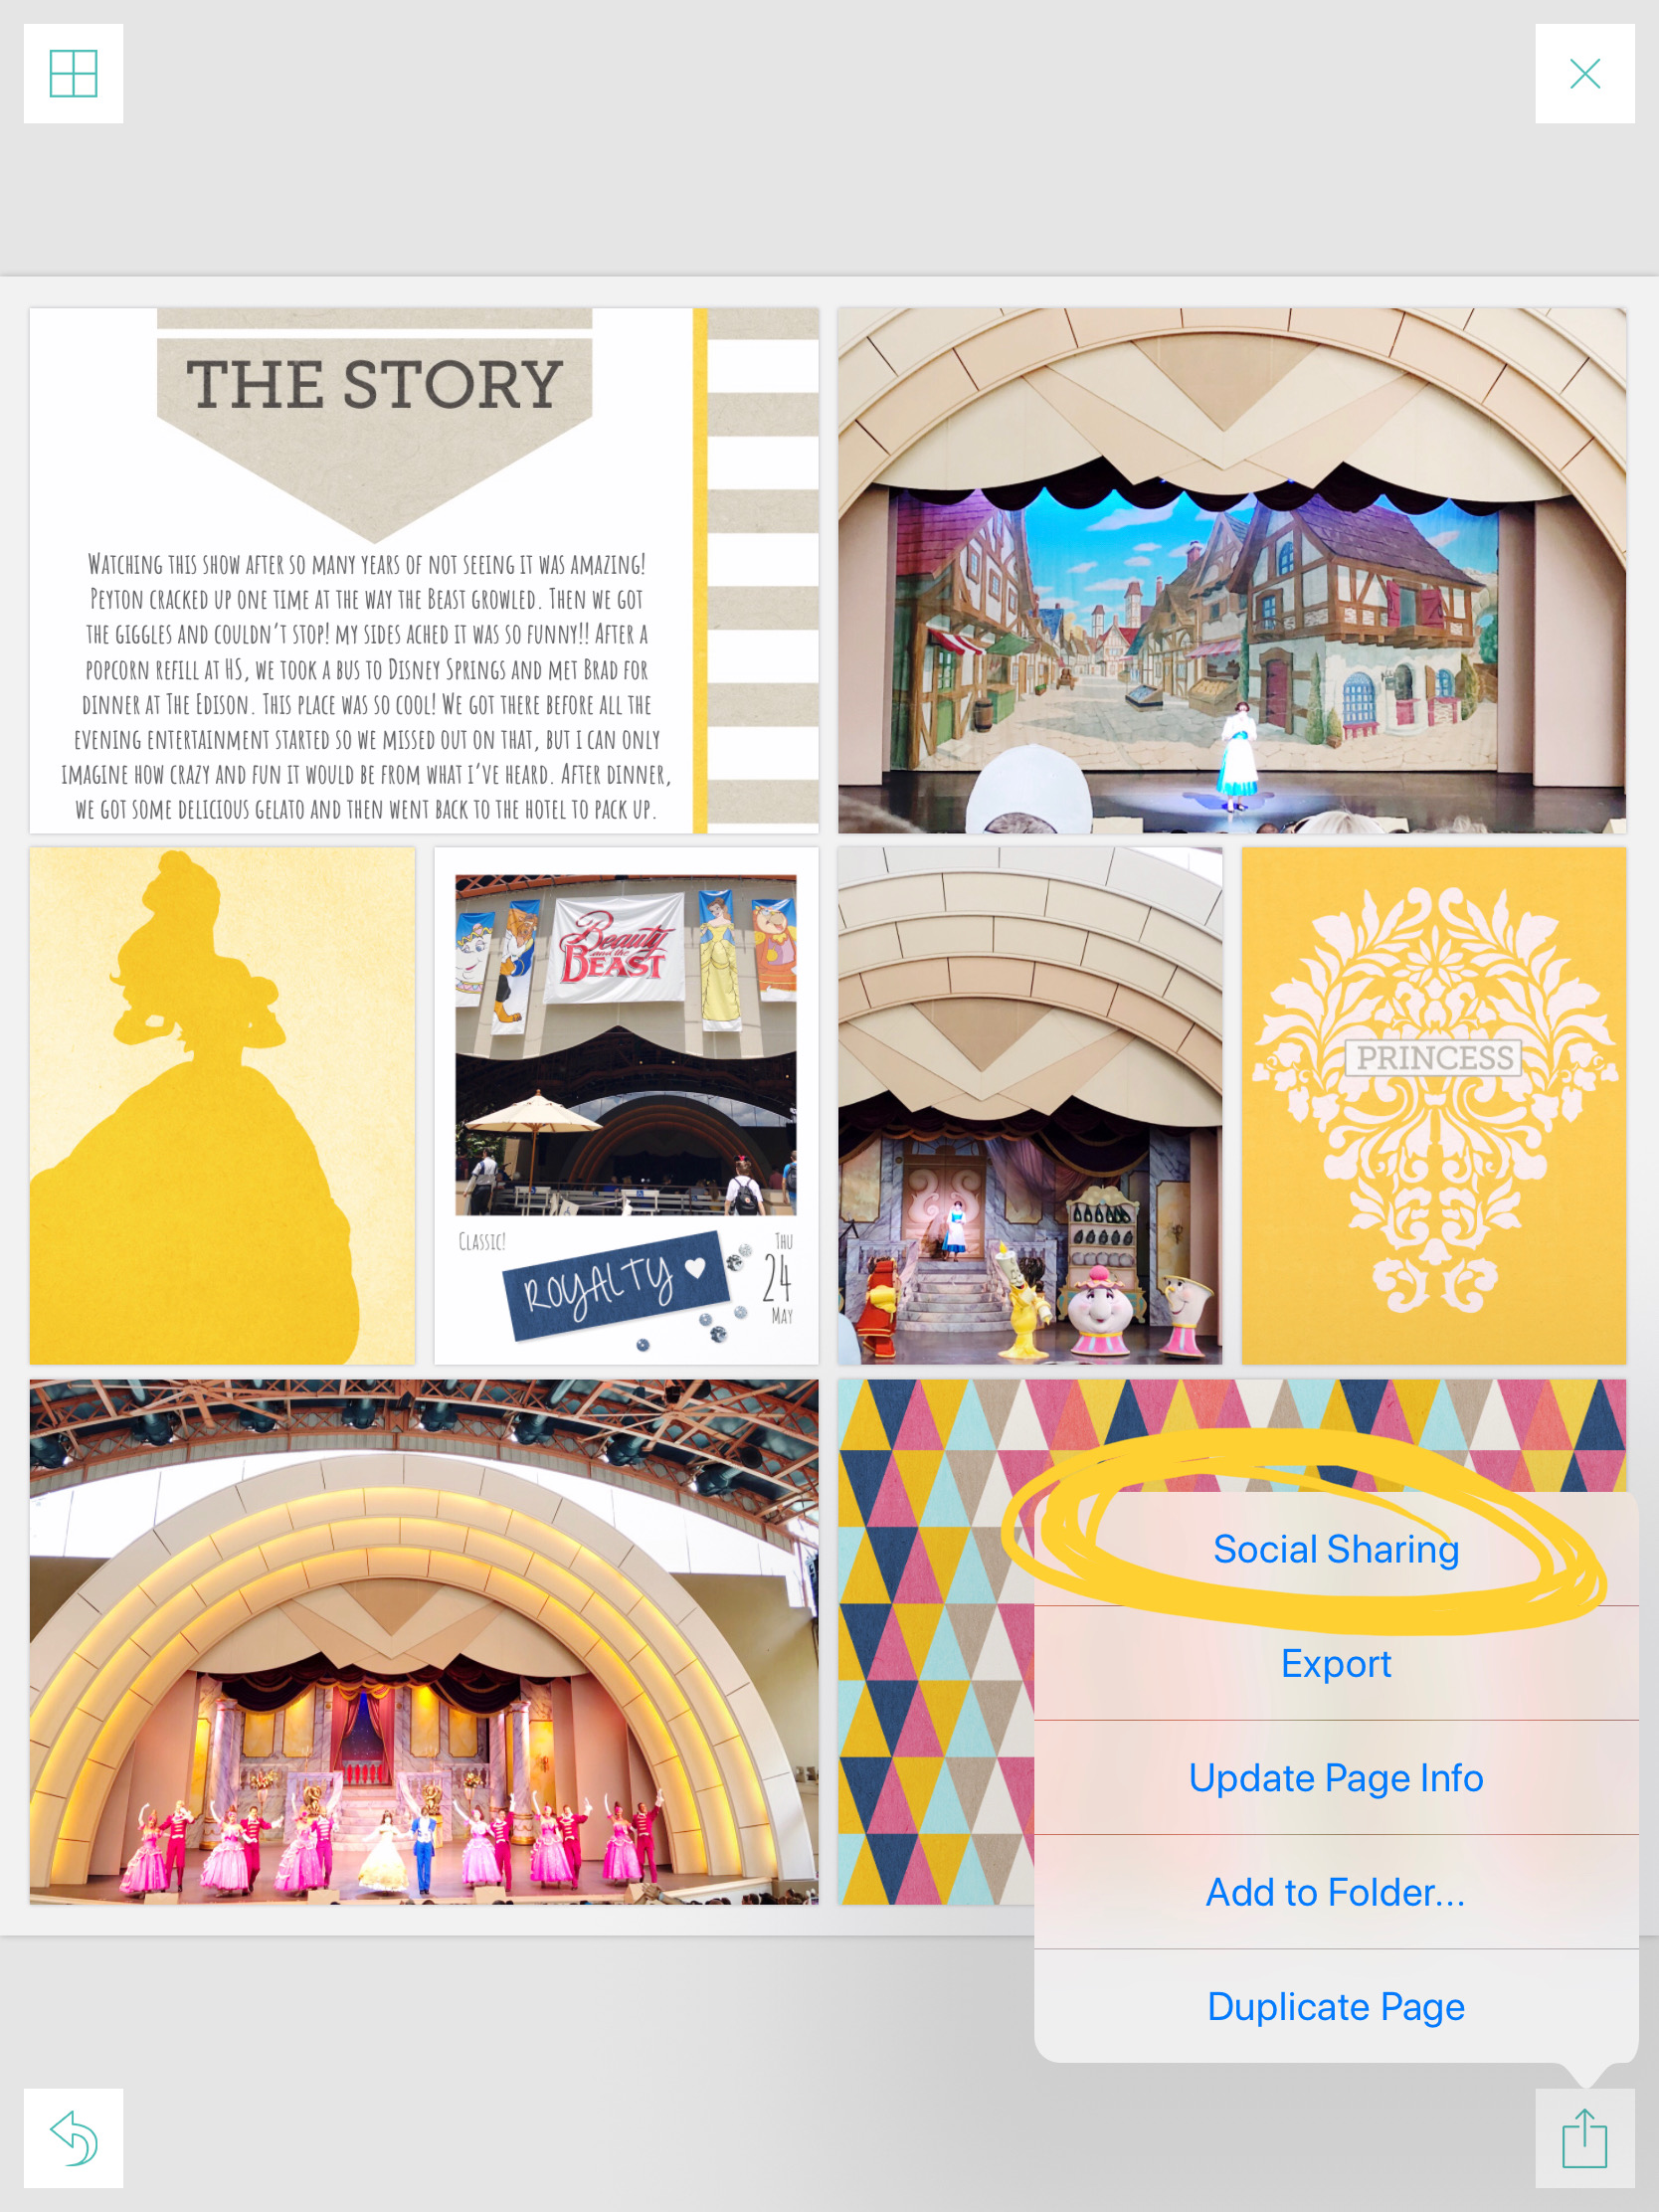
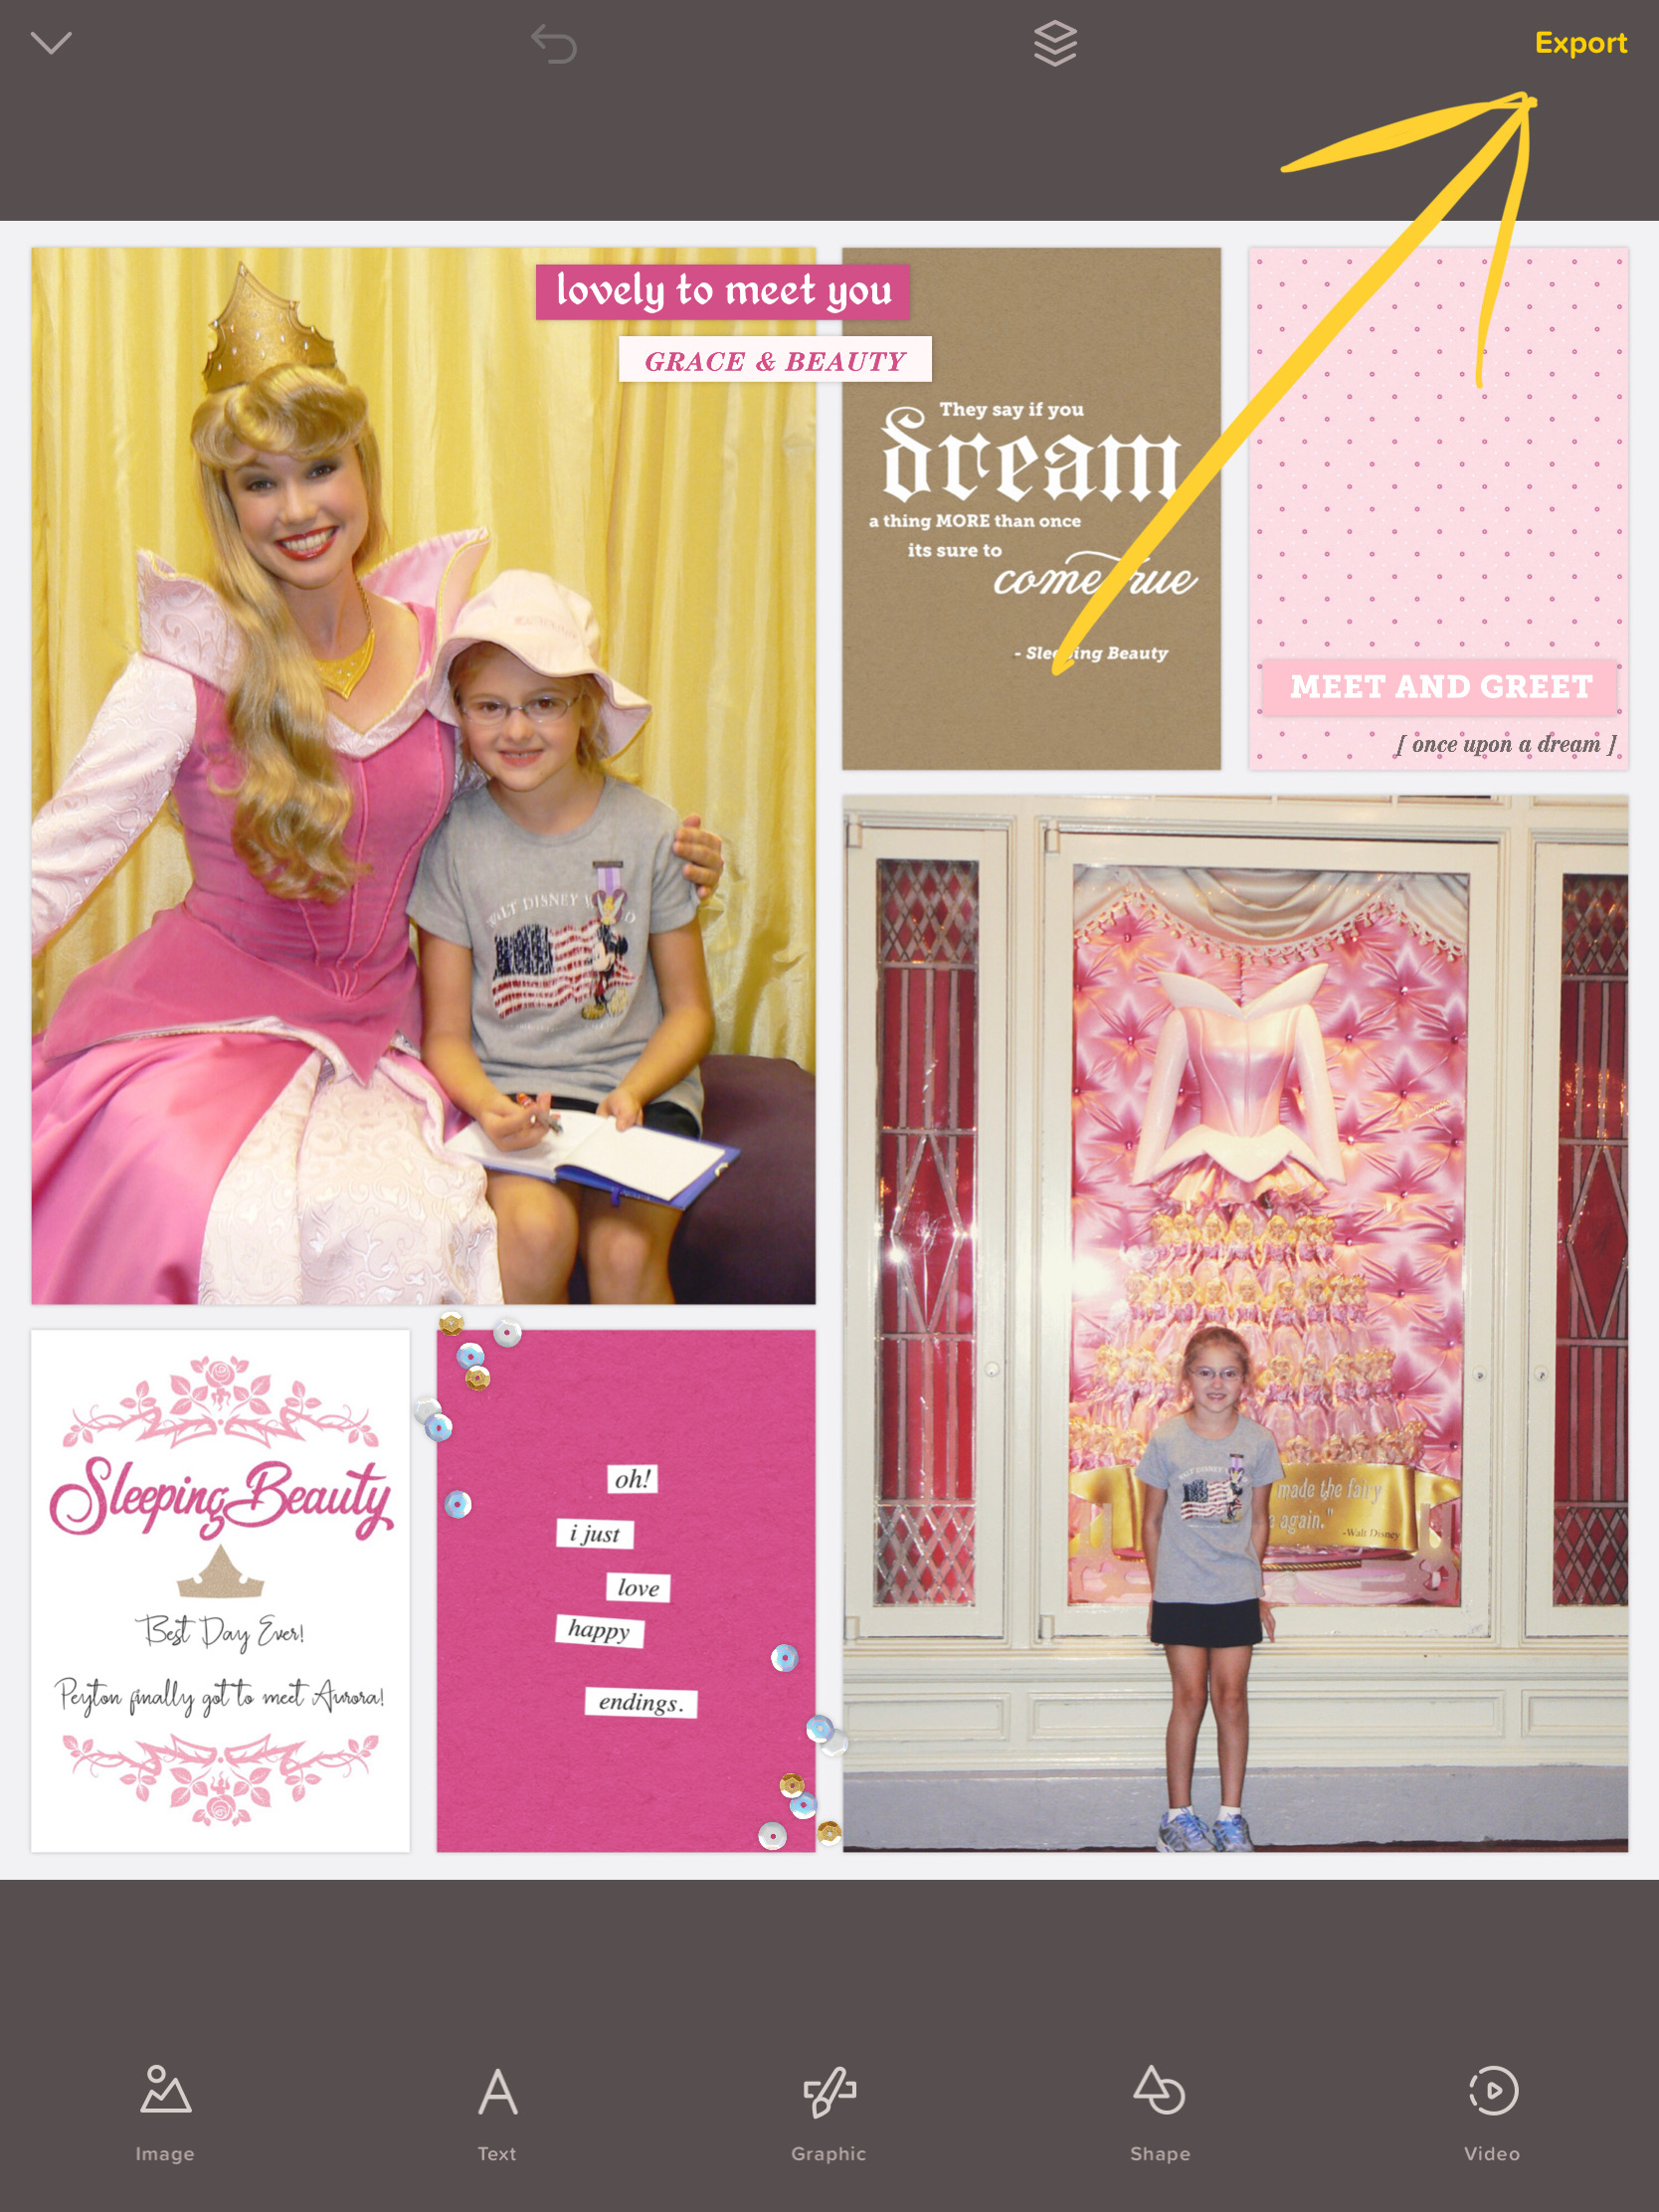
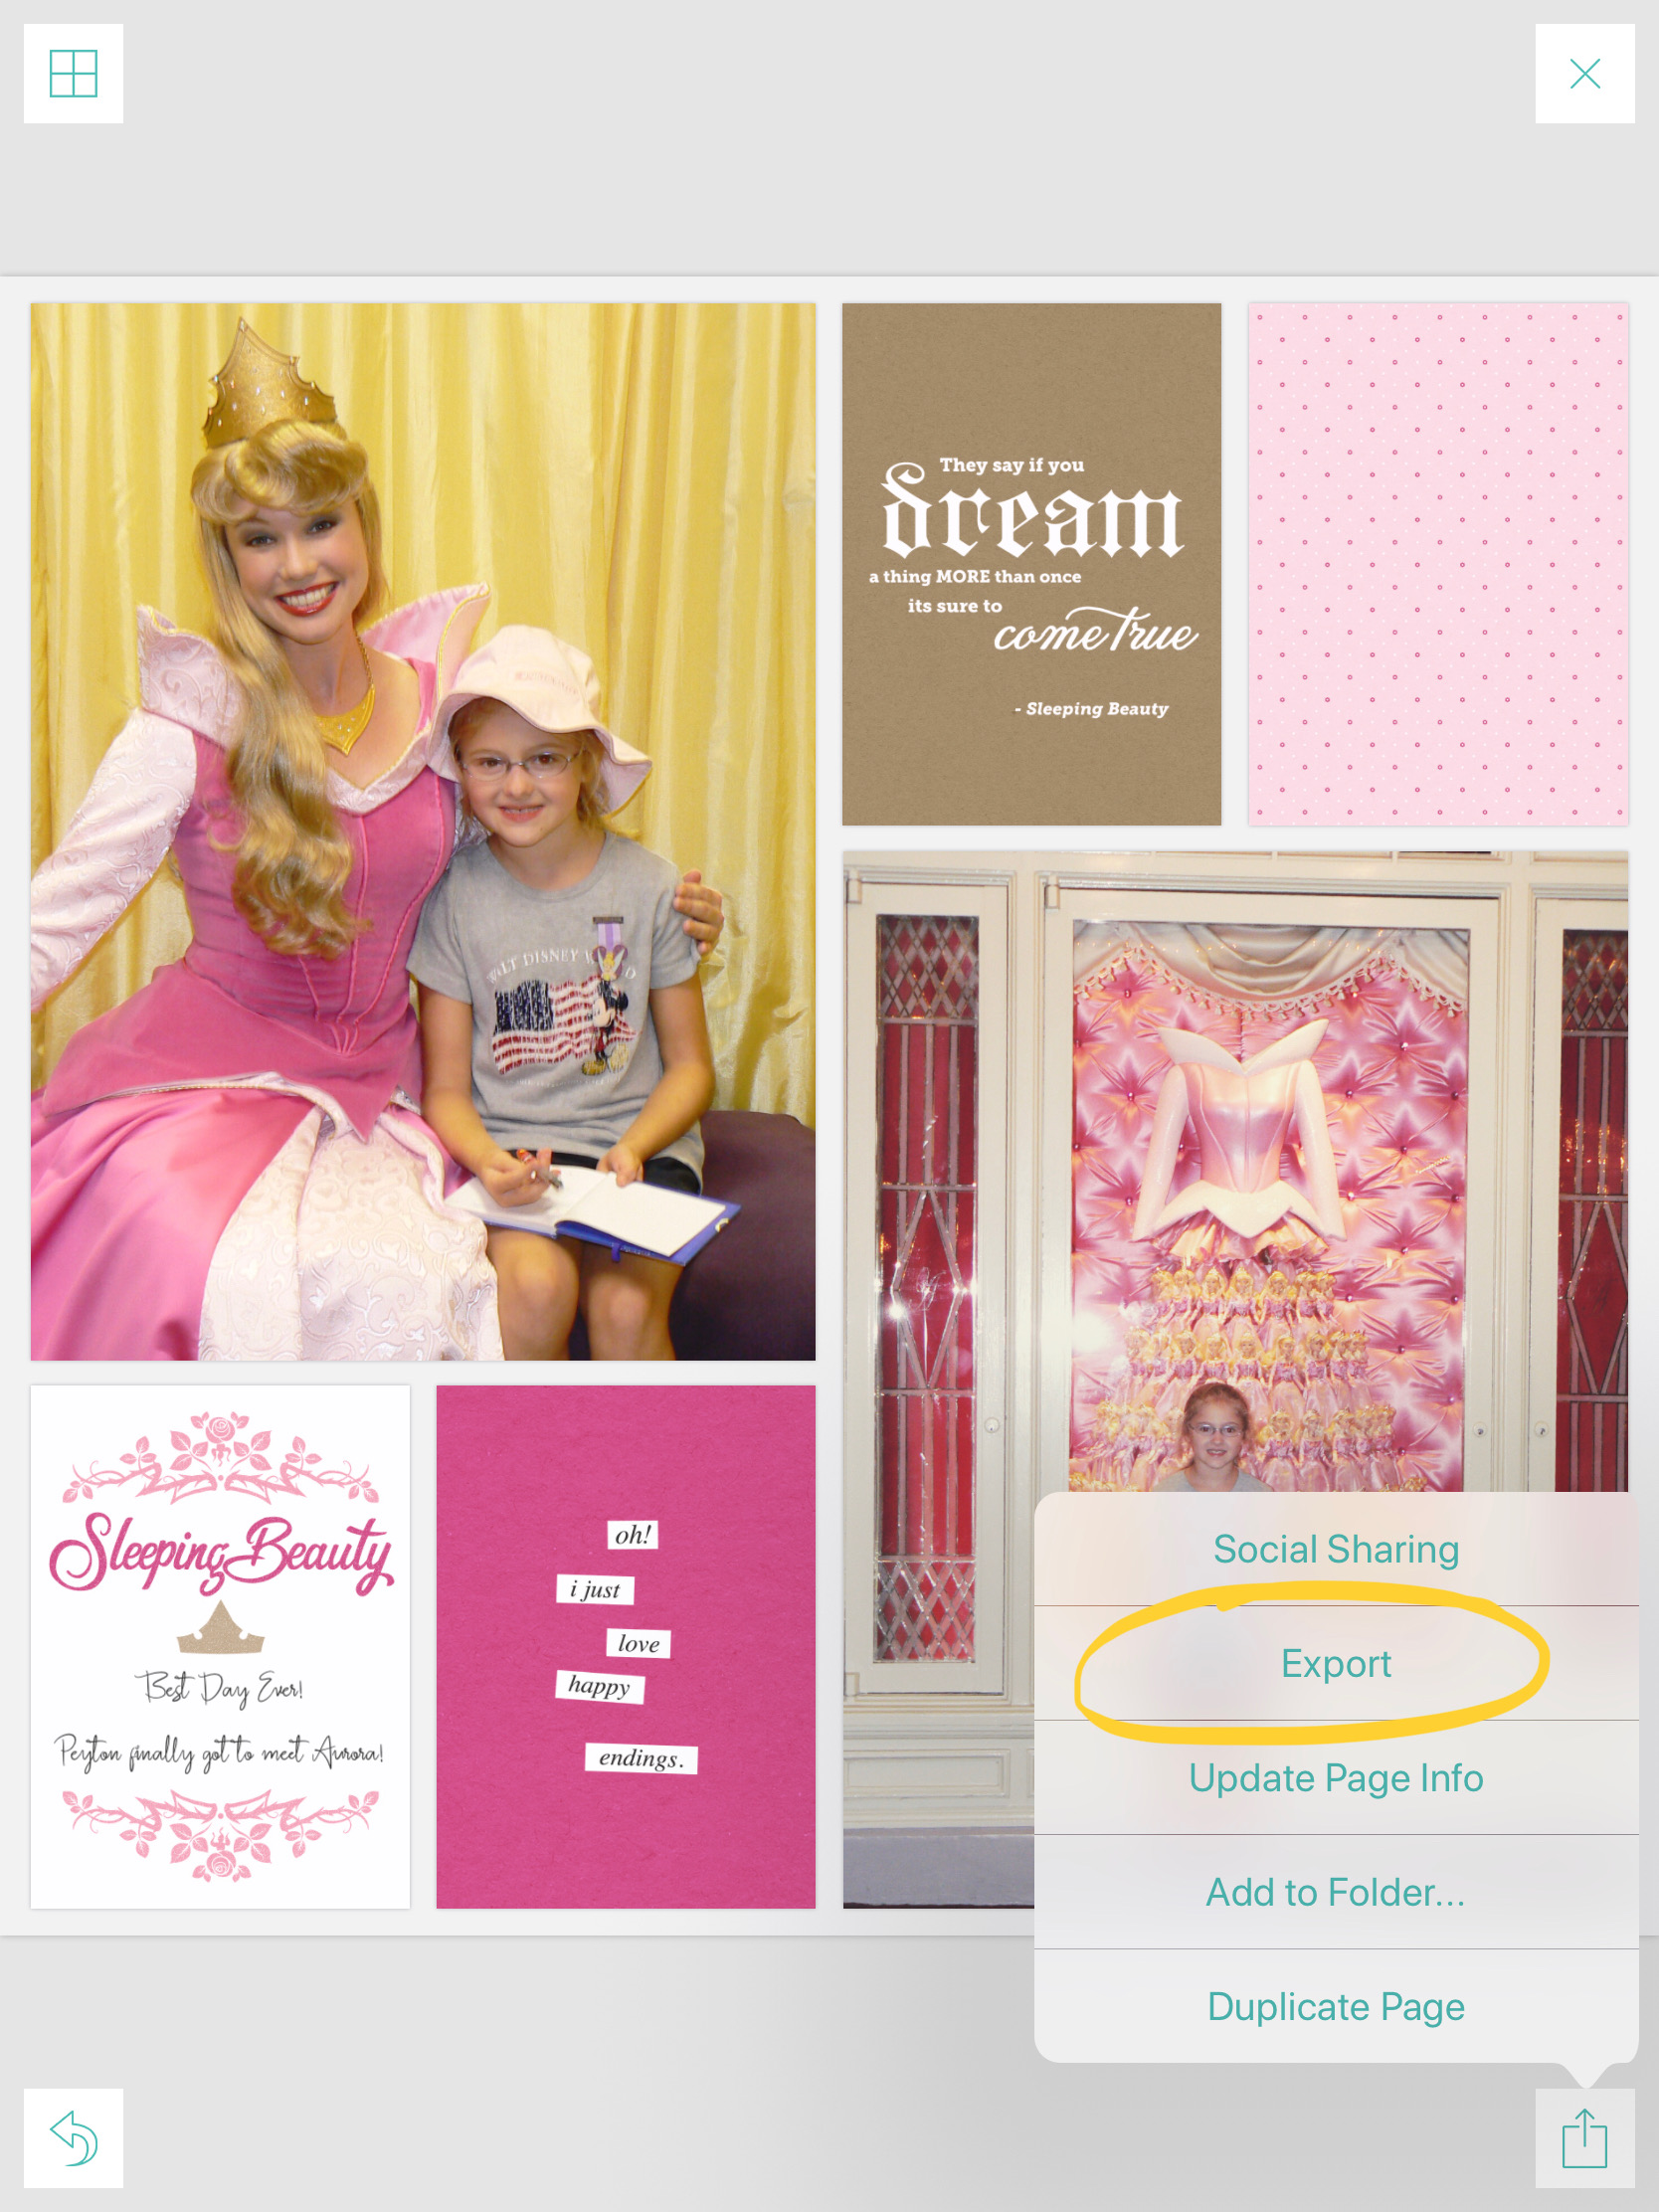
Here’s how I share my Project Life App layouts on Instagram from my iPad. Open your layout in the Project Life App, tap on the export button at the bottom right of the screen, and then choose Social Sharing.

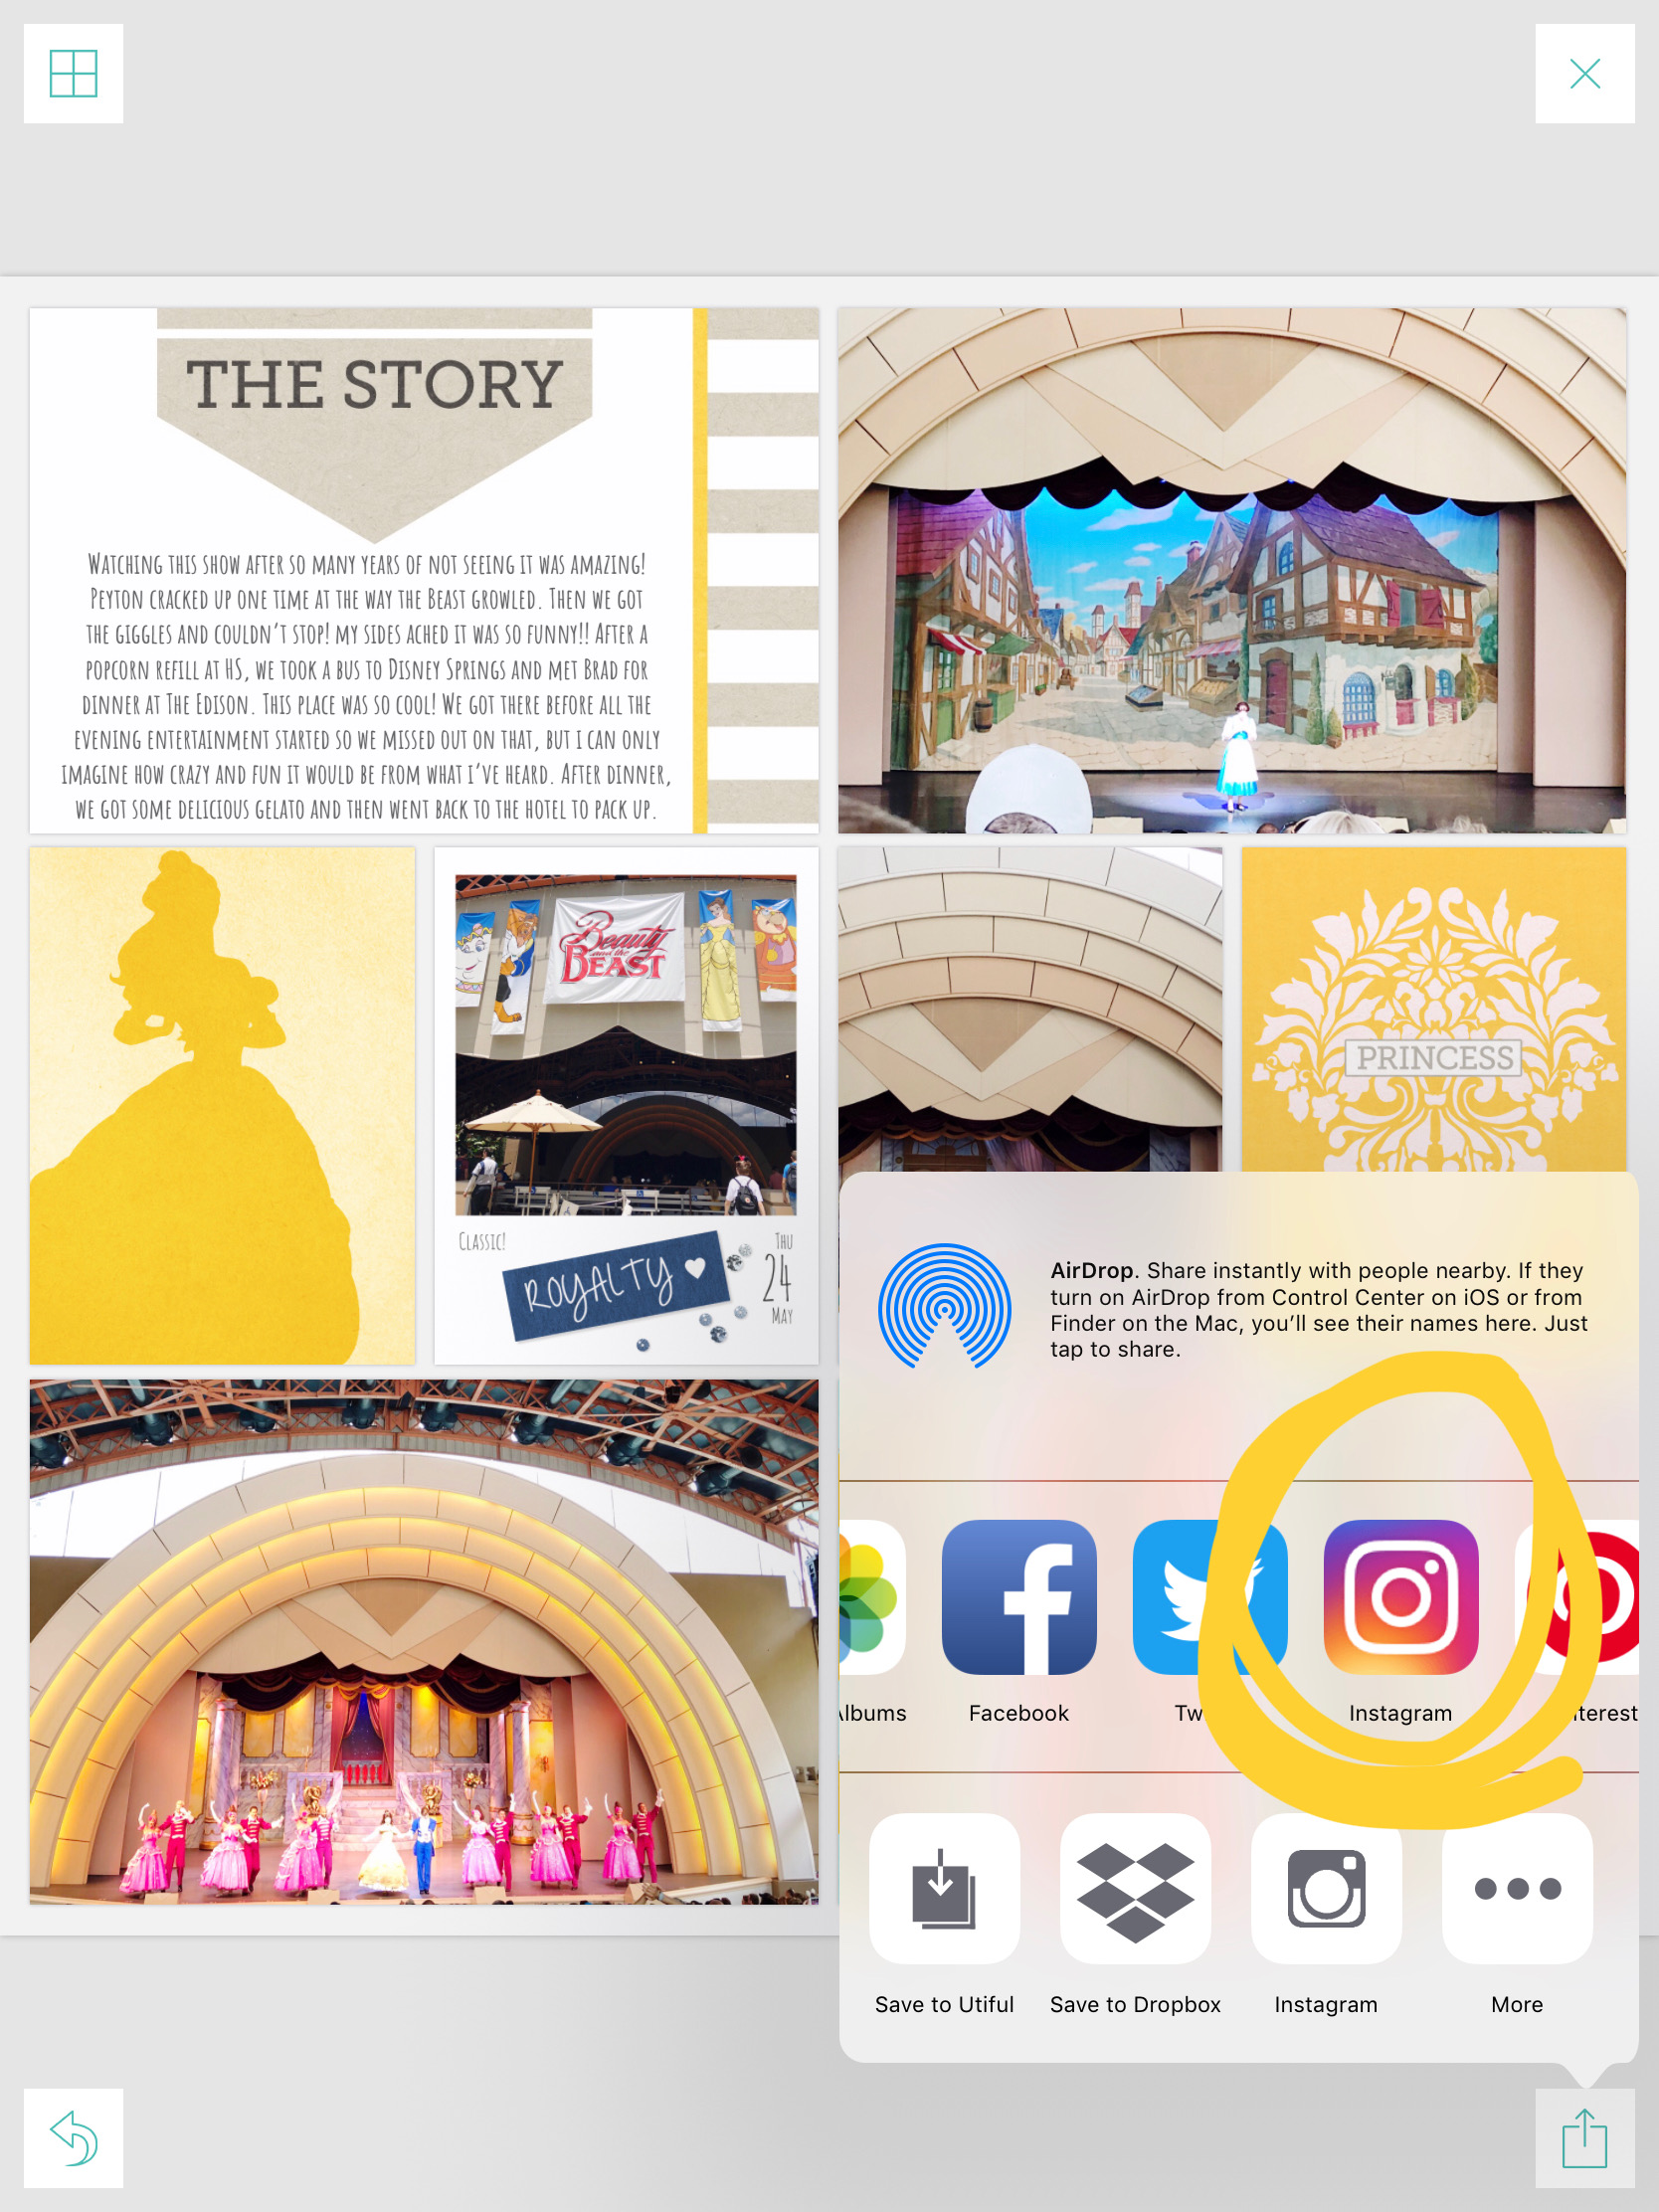
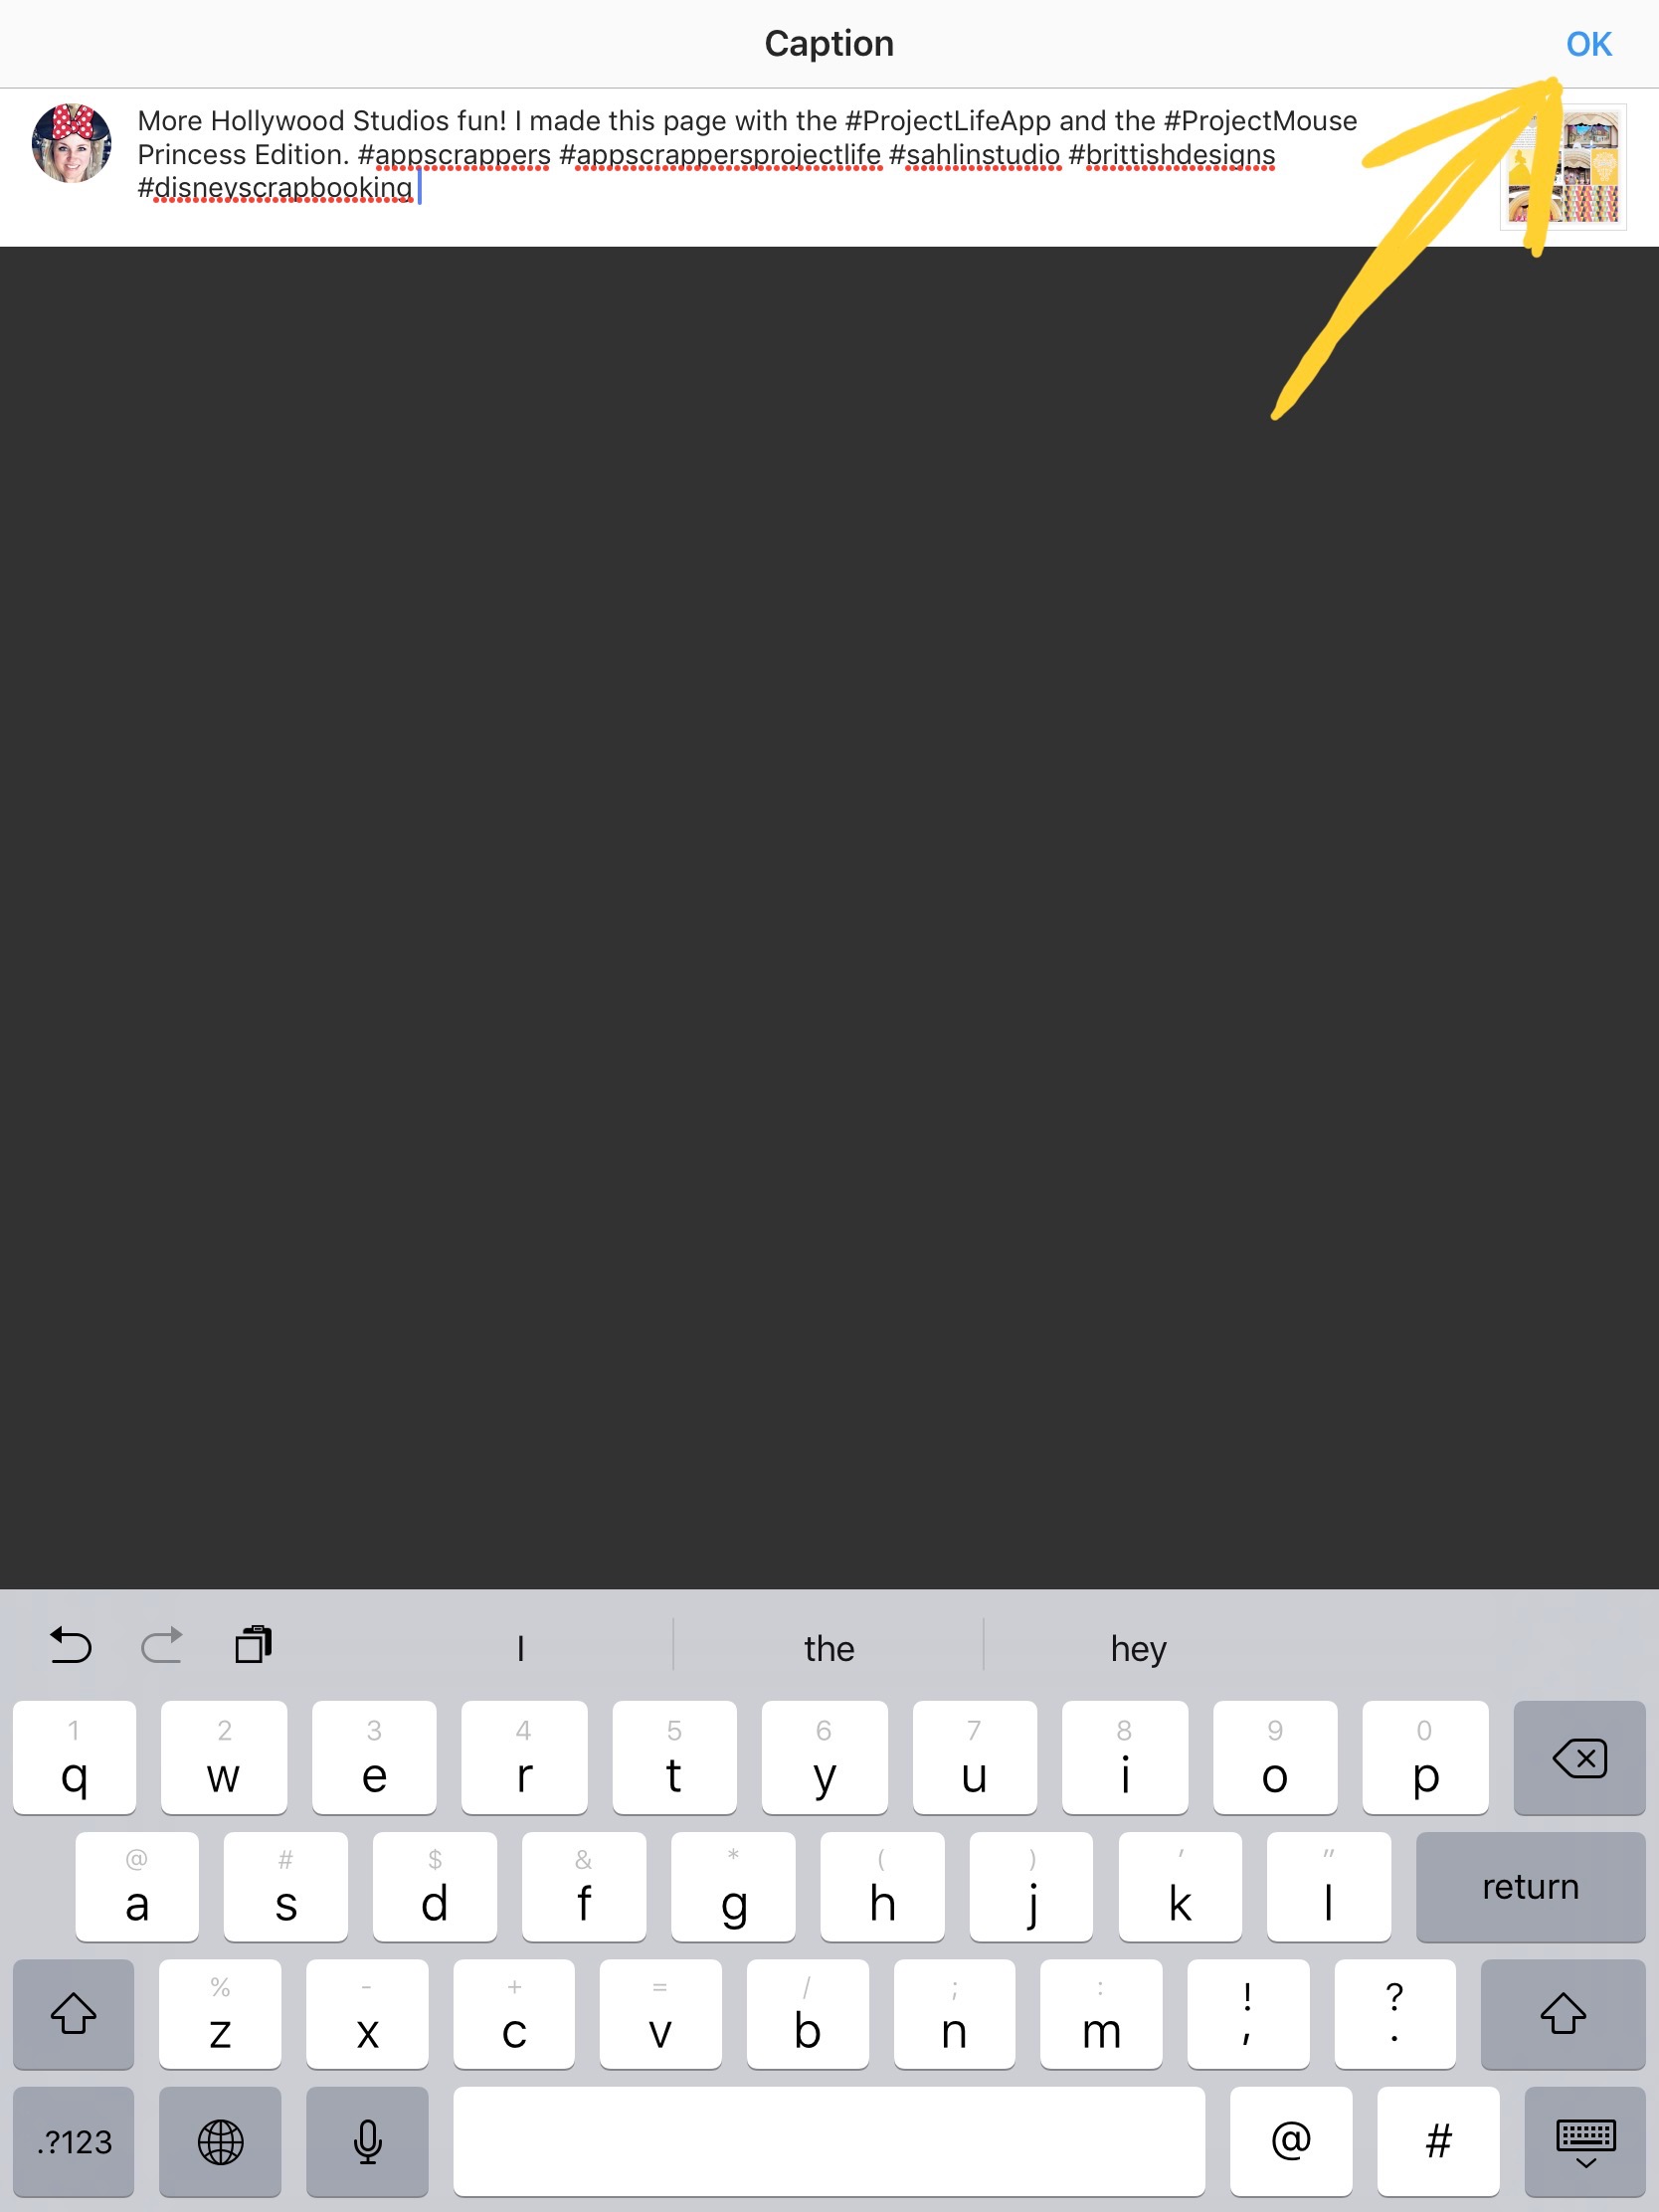
Scroll through the icons on the top row of the share sheet to find Instagram. Tap More at the end of the row if you don’t see it and toggle on any sites you might be interested in sharing to that are not displayed. Let’s choose Instagram and type out a caption in the box at the top. Don’t forget those hashtags so we can see your work and be inspired!
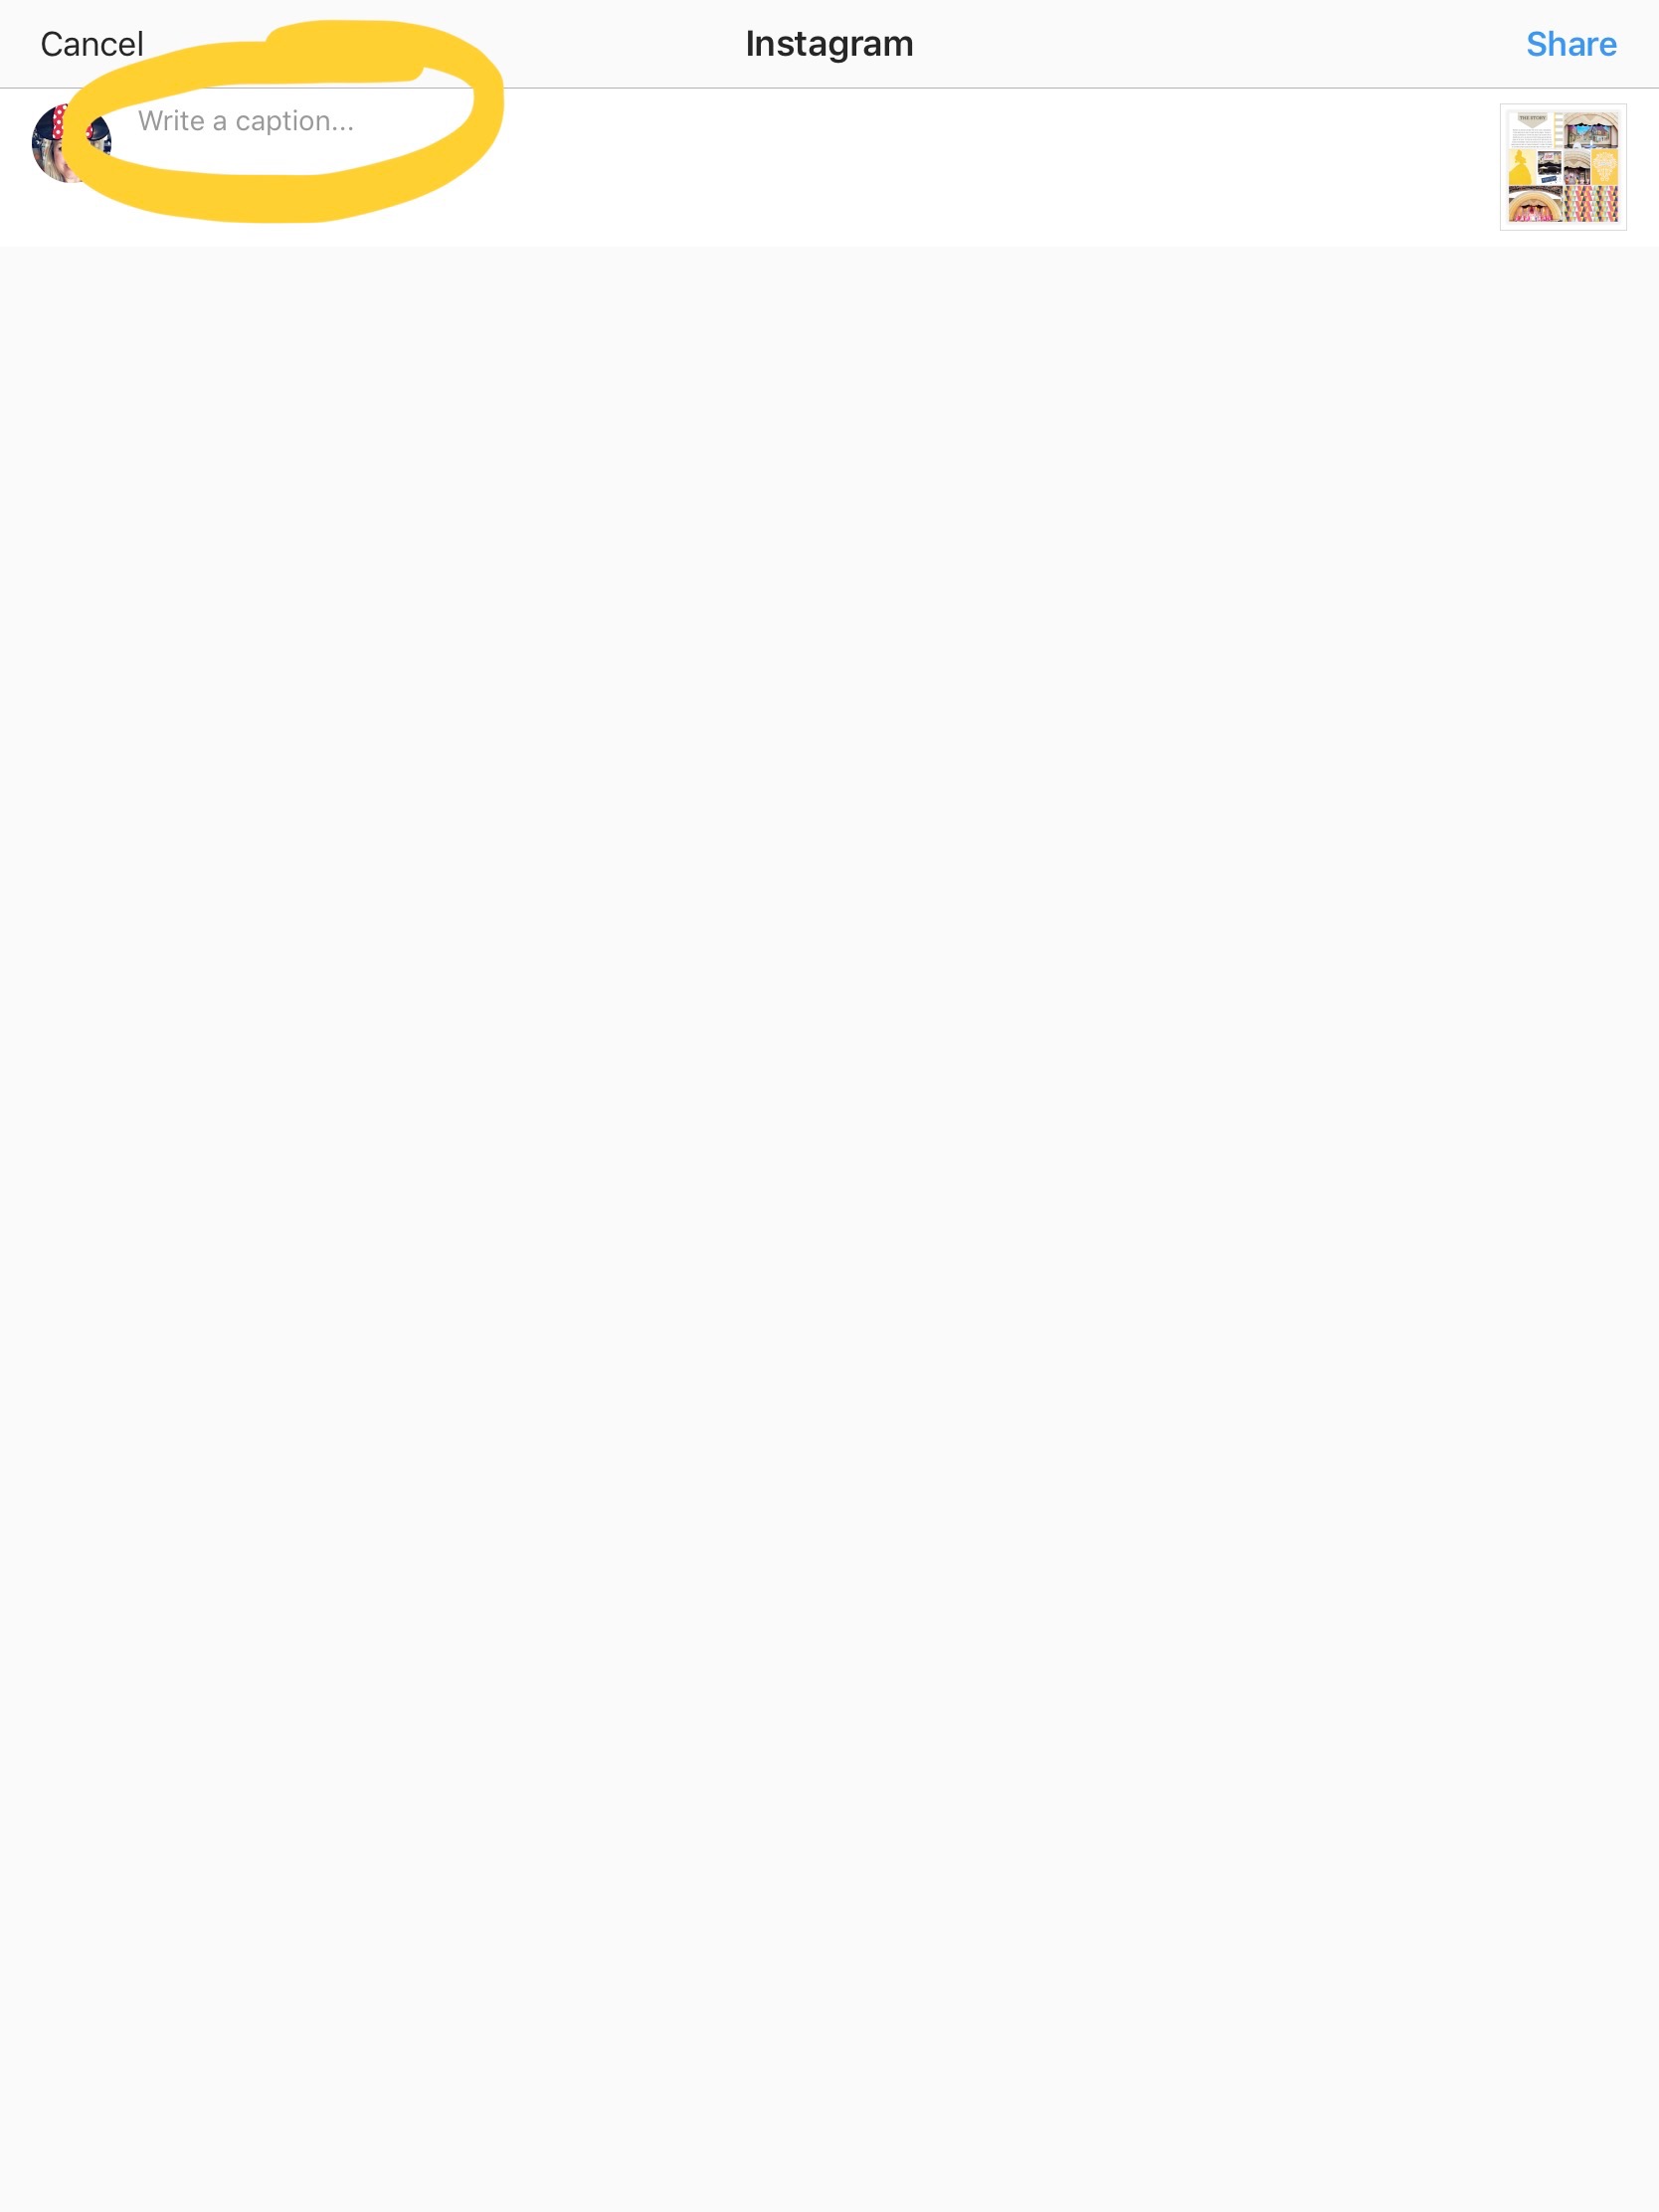
After you double check your spelling and add relevant hashtags, tap OK, and then tap Share.
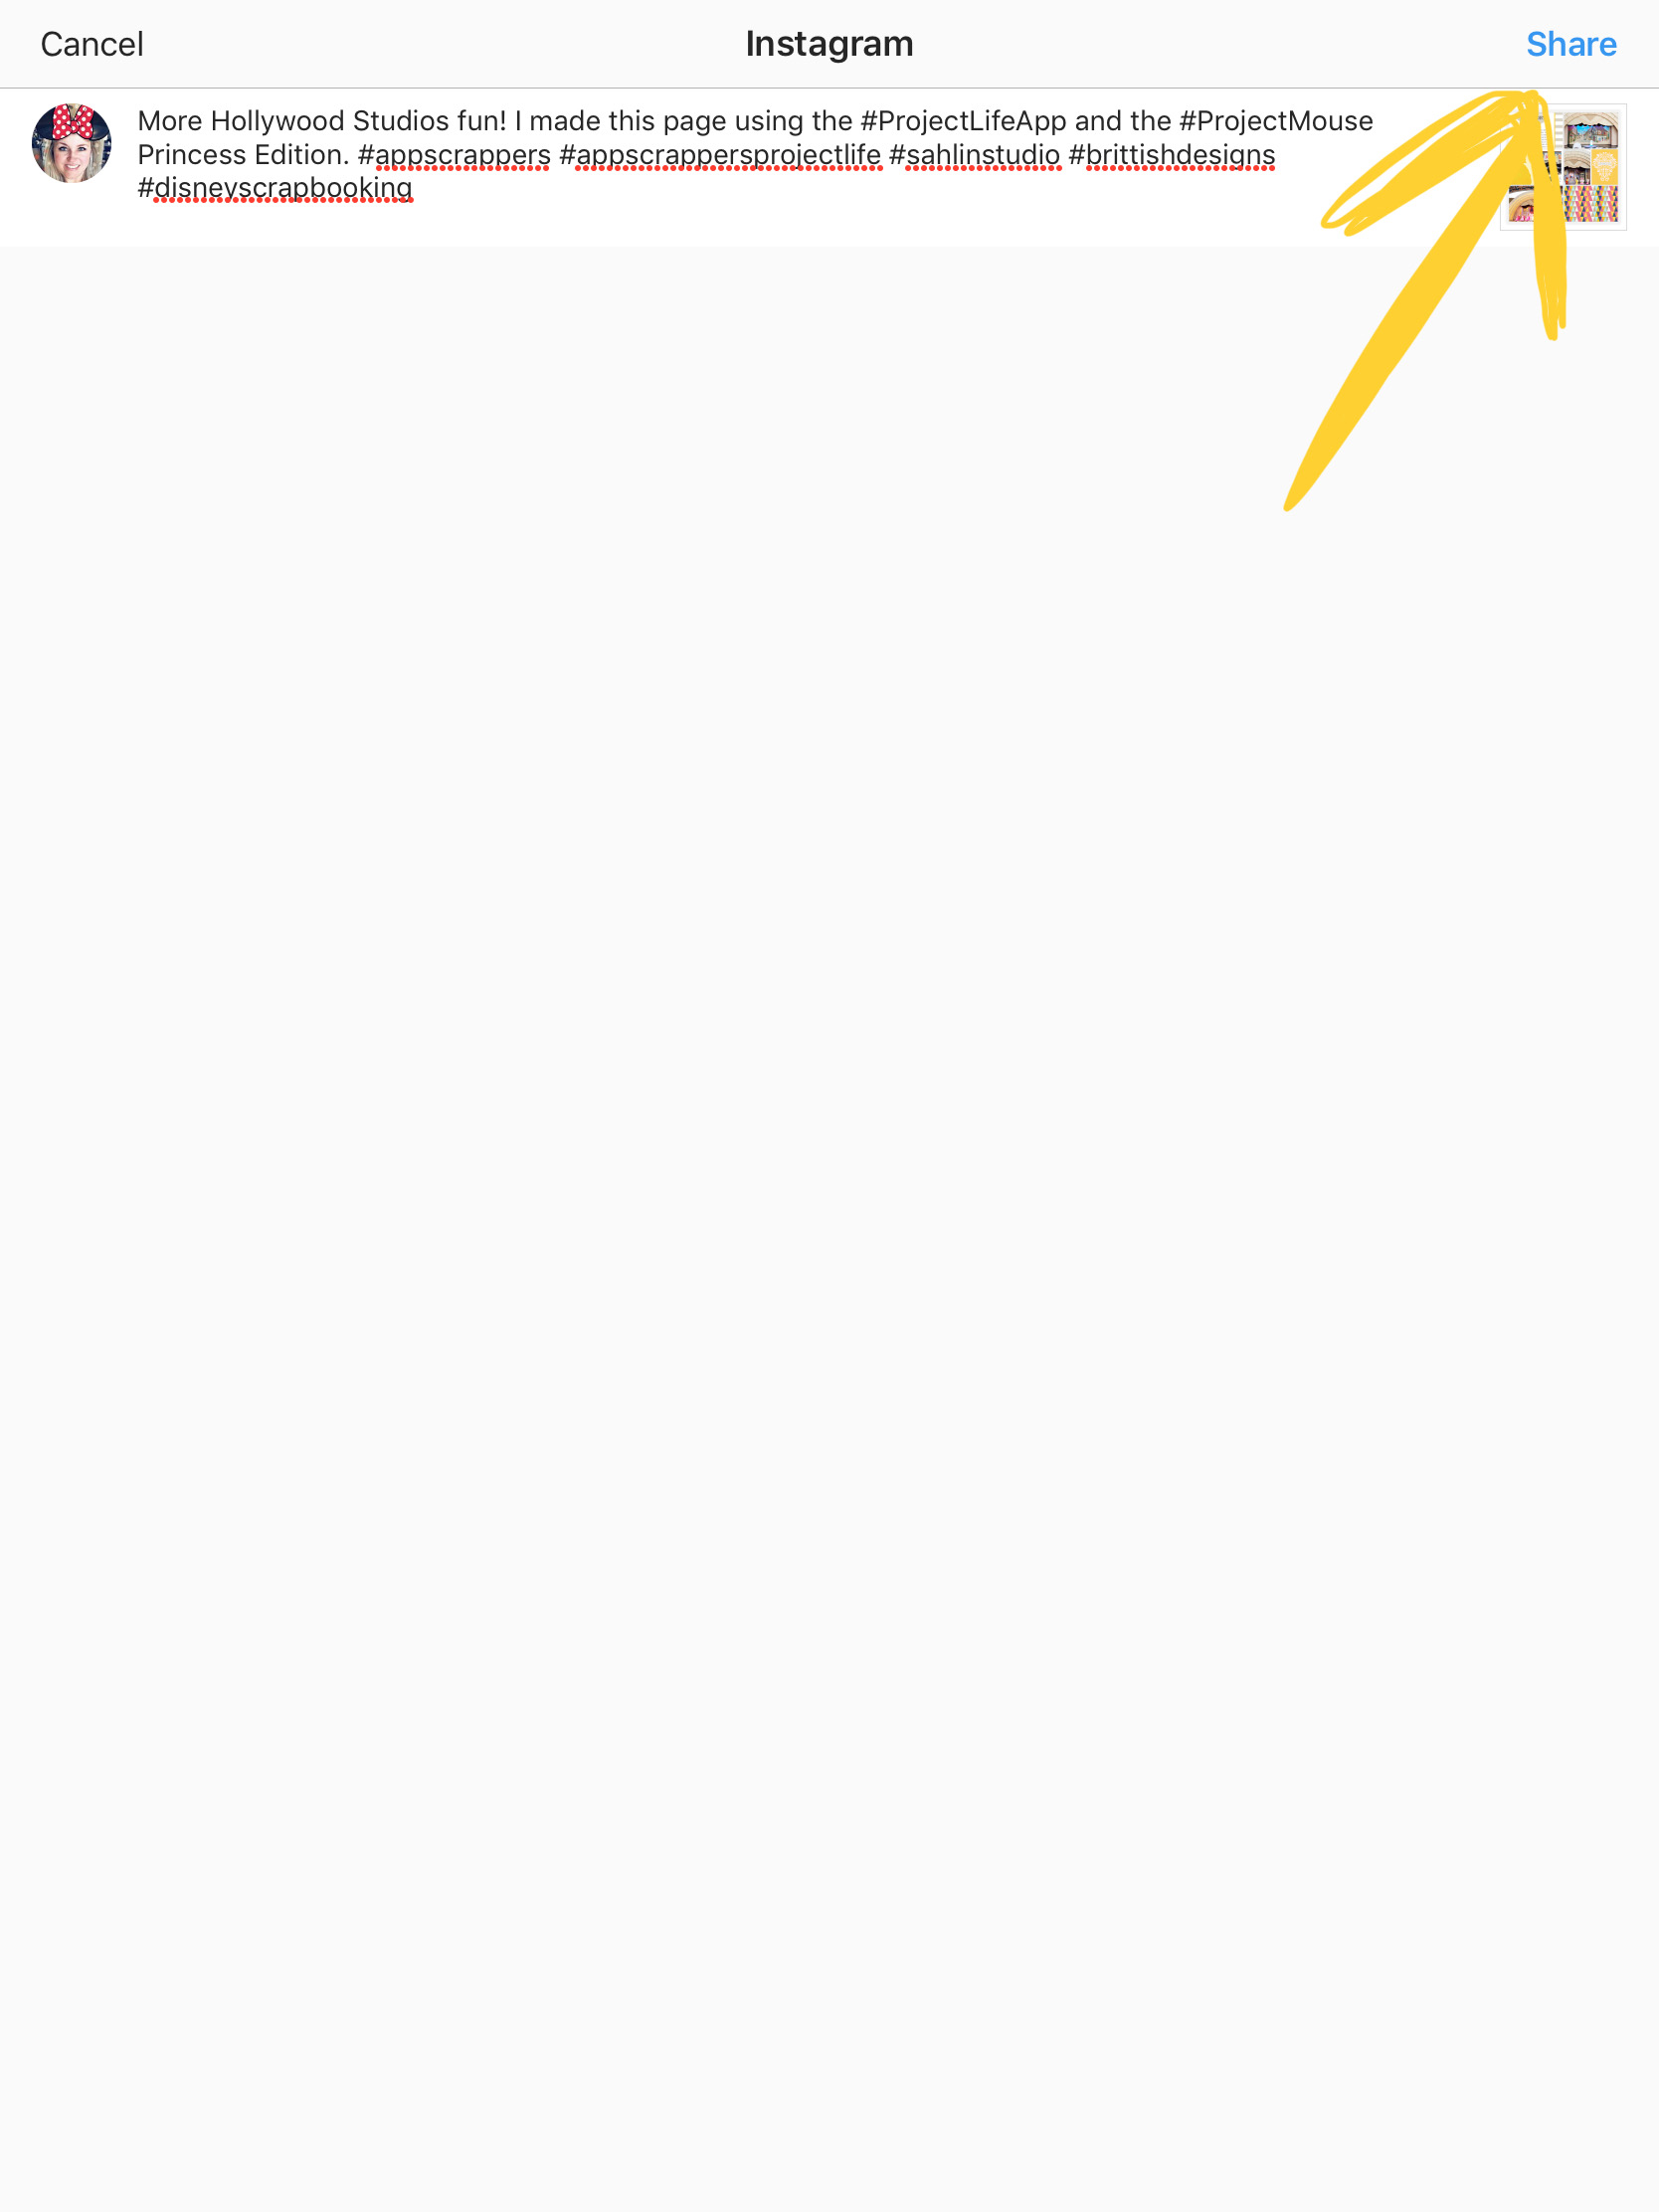
Your Project Life App layout will now be posted to your Instagram account. It’s that easy!
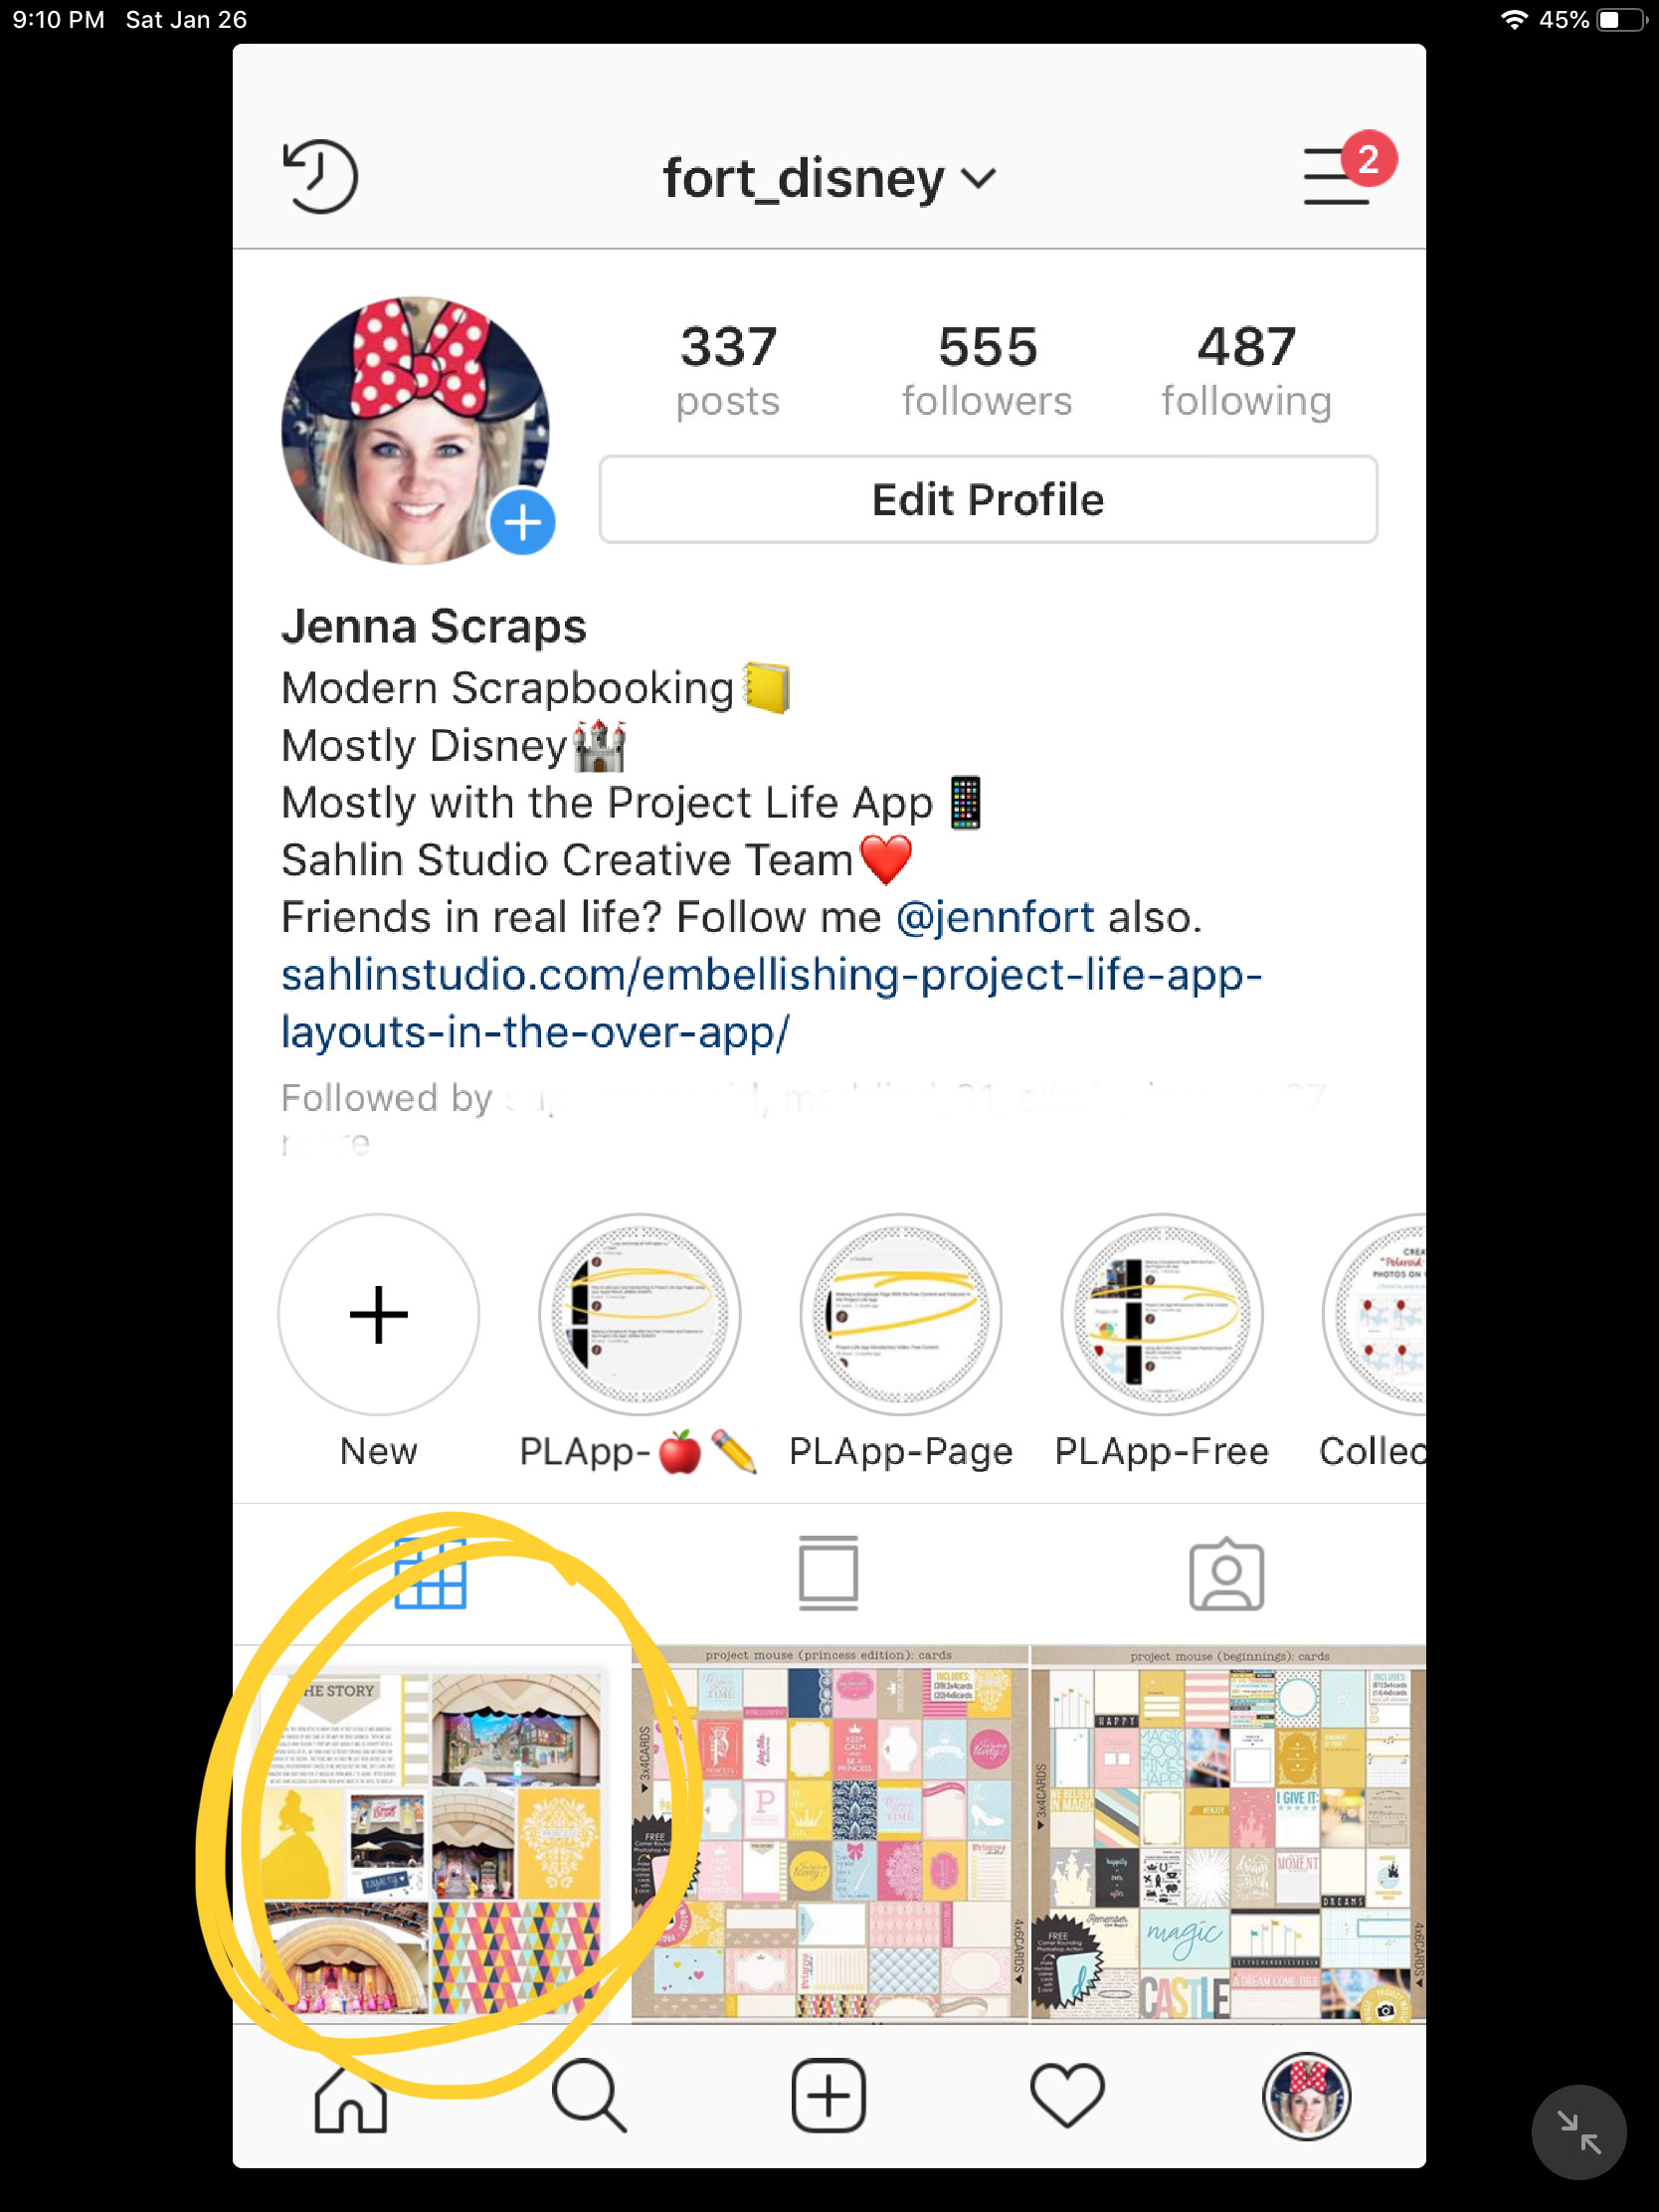
You can also share to other social media platforms like your Facebook profile or the Project Mouse Facebook Group by following similar steps.
How to Share App Layouts in Online Galleries
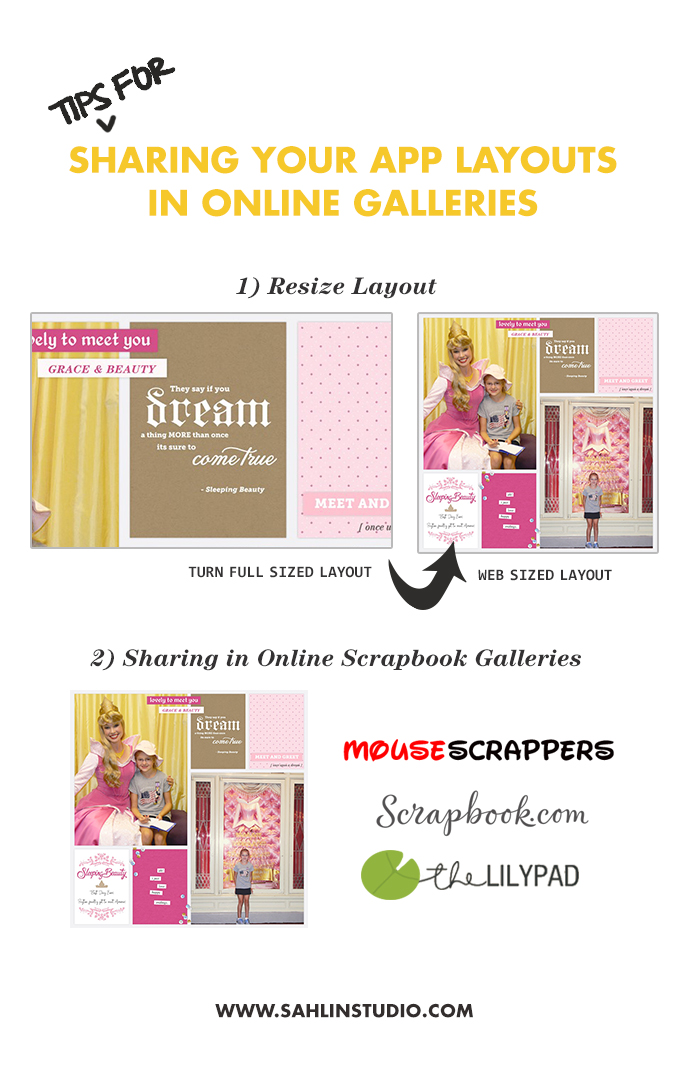
Another great place to share is in online galleries, like the gallery at The LilyPad. Some of these online scrapbooking galleries are wonderful communities to share in!! It’s always great to receive love and comments on layouts. However, these galleries do require your layouts to be a certain “size”, so they are not brought in too large.
Exporting Your Layout
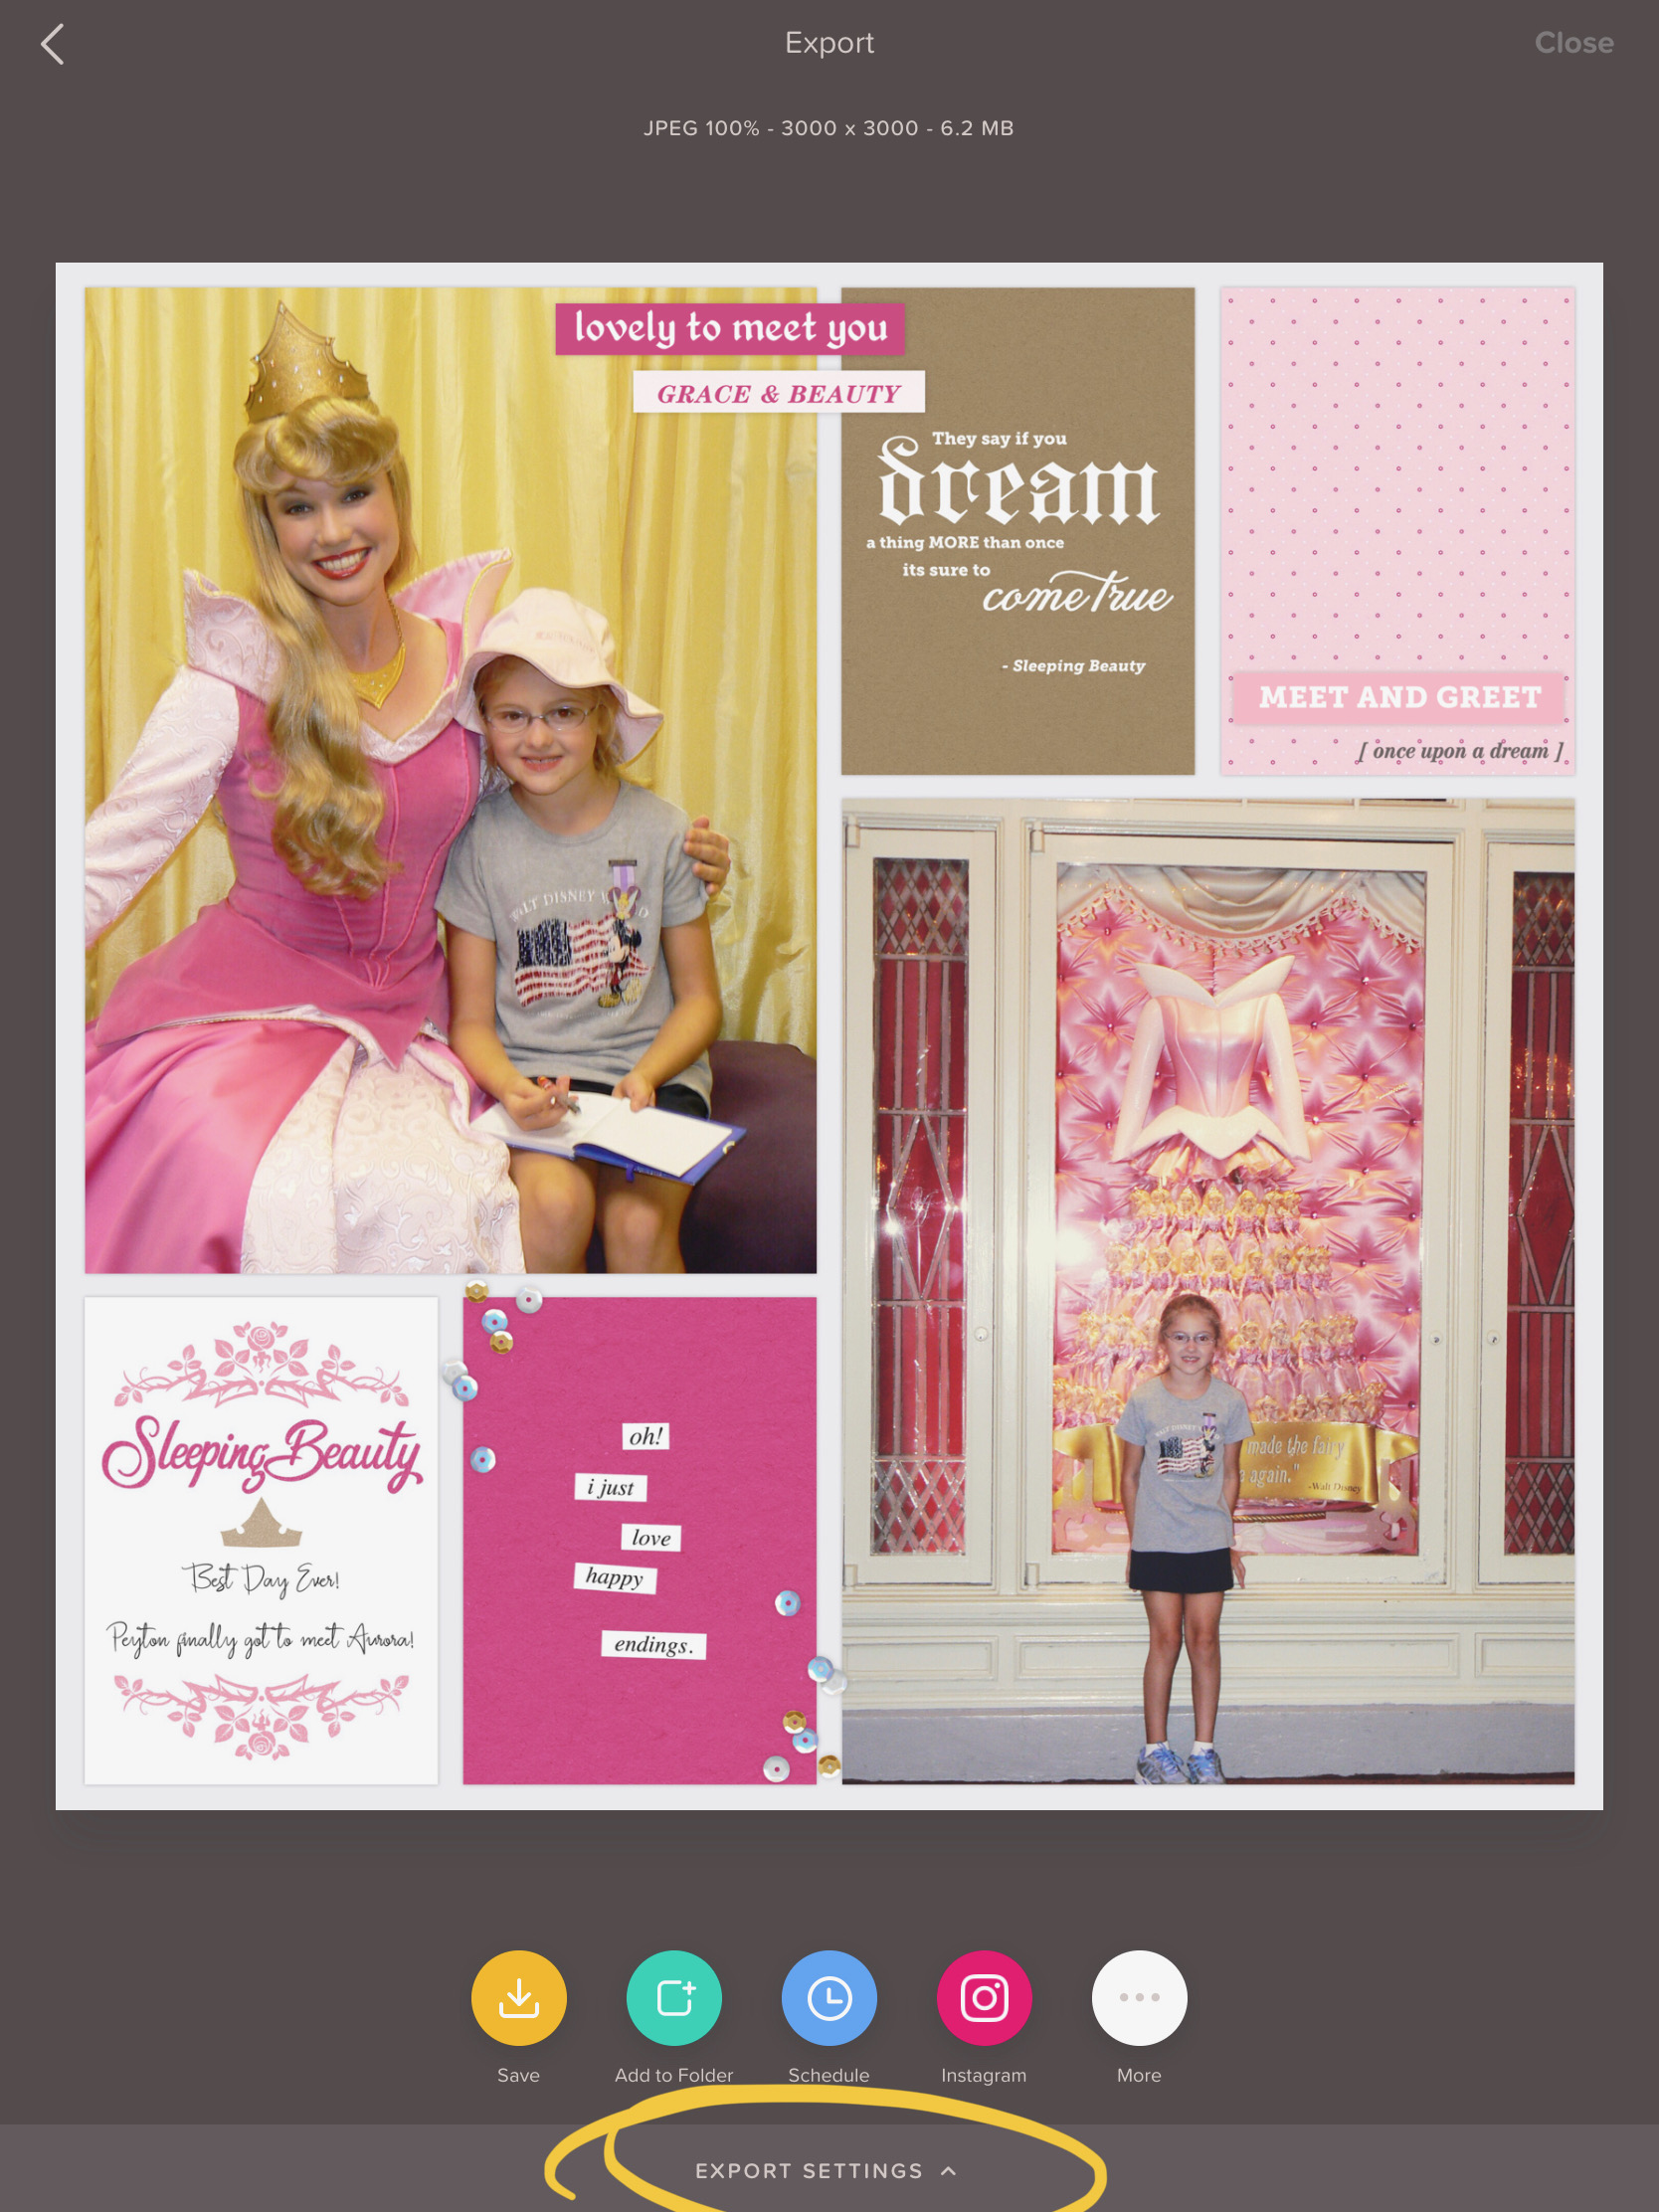
We’ll use the Over App for resizing so let’s begin by setting up our export options in the Over App because they’ve changed since my last Over tutorial here on the blog. Update and open the Over App, open a project, tap on the Export option at the upper right, tap on Export Settings at the bottom, and choose JPEG at BEST quality and then check the box to Save as Default. Don’t forget to tap Done also.

Resizing Your Layout
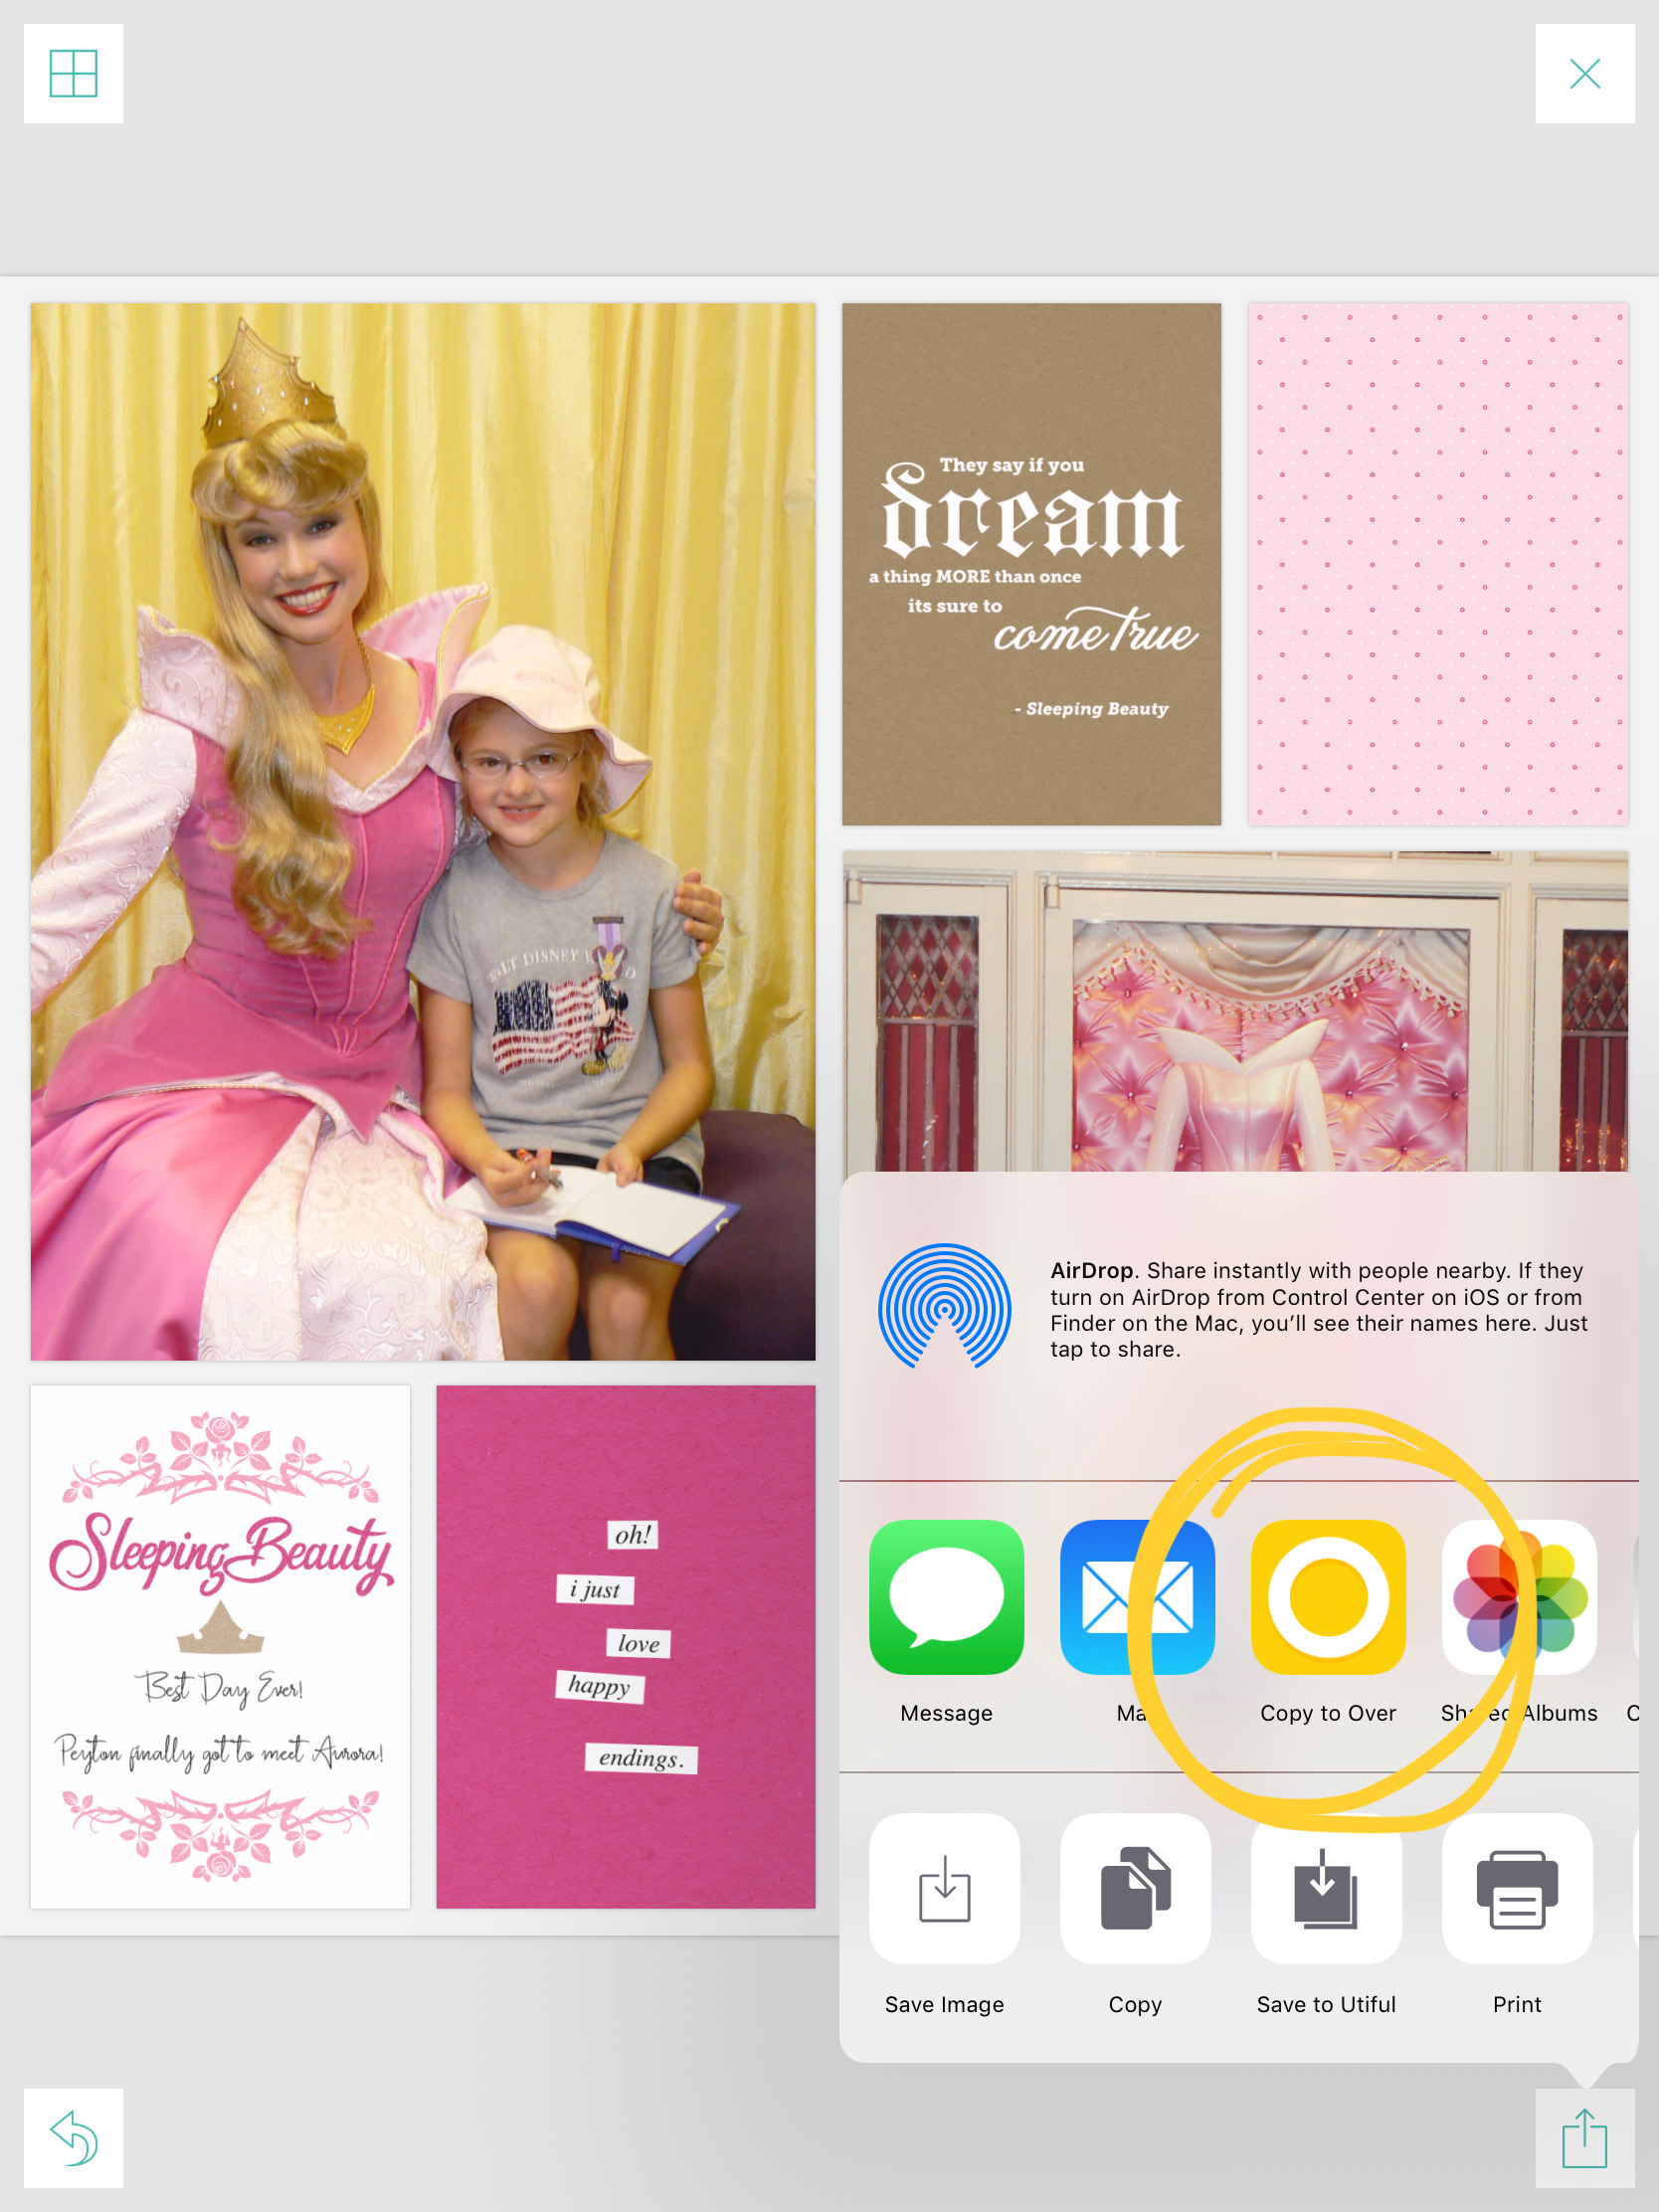
Now, let’s resize a layout. I use Over for this because, outside of the Project Life App, it is my most used scrapping app and I’m familiar with it. With your Project Life App layout open, tap on the Export Arrow in the bottom right, tap Export, choose the 12×12 option, and tap Copy to Over.
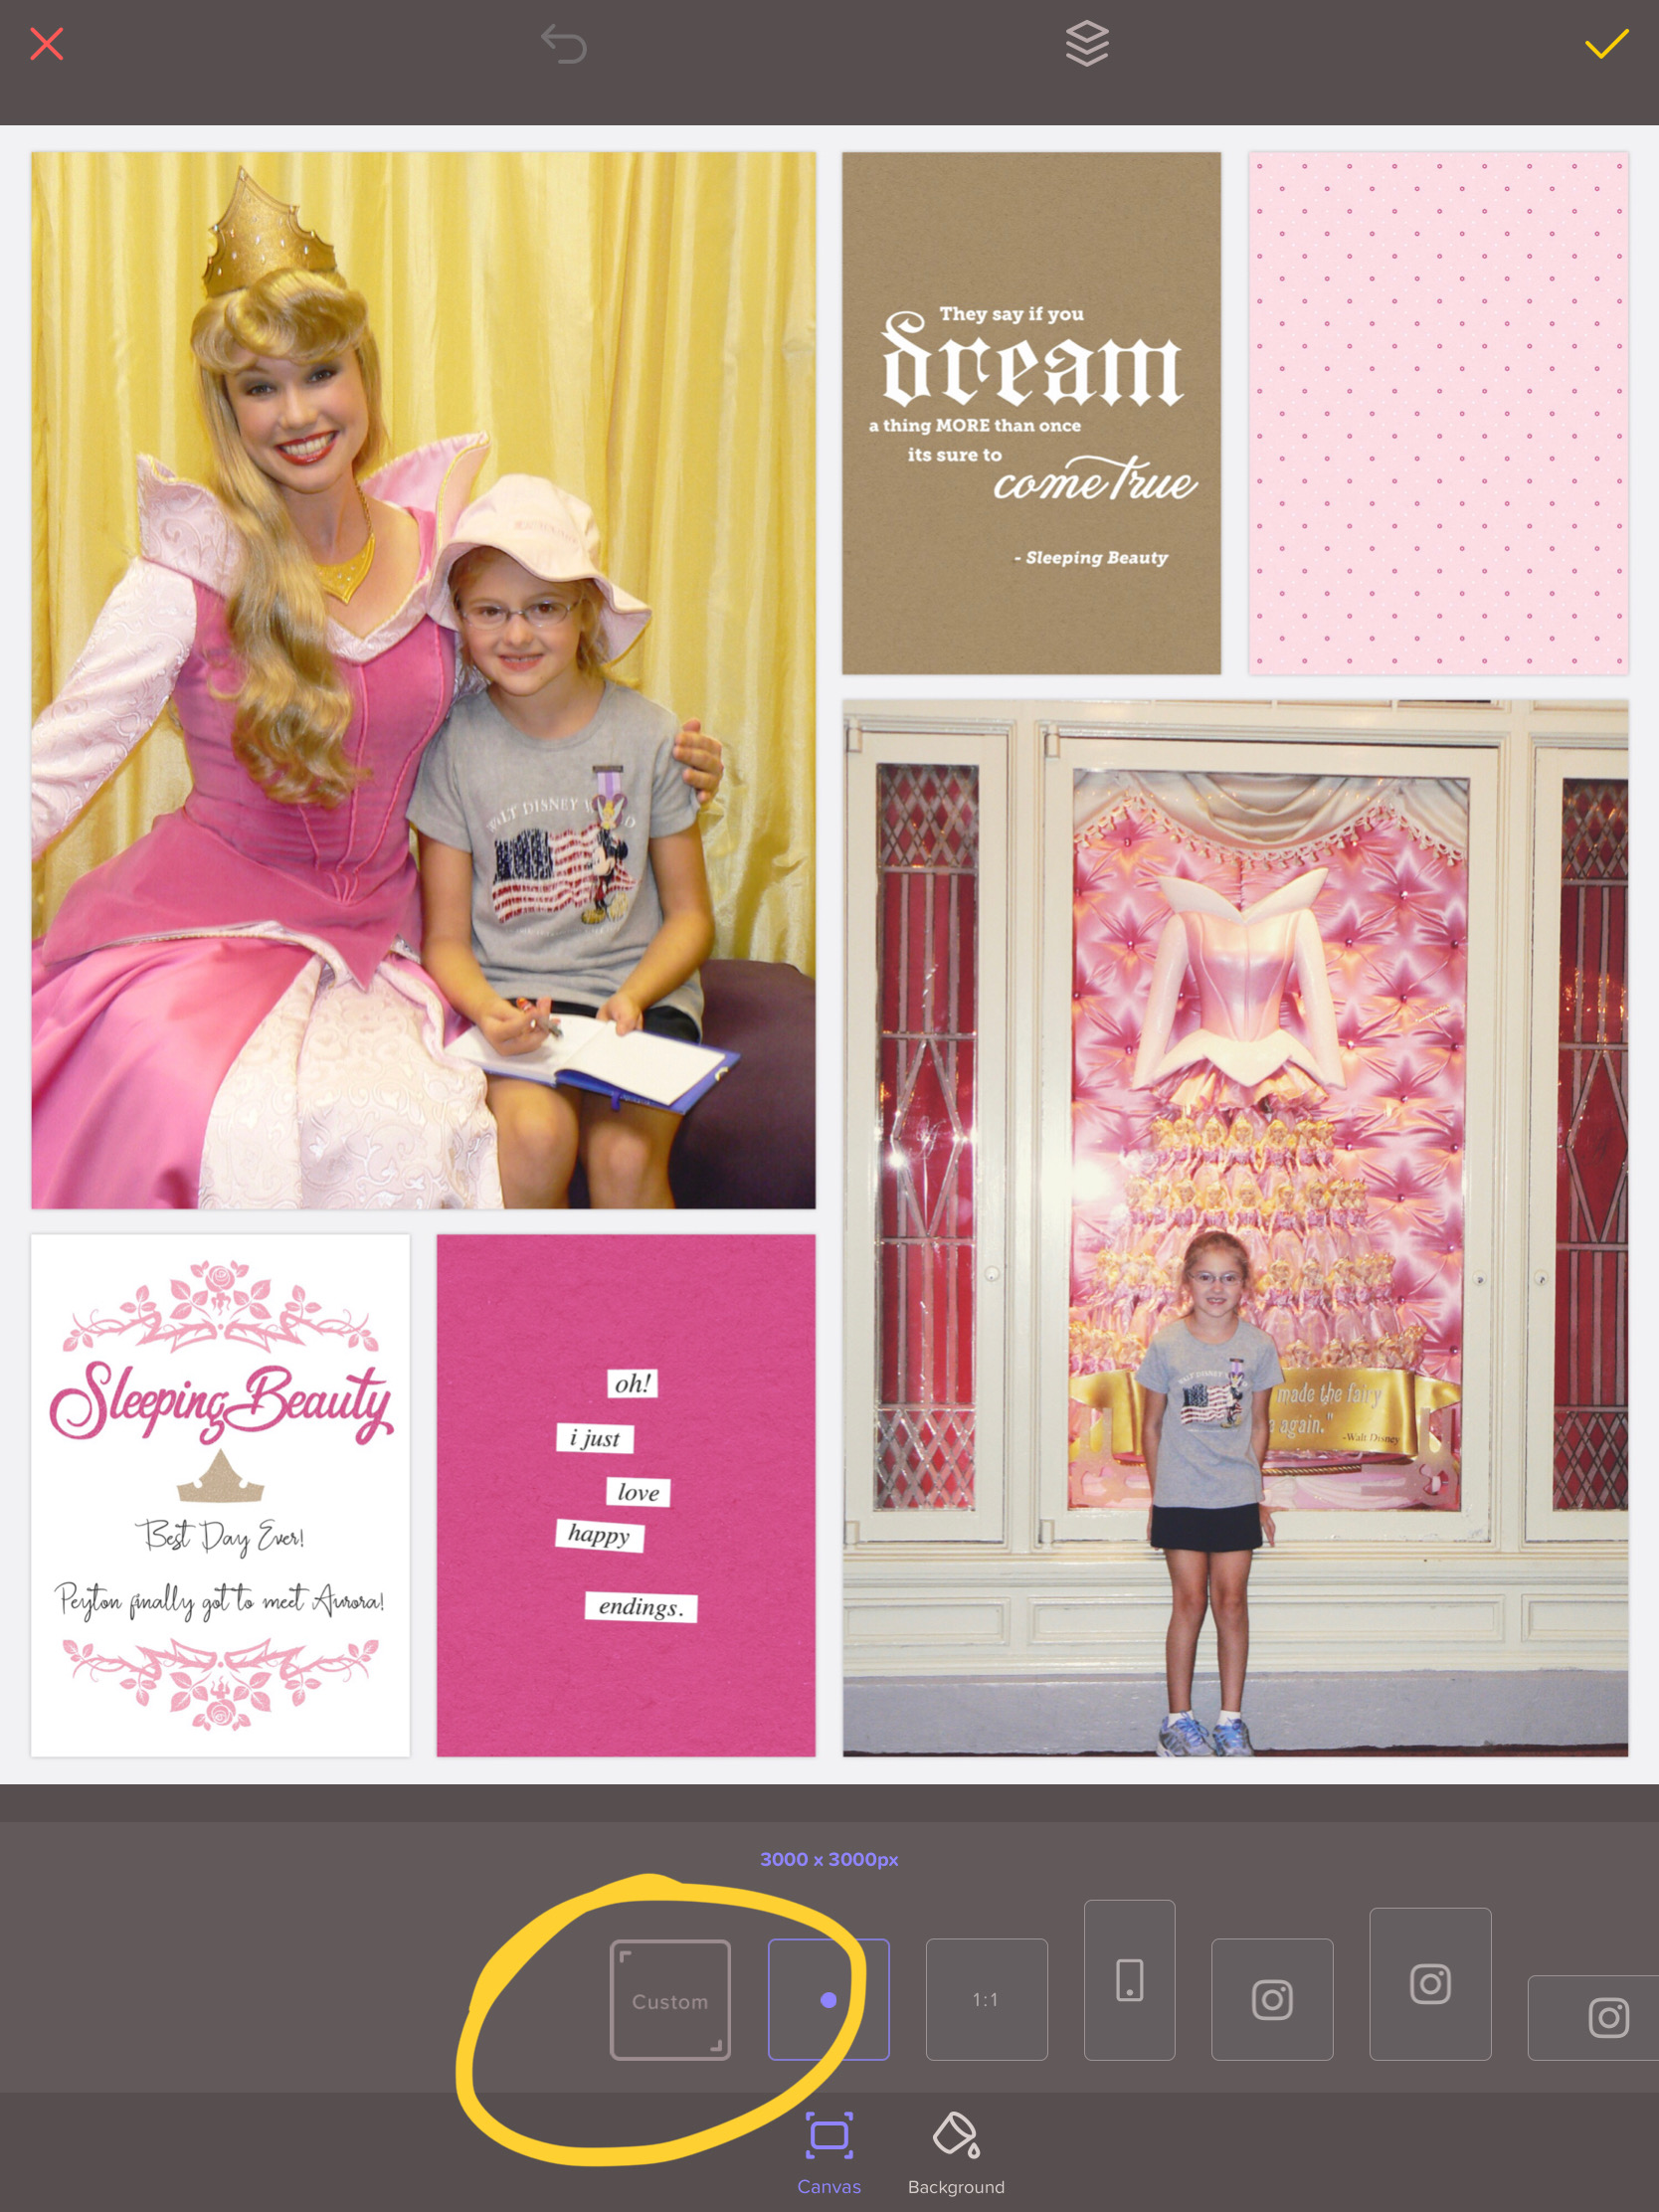
Tap on the Layers icon, tap on the bottom layer which is the canvas, and then tap on the Custom option at the bottom.
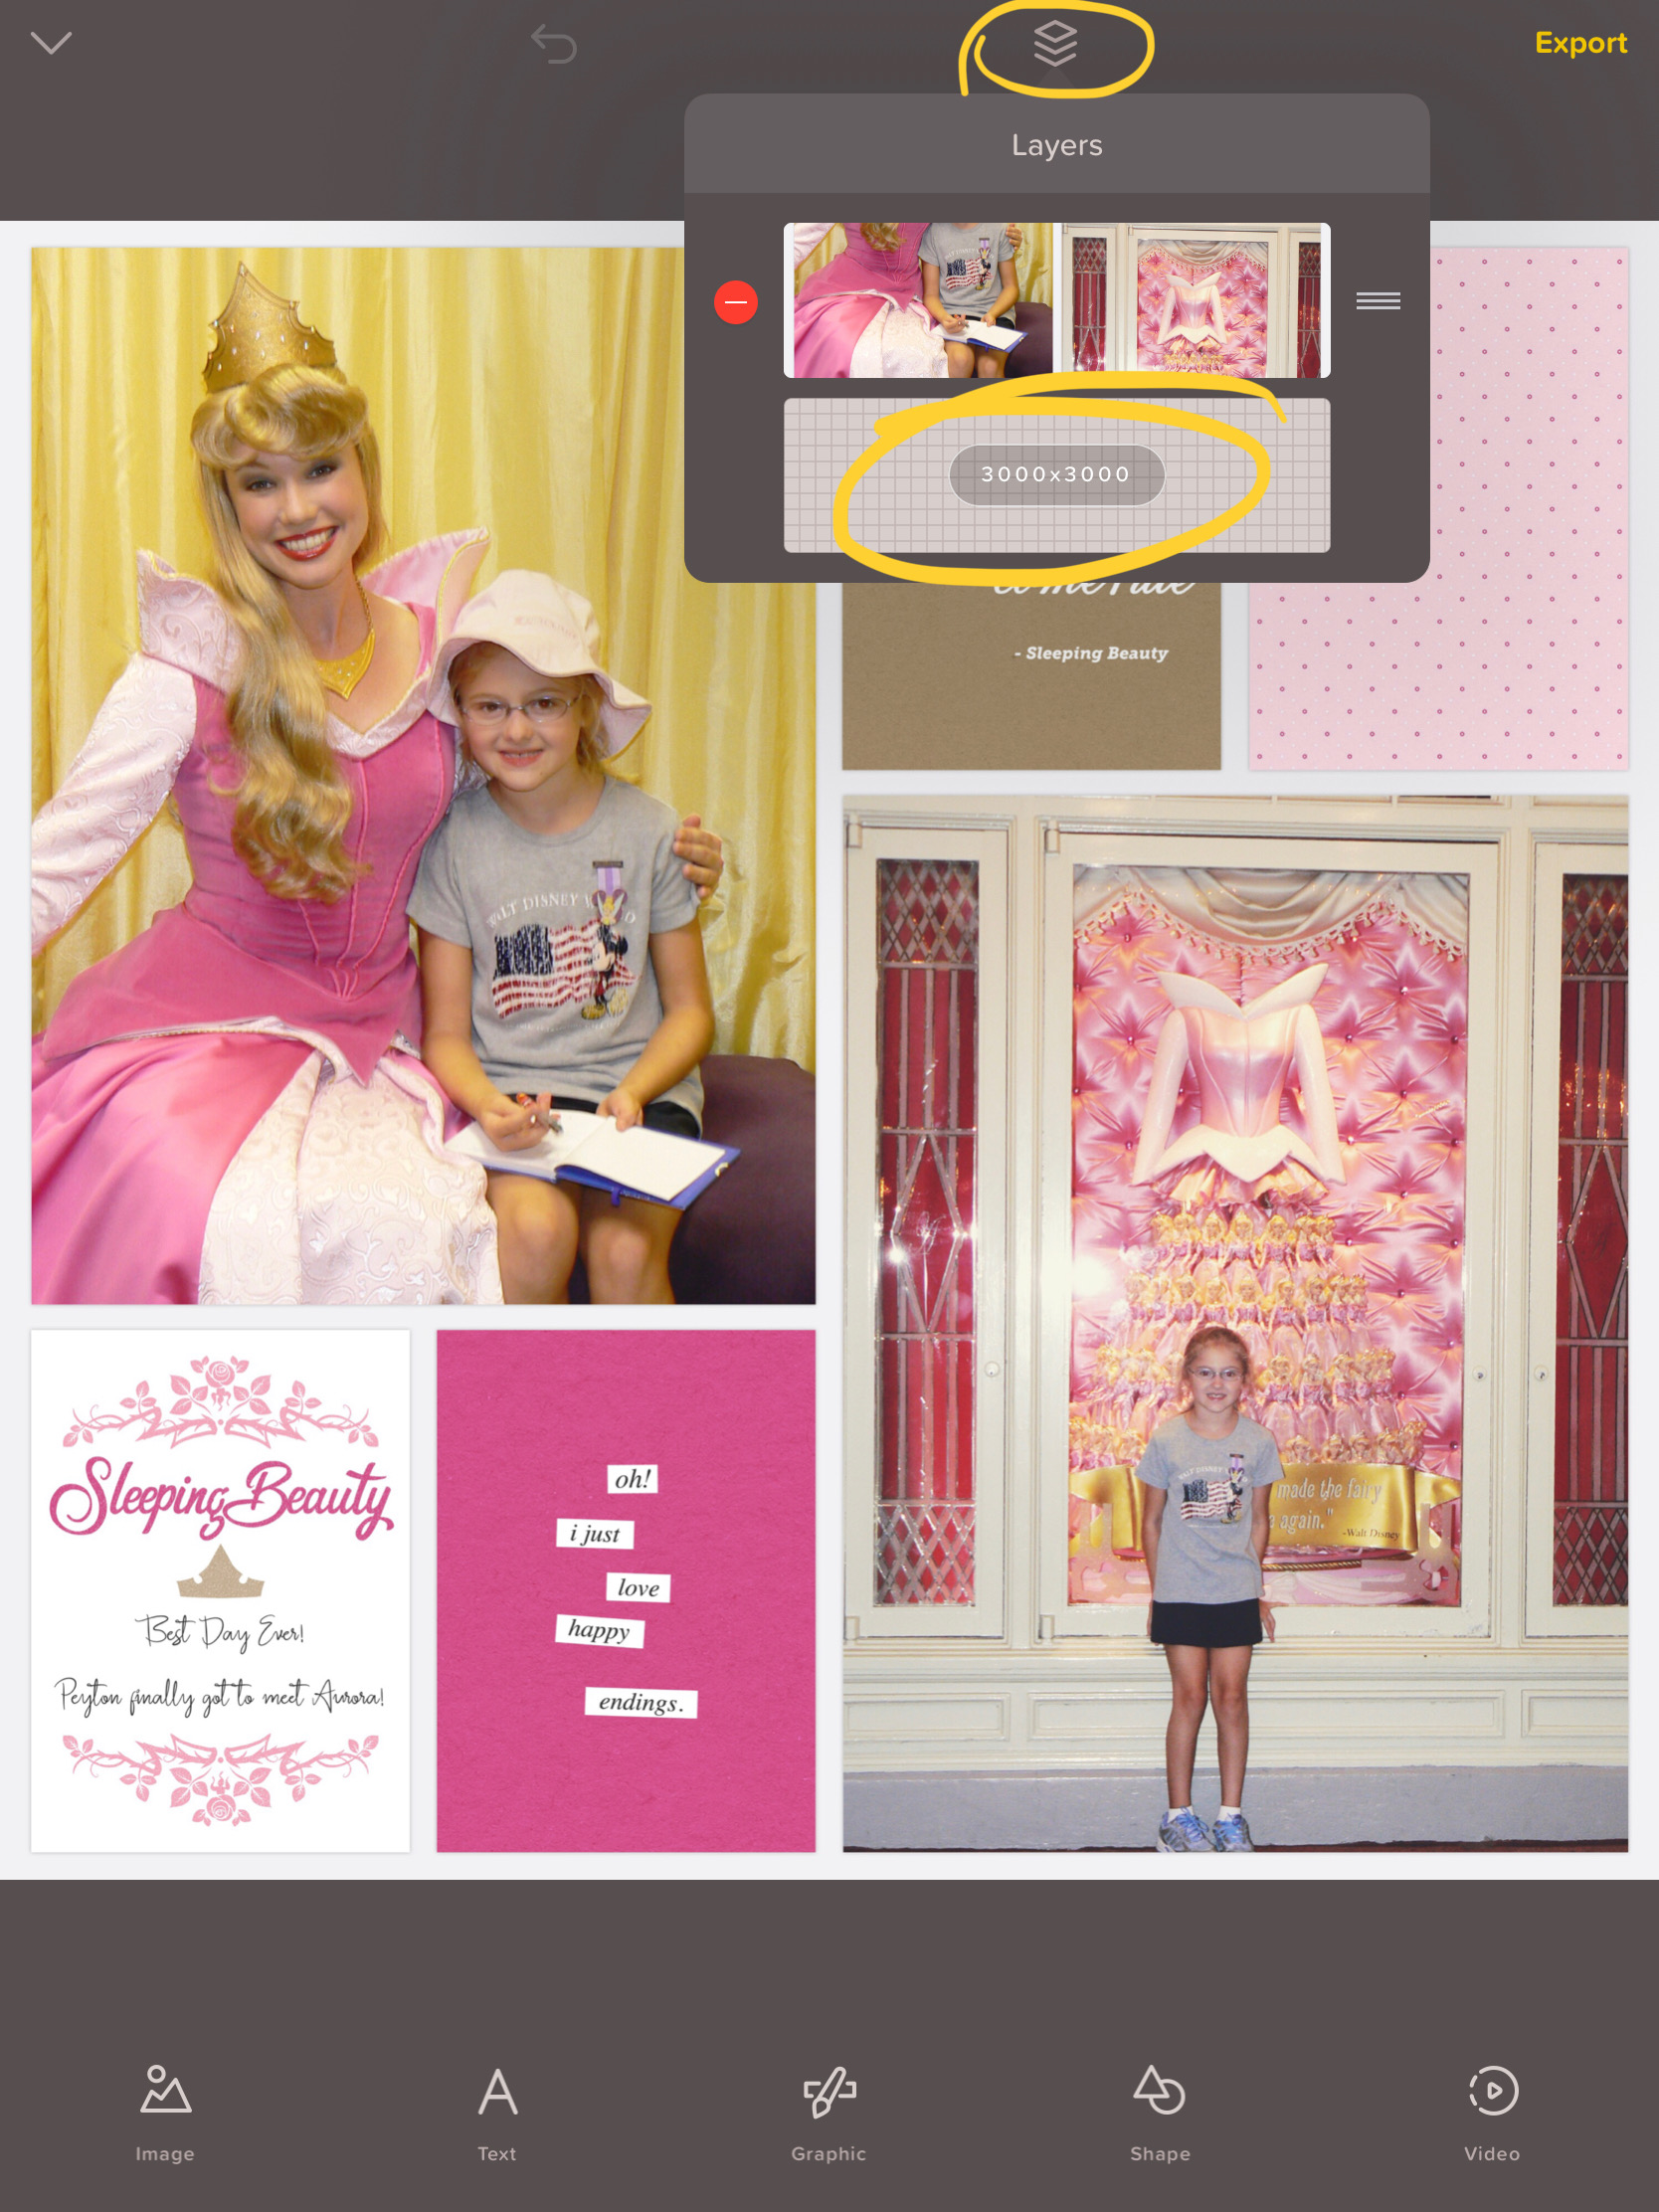
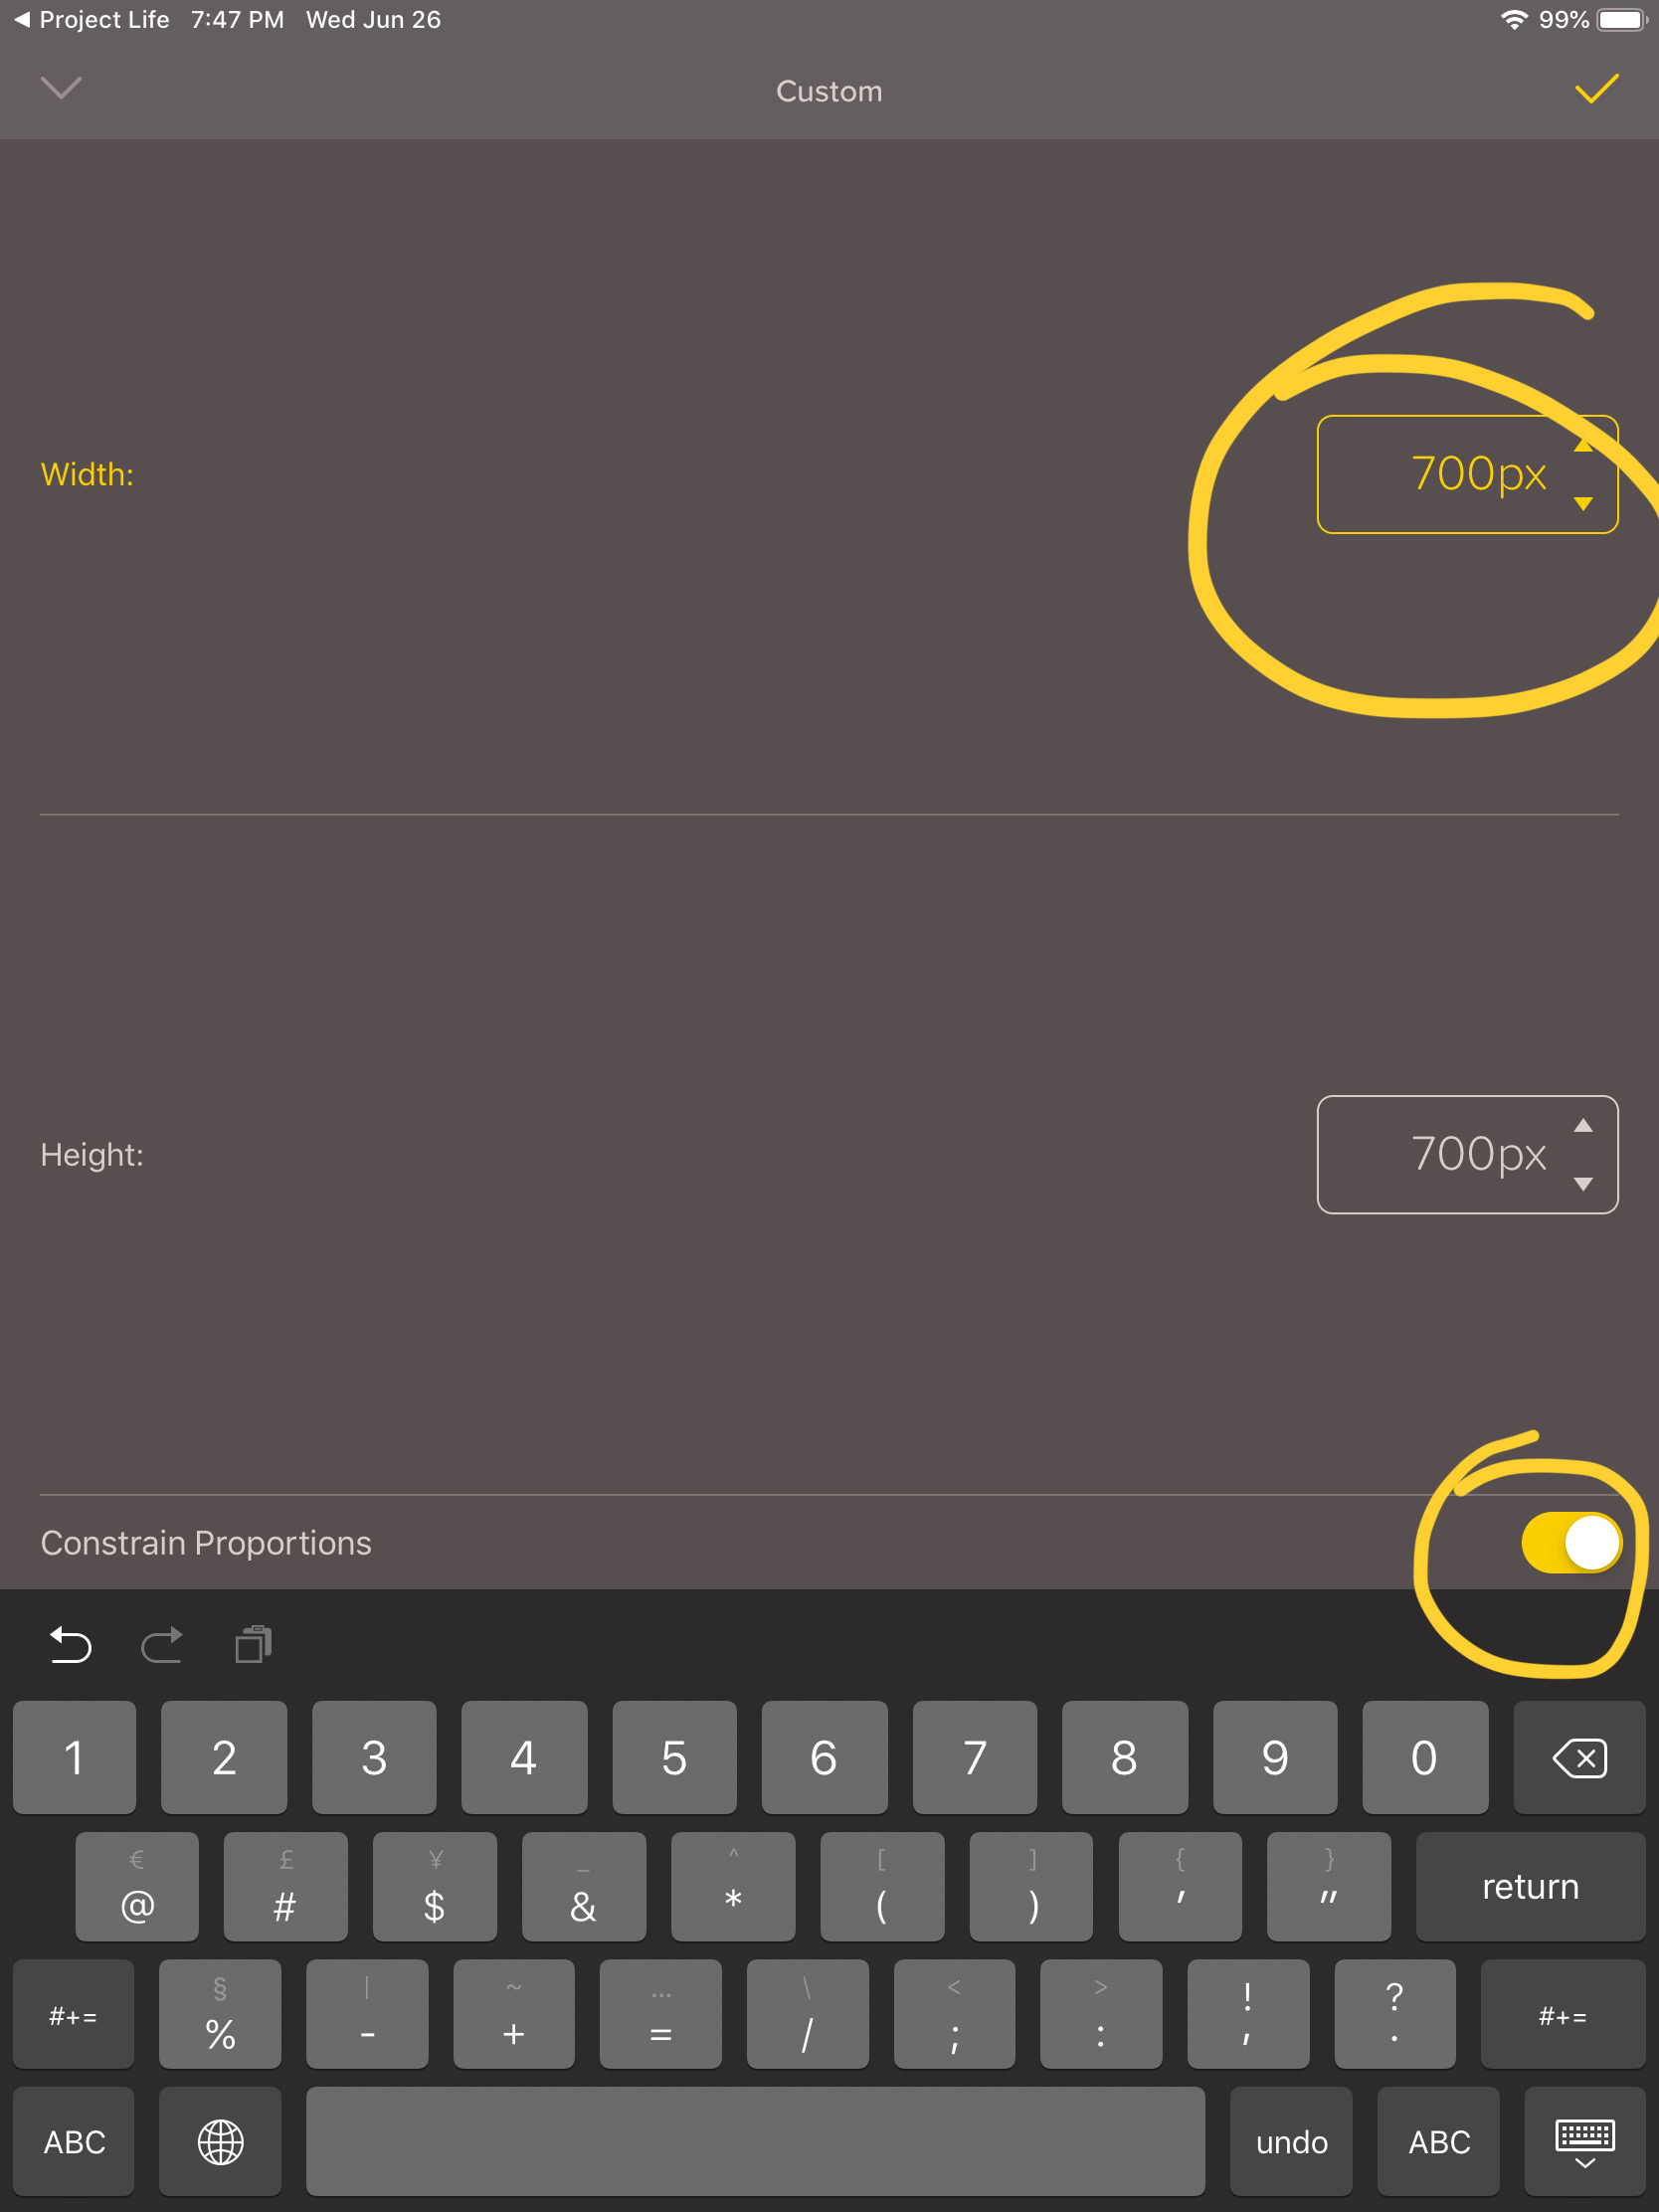
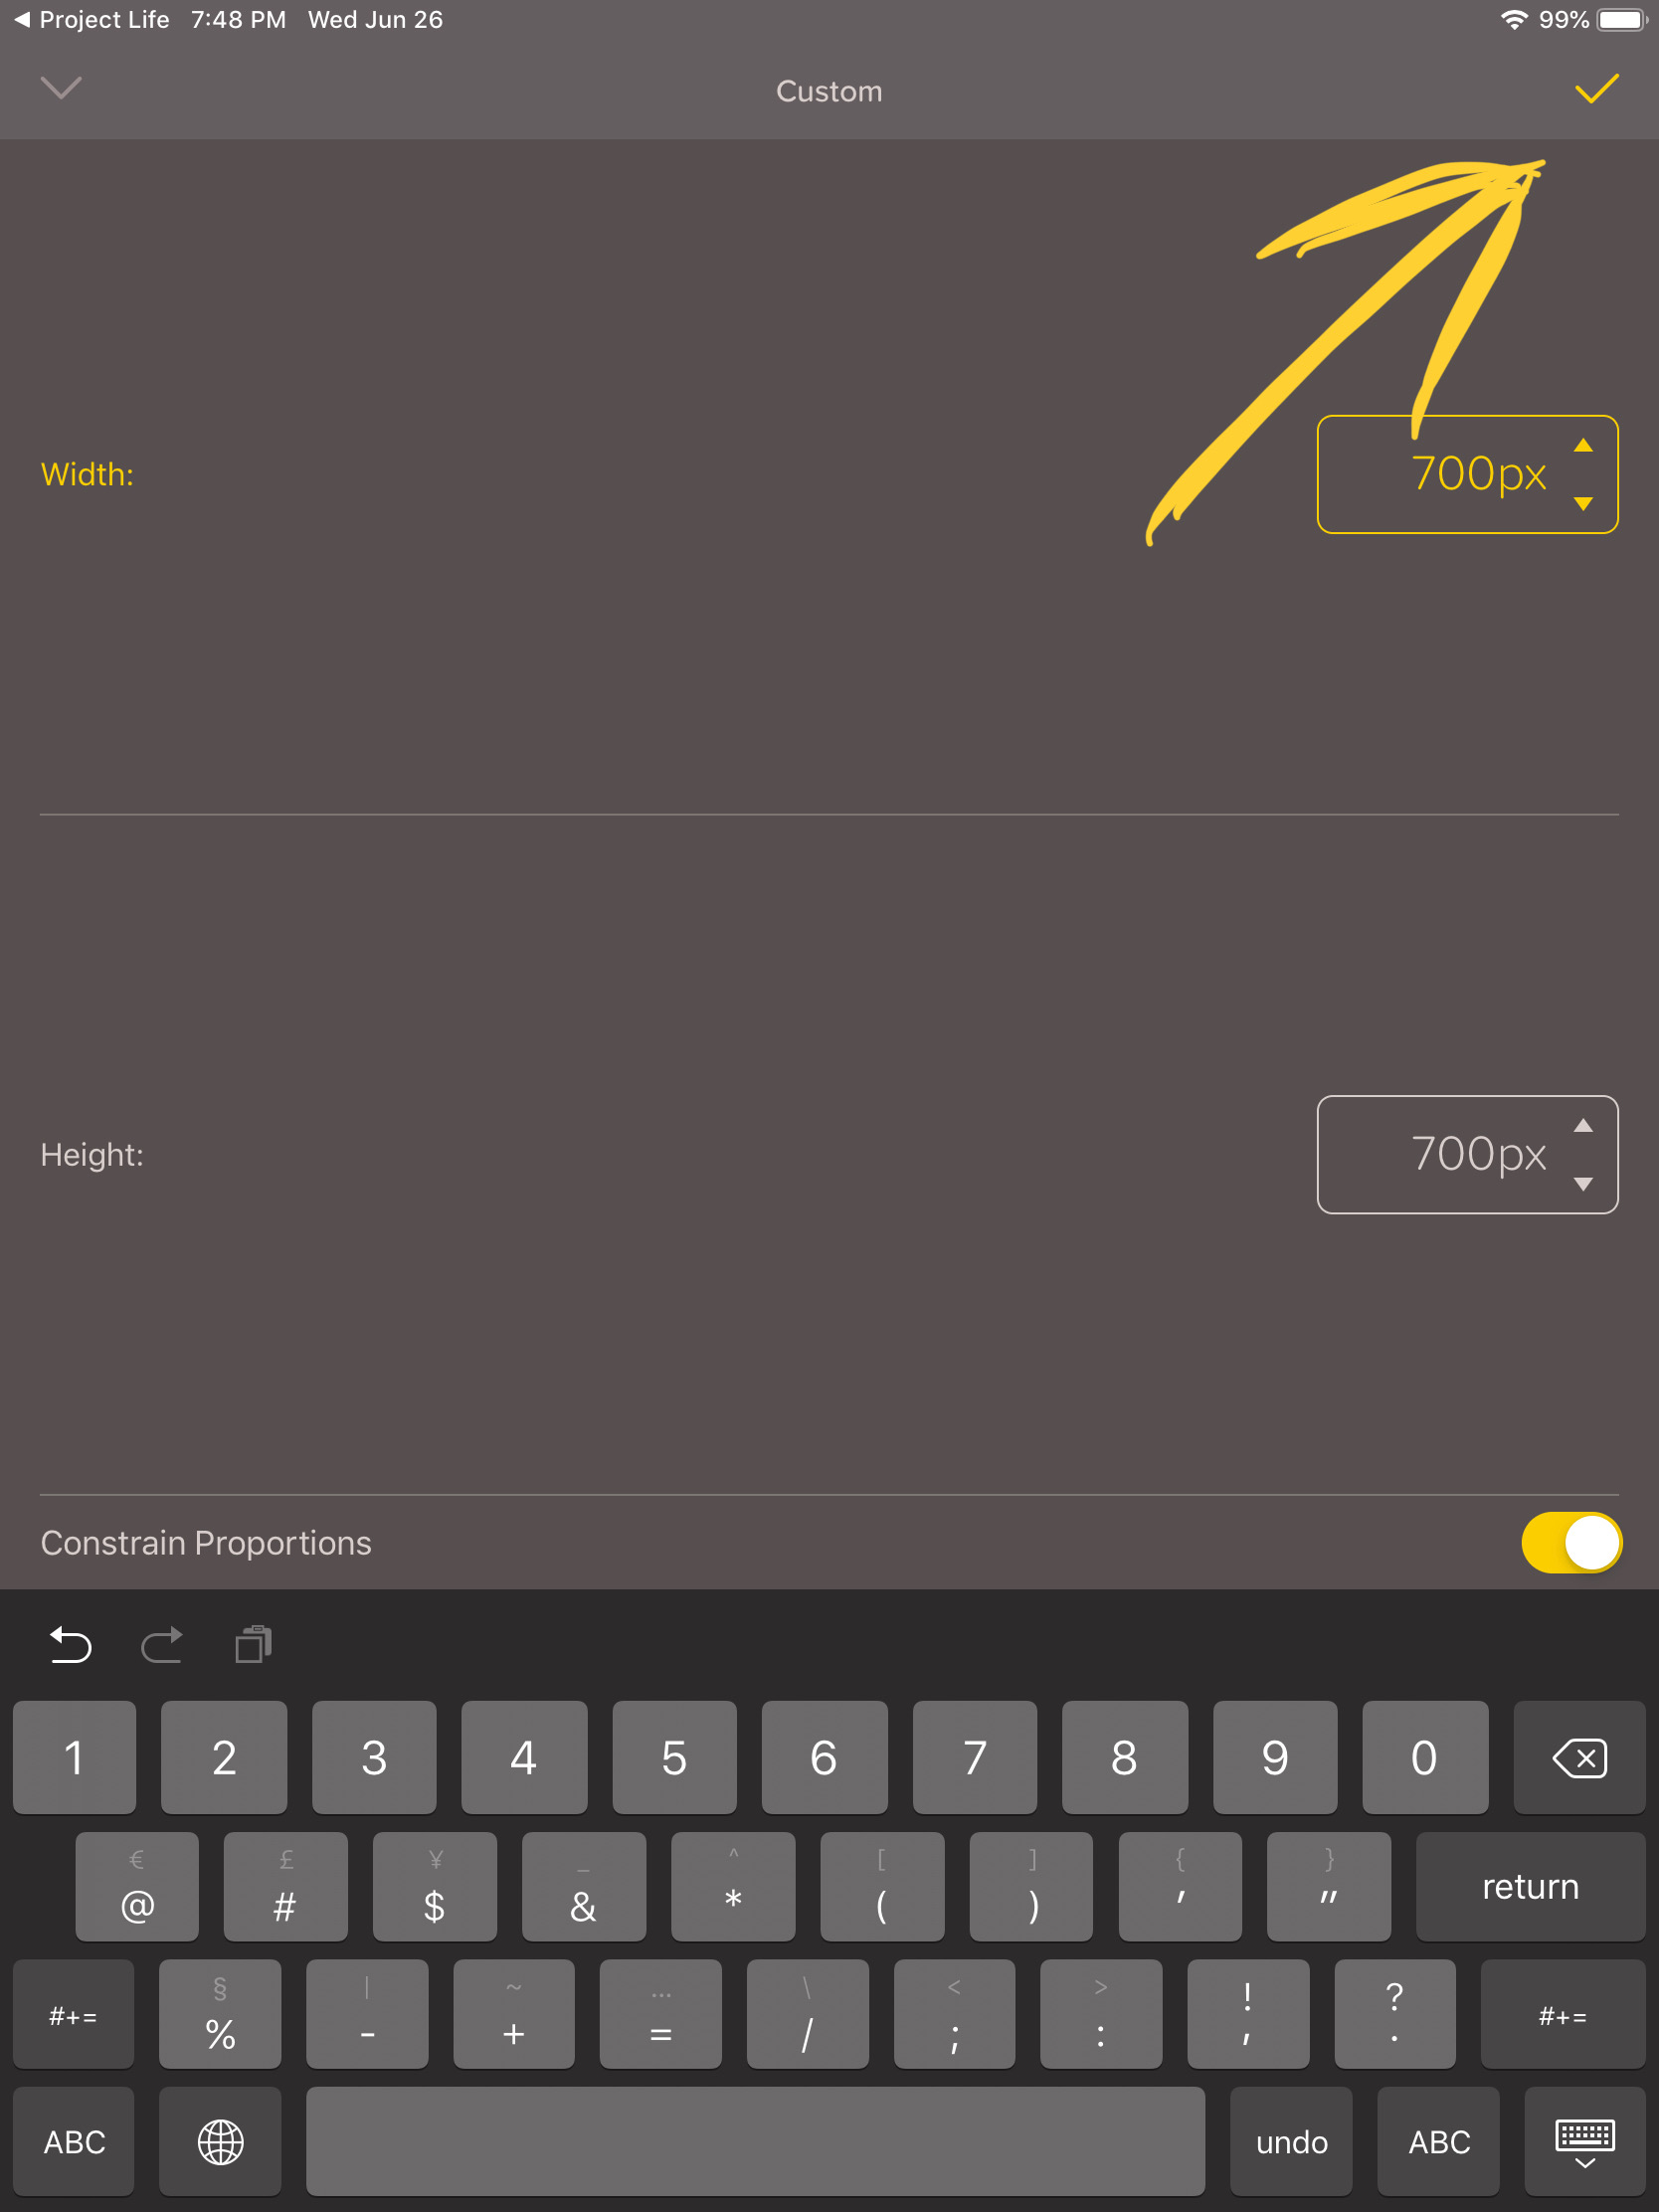
Make sure Constrain Proportions is toggled on, type 700 into the box, and then tap the check mark on that screen in the upper right. Then tap the check mark on the next screen also. Some galleries allow up to 900 x 900, so check their requirements and save accordingly.
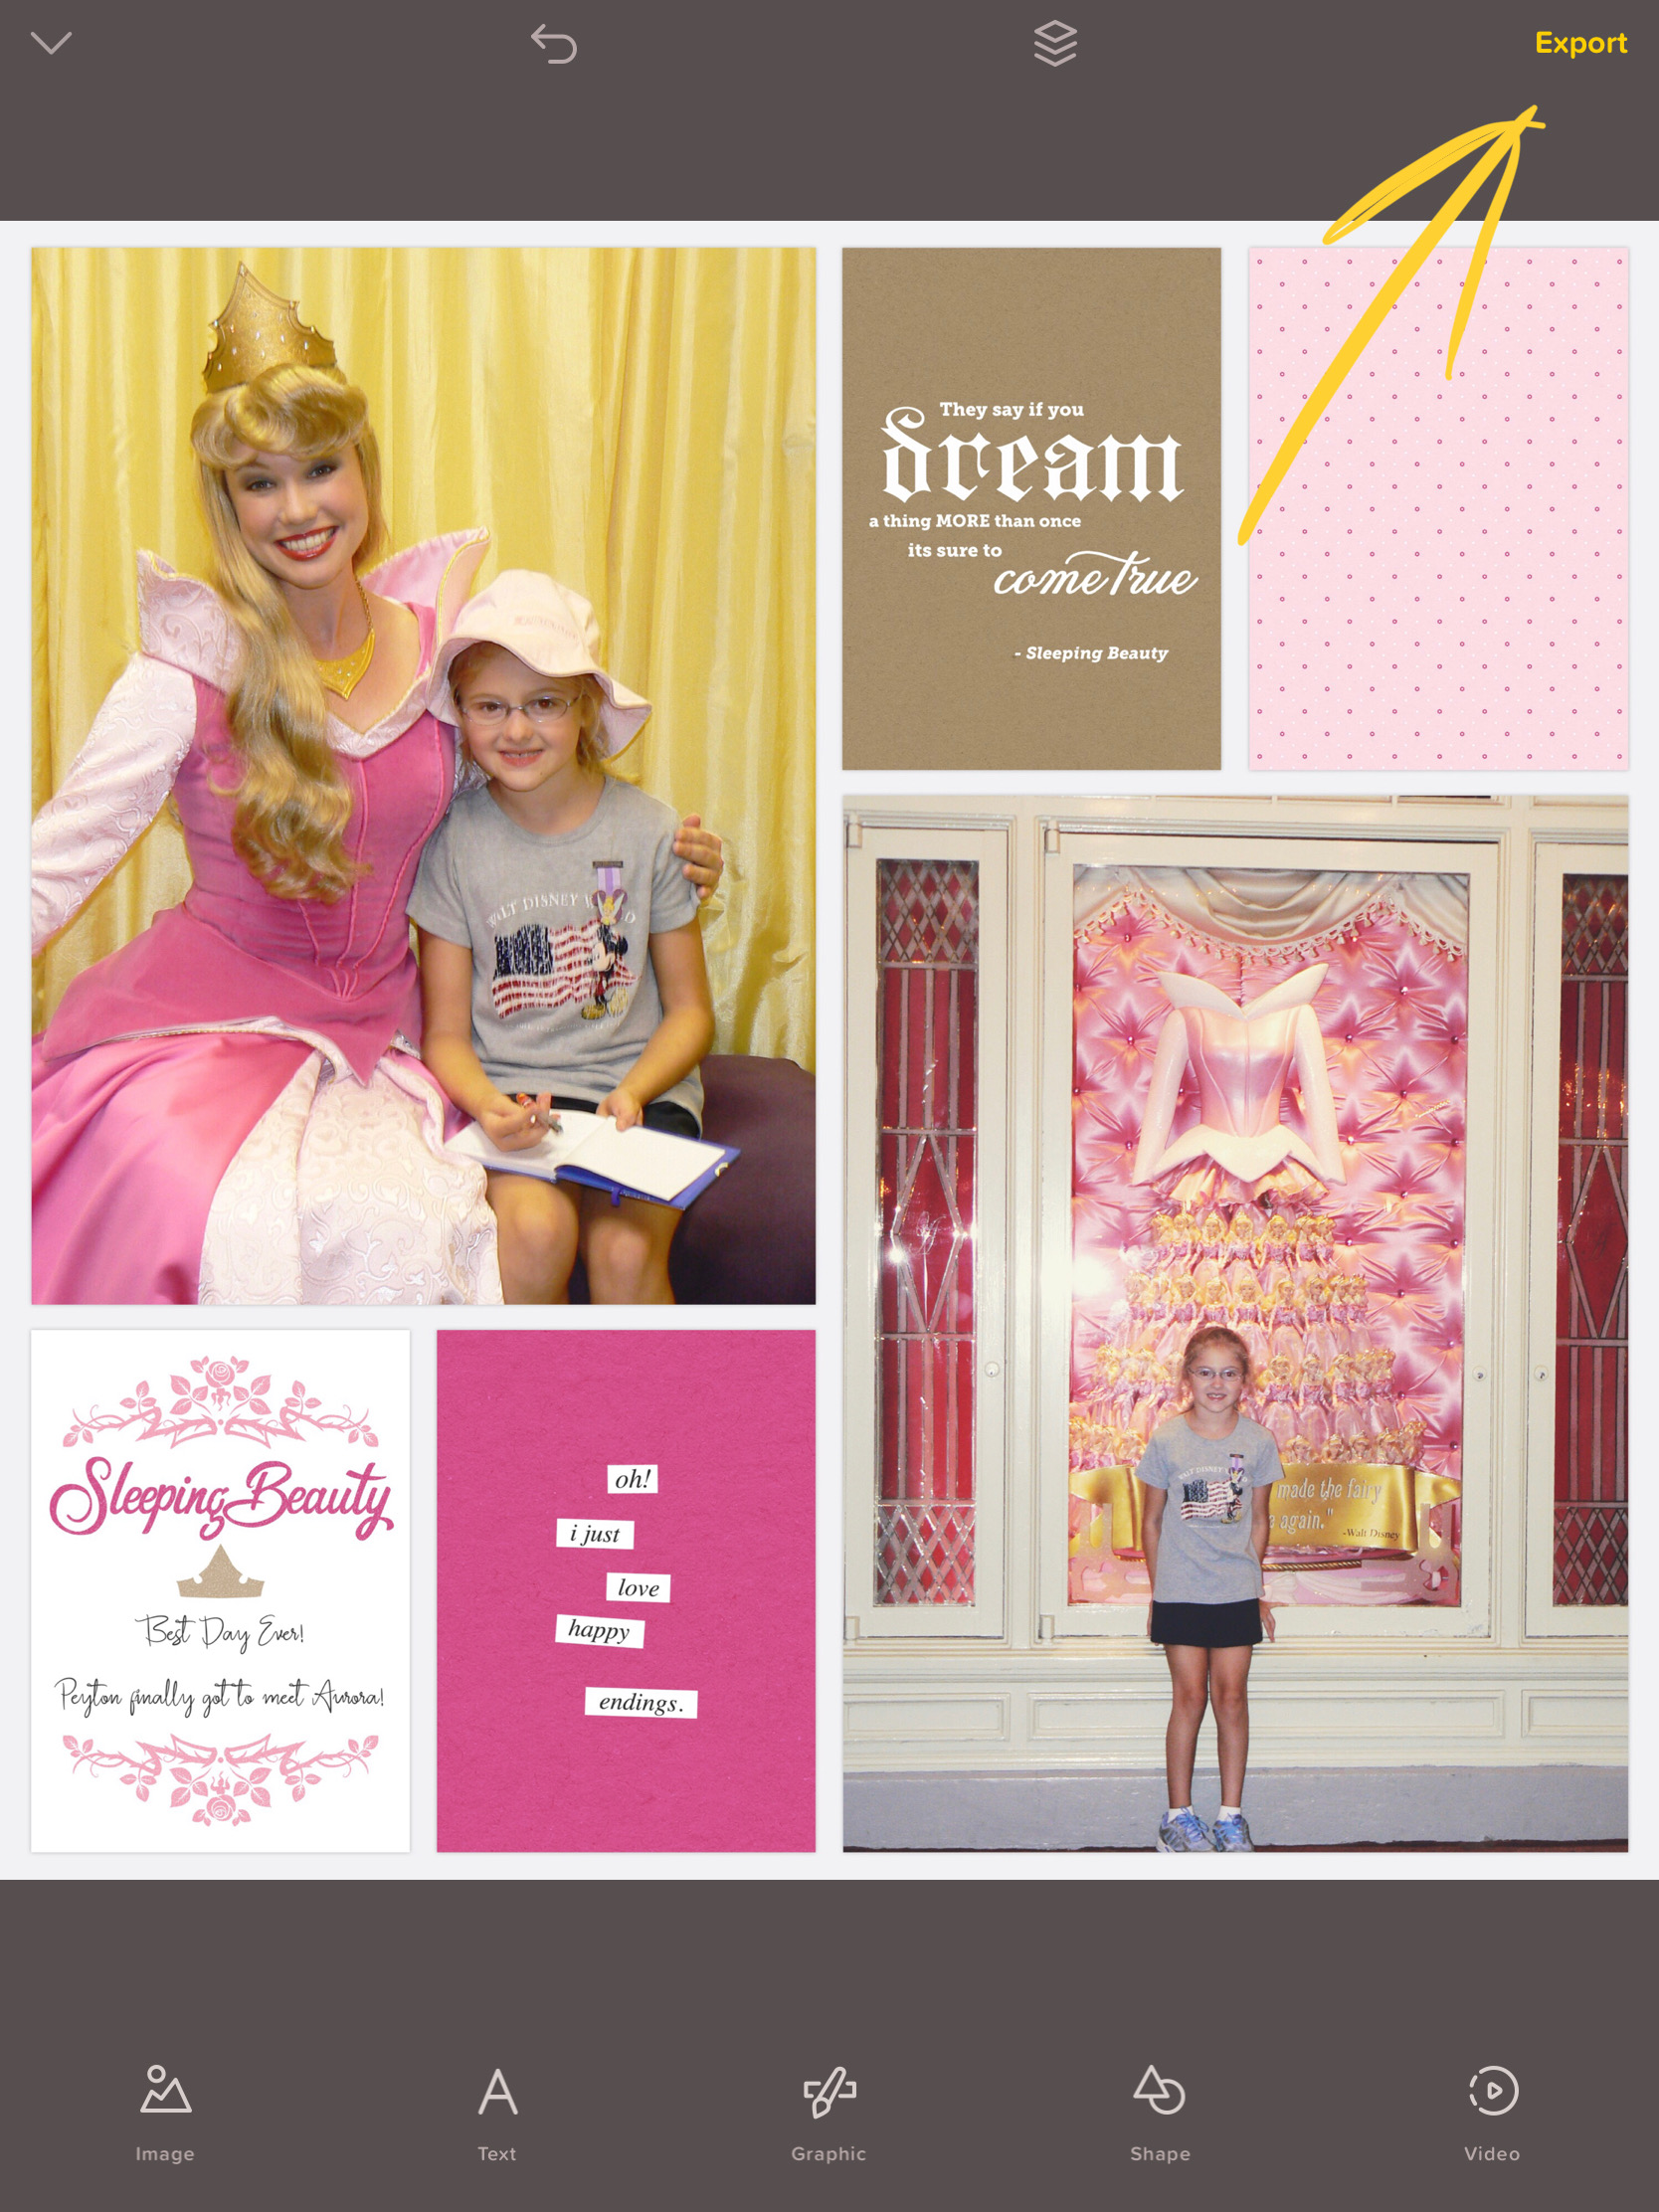
Tap the Export button at the upper right, tap Save at the bottom, and the image is added to your camera roll.

If resizing a page you’ve exported to Over from the Project Life App and embellished, save a full size image for printing and then resize the canvas as shown above and save again. I suggested creating an album of resized layouts and moving it to that album immediately. Now you can add resized layouts to your online galleries through your device’s browser. Most galleries require you to create an account to share layouts and view other layouts, but it’s worth it. It’s another great way to connect and be inspired by our amazing scrapping community. Give it a try!
Watch the Video
TOP TIPS
-For digital scrappers who use Photoshop, be sure to check out this previous post for information on saving, resizing, and web sharing.
-Be sure to also export a full 12×12 image for printing purposes.
-You can share on social media from the Over App as well. This is helpful to know for those of us that like to embellish our Project Life App layouts using that app. From Over, tap on the Export button, then at the bottom of the screen tap Instagram or More to navigate to another site.
-Your hashtags and pages shared from scrapbooking apps can only be seen by others if your social media accounts are public or shared to a Facebook group you belong to. Use and follow these hashtags to stay connected to other scrappers. #SahlinStudio #DigitalScrapbooking #ProjectLifeApp #SimplyProjectLife #AppScrappers #DisneyScrappers #ProjectMouse #BrittishDesigns
-Don’t be afraid to tap around and see what these apps can do!
Your Turn – – TRY SHARING!!
Happy app scrapping and sharing, we look forward to seeing your work in the Sahlin Studio Gallery at the Lilypad, the Project Mouse Facebook Group, or on your social media sites!
Speaking of social media, let’s connect!
Here’s where you can find me online… Instagram , YouTube, Facebook
Simply Project Life Facebook Group – Where we share how we use the Project Life App!
Project Mouse Facebook Group – Where we share how we use Project Mouse products!
I’m Jenna, a traditional scrapbooker, turned hybrid scrapbooker, turned digital scrapbooker, turned app scrapper. I’ve made my way through each form of scrapbooking and love them all, but for now my motto is KISS- “Keep it simple, scrapper!” I want to also encourage anyone reading this to create without comparison. Do what works for you and be proud of it. I scrapbook mainly on my iPad using a handful of apps like the Project Life App and Affinity Photo. I prefer pocket style scrapbooking, but am not one to shy away from an awesome template and a kit full of embellishments and goodies.
