Tutorial | Photo Sharpening
Posted on under Photo Editing Tutorials, TUTORIALS
Even with a high end cameras, our photos will often come out of the camera looking dull and fuzzy. However, with a few simple steps, you can sharpen up your photo and give it an extra boost that will give your photo clarity.

Today we are going to discuss this method for sharpening your photos using the High Pass filter. There are a few different ways to sharpen a digital image in Photoshop. Until a few years back, using the “Unsharp Mask” was the preferred method of sharpening… but now the High Pass filter is used just as often. I personally like to use the Unsharp Mask, to DEFOG (defog tutorial) my pictures at the beginning of my photo editing process. Then I use the “High Pass” filter to sharpen my photo at the very end.
For this tutorial, I will be using Photoshop CS5. (otherr PS and PSE programs use similar steps).
How to Sharpen Your Photos w/ High Pass
Step 1:
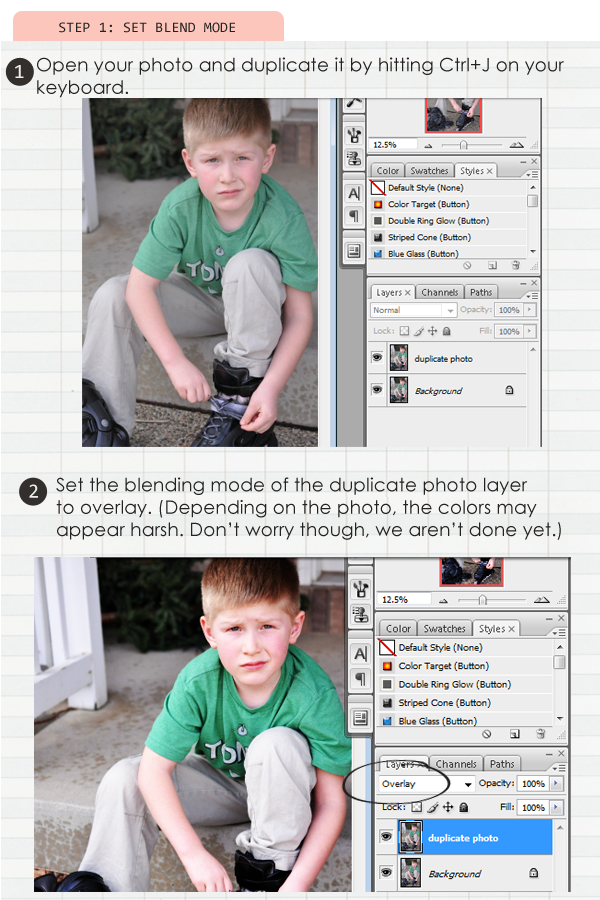
1. Open up your photo and duplicate it by hitting Ctrl + J.
2. Set the blending mode to overlay on your duplicate layer.
Step 2:
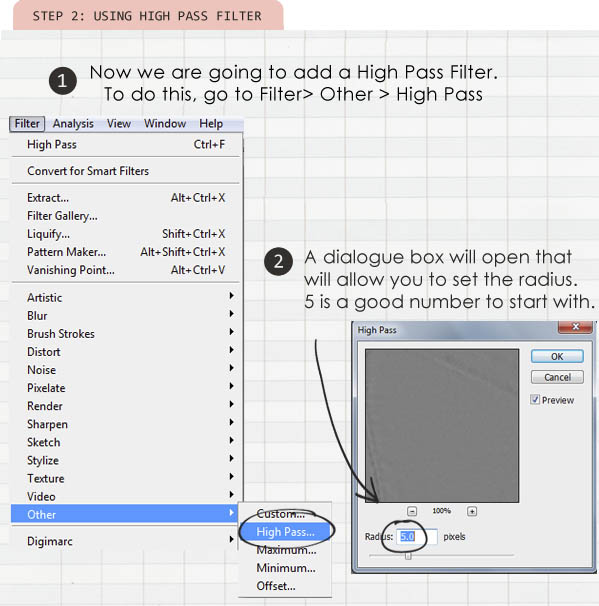
1. With duplicate layer selected, Add a High Pass Filter
3. Set the radius to 5
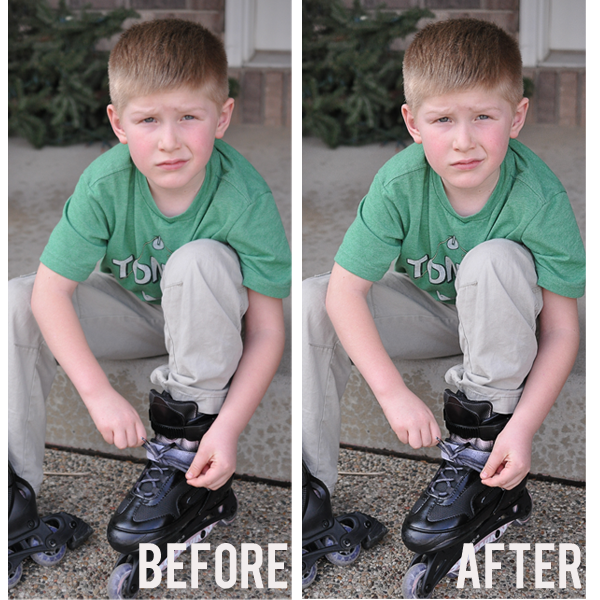
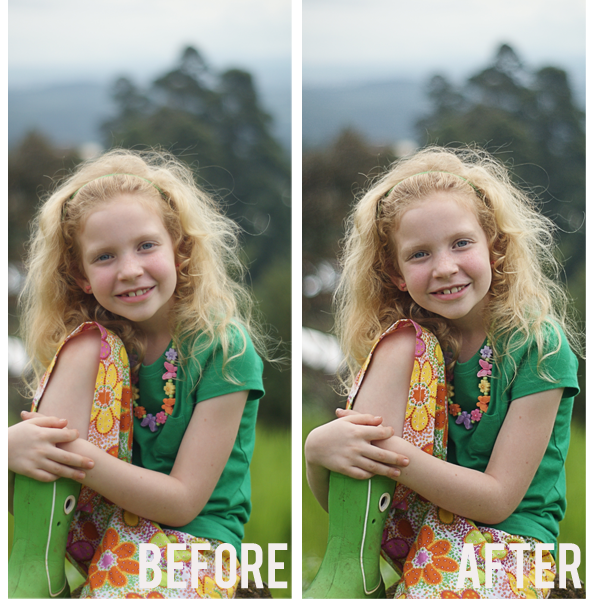
Before & After Sharpening Results
Here are a couple of examples of what the High Pass filter can do for your photo. The final results are subtle, but you can notice a marked difference in the sharpness of the photo when compared side by side. If the photo isn’t as sharp as you would like it, feel free to play around with the radius number.

December 12, 2012 at 9:00 am
Lor says:
Great tutorial, I must try this! I’m a faithful Unsharpen Mask user, but I’ll be sure and add this to my photo editing steps! Thank you! 🙂
December 12, 2012 at 9:14 am
Dalis says:
awesome little trick.
— dalis
December 12, 2012 at 3:12 pm
Jen J. says:
Thx for this!! 🙂 Will try it today! 🙂
December 12, 2012 at 8:36 pm
Sara S says:
Thanks for another great tutorial, I’ll have to try this!
December 12, 2012 at 9:32 pm
Nicole H says:
Wow. That’s it!? So simple and so effective. Now I just need to remember the few steps and to actually do that. Thanks for posting!
December 14, 2012 at 11:40 am
jayleigh says:
Terrific! “Sharpen” on the dialogue box does absolutely nothing to sharpen the photos – but this tutorial shows the steps clearly to really make that happen! Thank you
January 2, 2013 at 3:24 pm
s.pipes says:
This is amazing how easy it is to do this! Thanks for the great tutorial, my family albums will thank you!!!!
January 14, 2013 at 8:00 am
GFK says:
Thank you very much. I am french and experiment some trouble finding the corresponding menus in PSE but I think I got it with the “Incrustation” style (I thought overlay would be “Superposition” but it ididn’t work 🙁 )
Nevertheless, I hope I did well and I thank you for your tutorials.
December 8, 2015 at 5:23 am
grateful says:
thank you