Recoloring Journal Cards in the Project Life App
Posted on under Project Life, Scrapbooking With Apps
Hello all! I’m Jenna, a new member of the Sahlin Studio Creative Team. My favorite method of documenting is using the Project Life App. I love to learn about tips and tricks to make my documenting on the app better and better. The most recent? Learning how to recolor journal cards IN the Project Life App. Yes you can!! So below I wanted to share how I recently edited a Project Mouse digital card within the Project Life App.
Pic Tap Go
This method uses the “Pic Tap Go” Photo Editing system inside the PL App. The Pic Tap Go app is a separate purchase and can be integrated directly into the PL App. It offers a greater variety of extra editing options. Right now, this feature is only available for iOS users.
Before and After
I previously downloaded and unzipped the Project Mouse: (Fantasyland) and(Rides + Attractions) card packs (along with this amazing freebie from Britt’s blog) on my PC and then added them to my Dropbox account. From there, I directly accessed Dropbox from the PL App and created my page. For more information on how to use Project Mouse supplies or any other cards in the PL App, see this post .
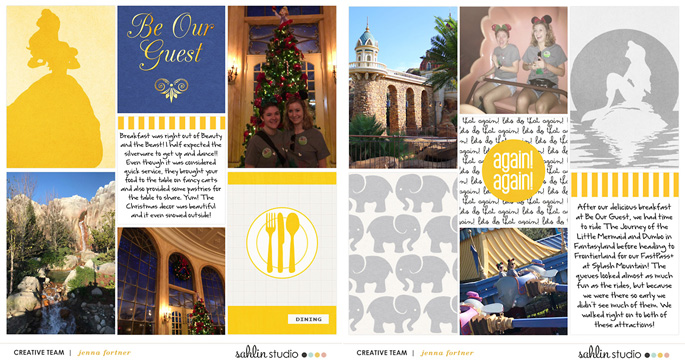
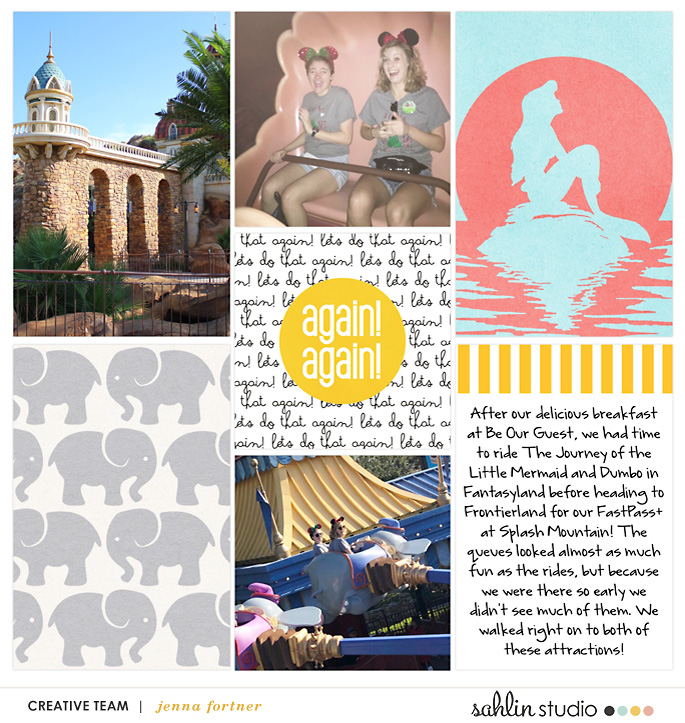
The page below will be the right side of a two page layout, but I knew I needed to do two things to make this better coordinate with the rest of the layout: 1) FLIP the Ariel card to face the page and 2) RECOLOR the card to coordinate with the elephants. Create a page in the PL App and then follow along with me using the screenshots and instructions below to flip and recolor any non-PL App card.
BEFORE
AFTER
How To Recolor – THE VIDEO
How To Recolor – STEP BY STEP
Do you need some step by step instructions?
Let’s start with our BEFORE page in the PL App.
Let’s Flip our Photo – The Horizontal Flip
[one-half-first]
STEP ONE >
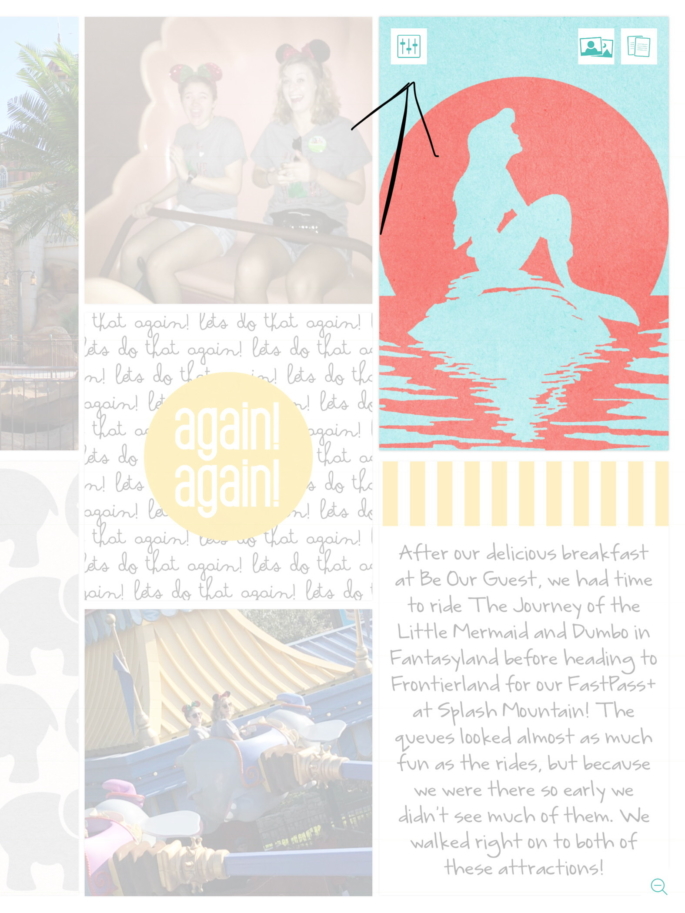
Tap on the pocket that contains the Project Mouse card you want to flip. Then tap on the editing options in the upper left of the pocket.
[one-half]
STEP TWO >
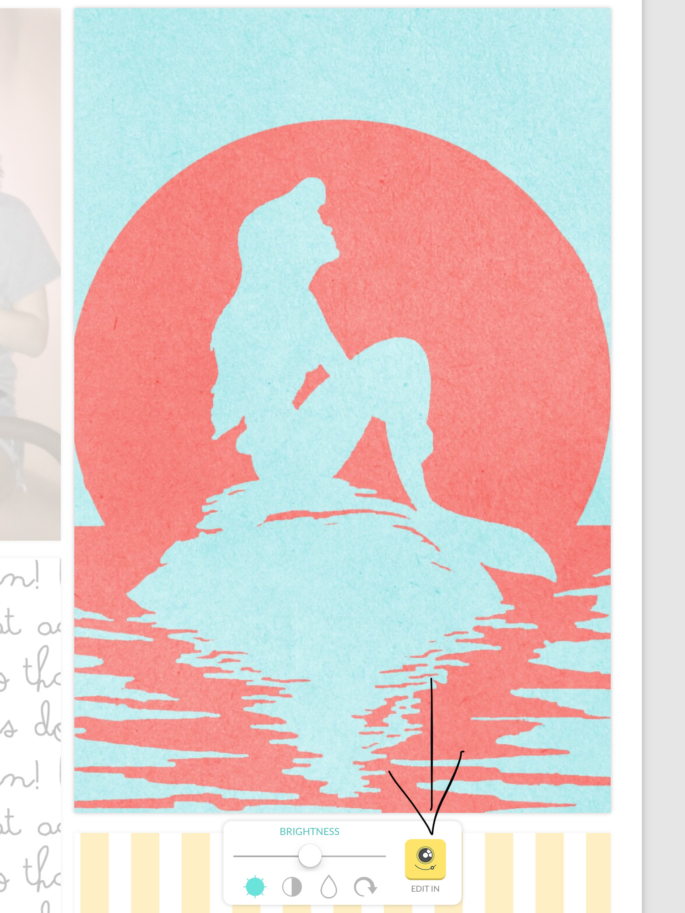
Tap the Pic Tap Go icon at the bottom of the pocket.
[one-half-first]
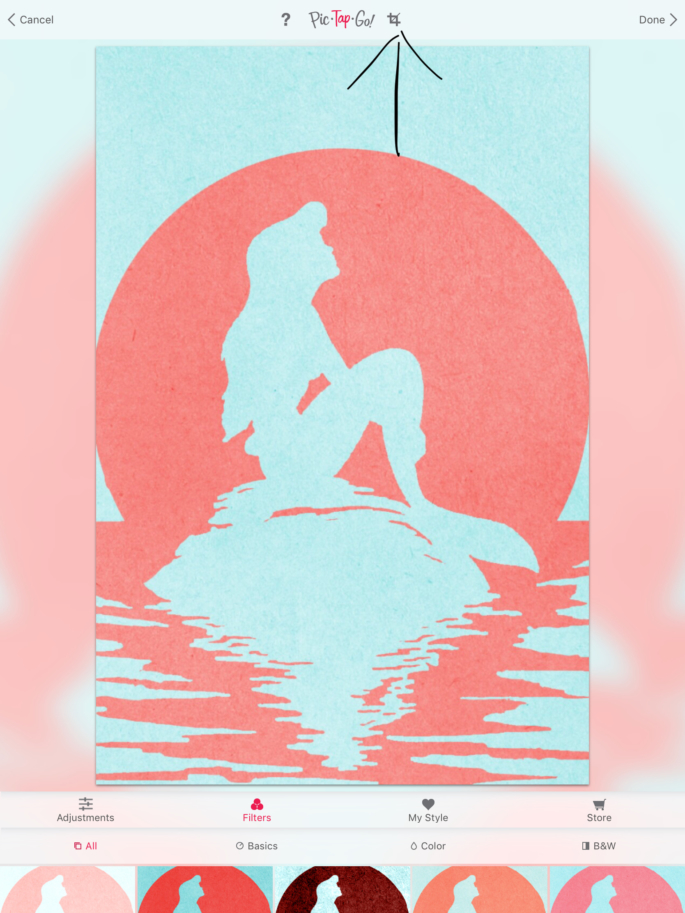
STEP THREE >
Tap the crop icon at the top of the pocket.
[one-half]
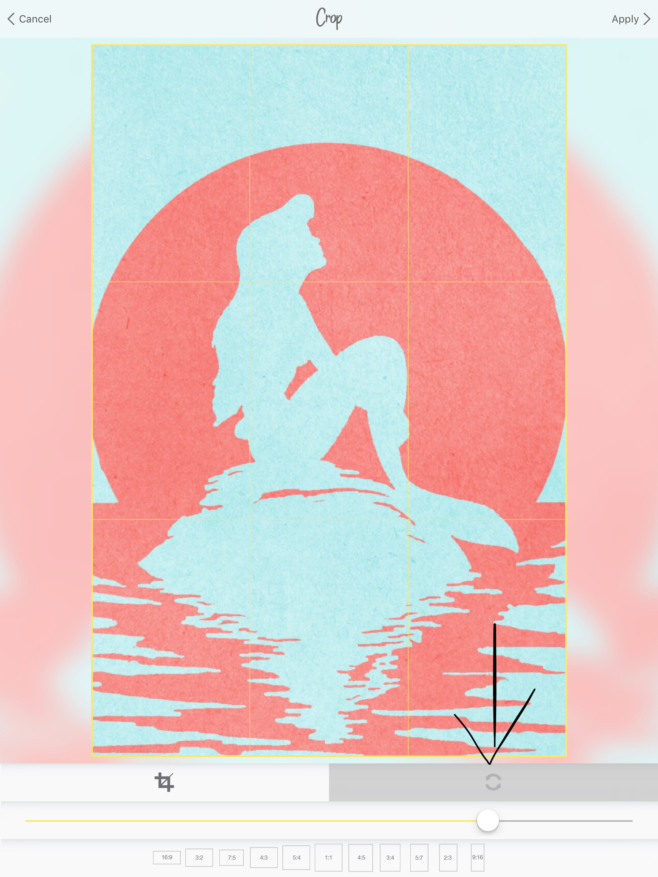
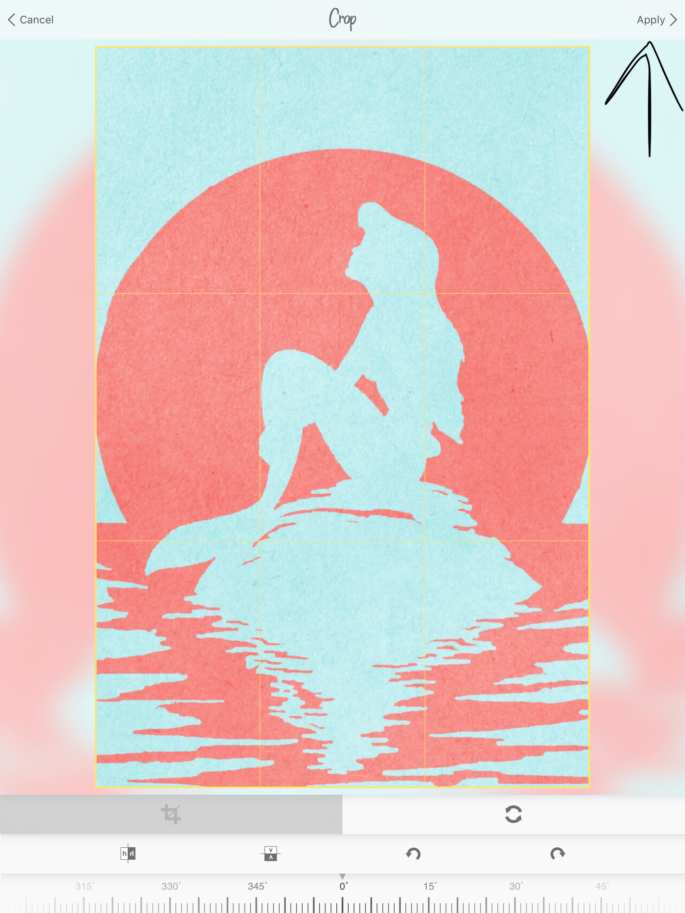
STEP FOUR >
Tap the rotation icon at the bottom of the pocket.
[/one-half]
[one-half-first]
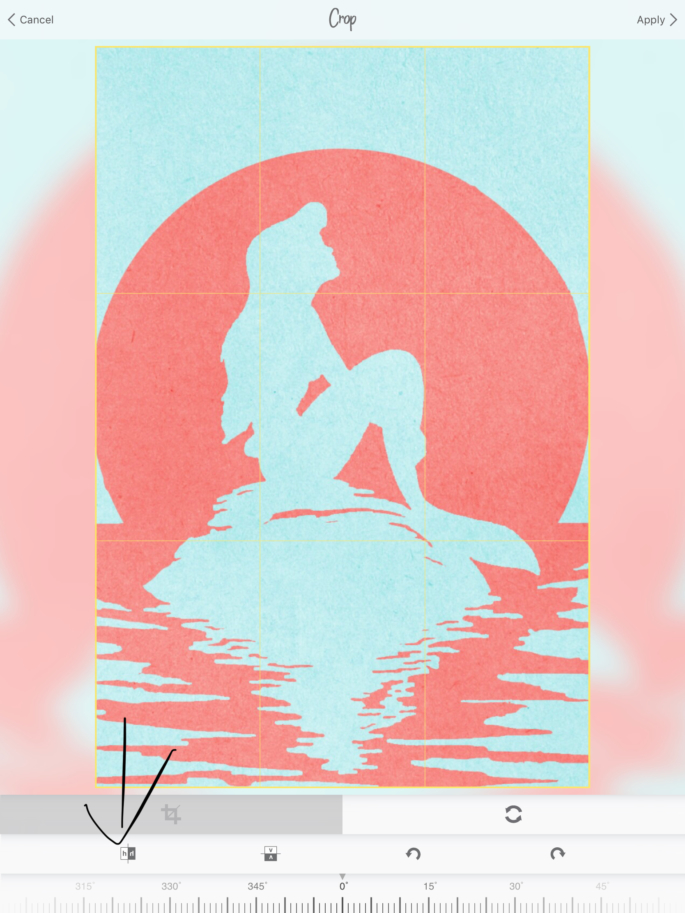
STEP FIVE >
Tap the horizontal flip button below and to the left and watch the magic happen.
 [/one-half-first]
[one-half]
STEP SIX >
Don’t forget to tap Apply in the upper right to set the changes. Viola! She is now facing inward.
Recoloring a Journal Card – Black and White
Now it’s time to recolor the journal card. The options for these are really endless, but for this card I simply would like to make it black and white.
[one-half-first]
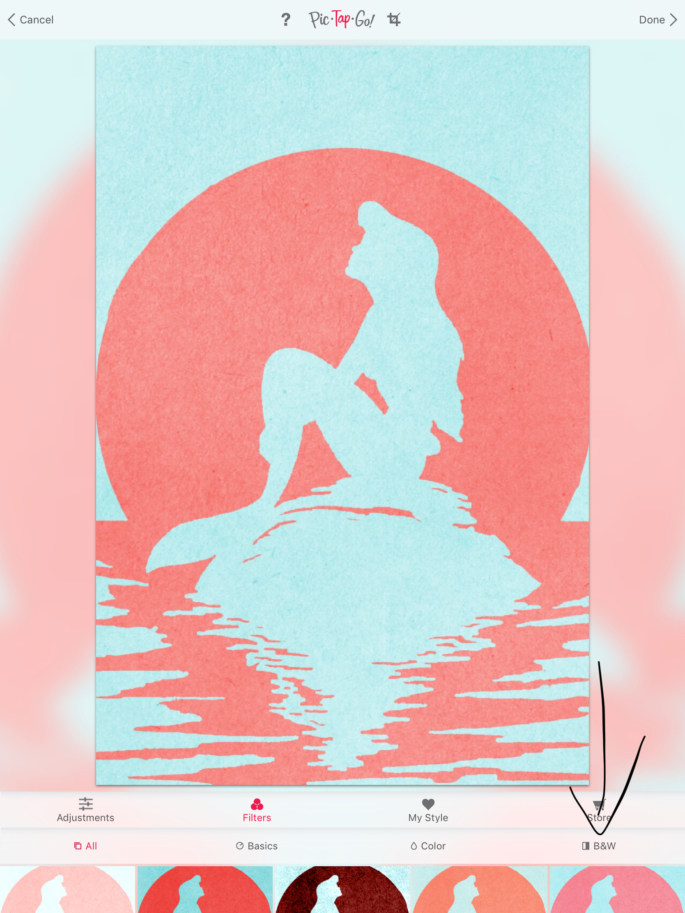
STEP ONE >
Tap B&W and swipe up to see all the options.
[one-half]
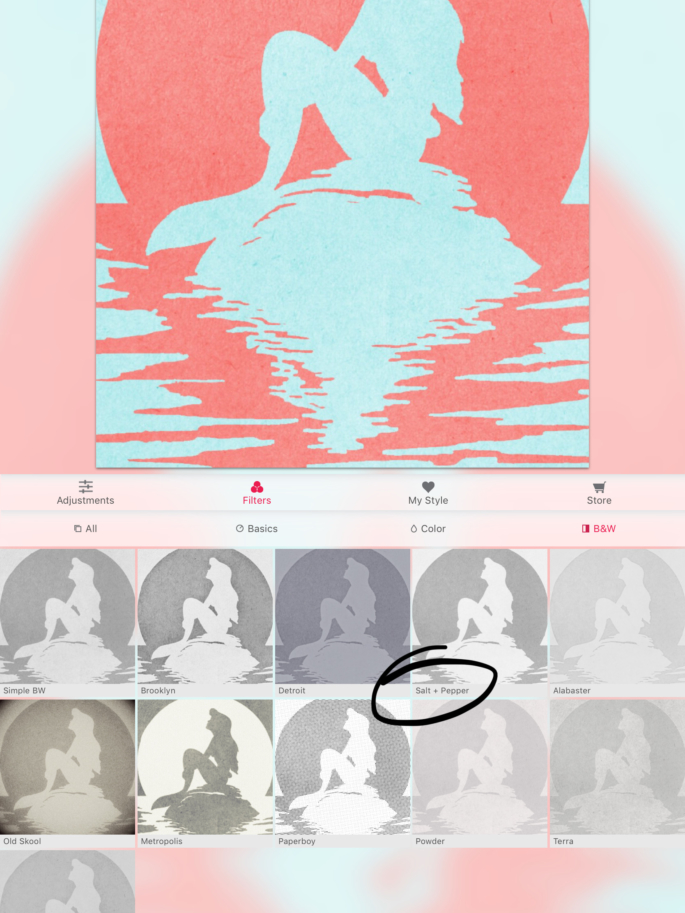
STEP TWO >
Select the Salt and Pepper option, then tap Done in the upper right.
Recoloring a Journal Card – COLOR
To recolor instead of choosing a black and white option, tap All (instead of B&W), and swipe up again. This is really when you start playing. Choose an option and swipe up to see more options. Do this again and again for even more options! Steph Clay from Modern Photos Solutions recently posted a detailed video on her Facebook page showing more about this recoloring process.
Live Video – Steph Clay (Modern Photo Solutions)
Now Ariel coordinates much better and I am happy with the results! Here’s the AFTER….
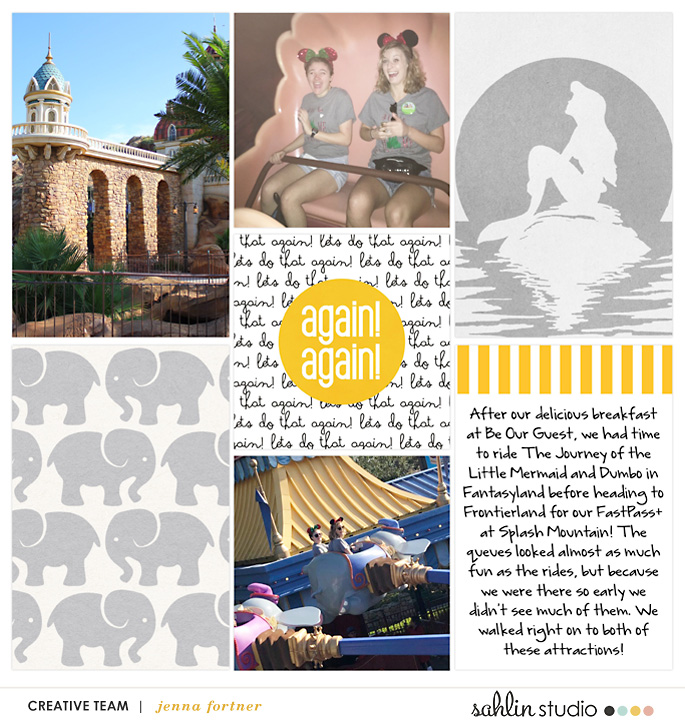
You can make a page and do some major editing all in one app. Okay, two. Sort of! Take some time to play around with all the editing options Pic Tap Go offers!! This is great to be able to make a card more easily coordinate with the other cards and photos on a page.
Here is the full layout with before and after again…
Products used for this layout: Project Mouse (Fantasy) Cards, (Food) Cards, (Rides & Attractions) Brittish Designs Blog Freebies and a journal card from the Project 12 January Edition in the Project Life App.
Give it a try and share your page with us in the Project Mouse Facebook group!
Happy Scrapping, Friends
I’m Jenna, a traditional scrapbooker, turned hybrid scrapbooker, turned digital scrapbooker, turned app scrapper. I’ve made my way through each form of scrapbooking and love them all, but for now my motto is KISS- “Keep it simple, scrapper!” I want to also encourage anyone reading this to create without comparison. Do what works for you and be proud of it. I scrapbook mainly on my iPad using a handful of apps like the Project Life App and Affinity Photo. I prefer pocket style scrapbooking, but am not one to shy away from an awesome template and a kit full of embellishments and goodies.


March 13, 2018 at 7:30 am
Embellishing Project Life App layouts in the Over App | Sahlin Studio | Digital Scrapbooking Designs says:
[…] how we can take this pocket page from my last blog post, and give it a little something extra with […]
April 8, 2018 at 12:27 am
Jenna says:
In the April 2018 Project Life App update, there is now an option to purchase an add on feature that allows text on any card or photo right in the Project Life App! (Android users will get this option next month.)
April 19, 2018 at 4:42 pm
Journaling on Project Mouse Cards in the Project Life App! | Sahlin Studio | Digital Scrapbooking Designs says:
[…] the following: card kits, layout designs, fonts, and/or special features like Freeform Text and Pic Tap Go integration. For the basics of using Project Mouse or other Sahlin Studio supplies in the Project Life App, see […]
September 15, 2018 at 11:26 am
Jenna says:
As of summer 2018 you can now add your own fonts to the PL App, making it even easier to add Disney touches to your pages!