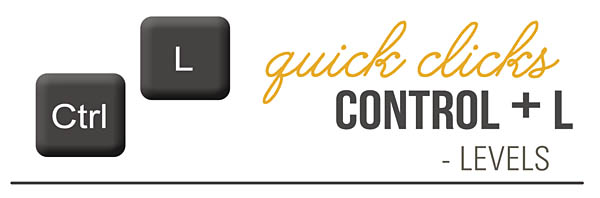
Photo Enhancement – Let’s Talk Levels.
Posted on under Photo Editing Tutorials, TUTORIALS
I hope your day is off to a wonderful start… and that you can squeeze in some scrap time today!
I thought it would a great tool to provide you with some photo enhancement essentials. We all want our photos to look their best. So, how about we start with one of the first and most powerful steps that can be taken to beautify your photos. Don’t get nervous, because it’s easy; just follow along below. You will truly be amazed by the results.
(* I am using PSE 5.0 for this tutorial, but most photo editing programs are fairly similar.)
Let’s talk “LEVELS.”
Levels is a tool in Photoshop which can help to improve the brightness, contrast, and tonal levels in your photographs. It uses the black, white, and midtones in a histogram in order to adjust your photo.
To work on your “levels”, click at your top tool bar click Enhance > Adjustments Lighting > Levels (OR Ctrl + L, as a short-cut). The levels histogram then pops up, which is a graph of the highlight, dark and color areas of your photo. You can adjust the levels in the histogram in three different ways. 1) By using the eye-dropper , 2) by adjusting the sliders, or 3) by entering a value into the box. Today I am going to show you what the eye-dropper and sliders can do. Give them all a try, and use what you find to be the most comfortable or the easiest.
Here is an example of what it would like with your histogram open on your desktop:
(You will find the different tools we will discuss marked in blue.)
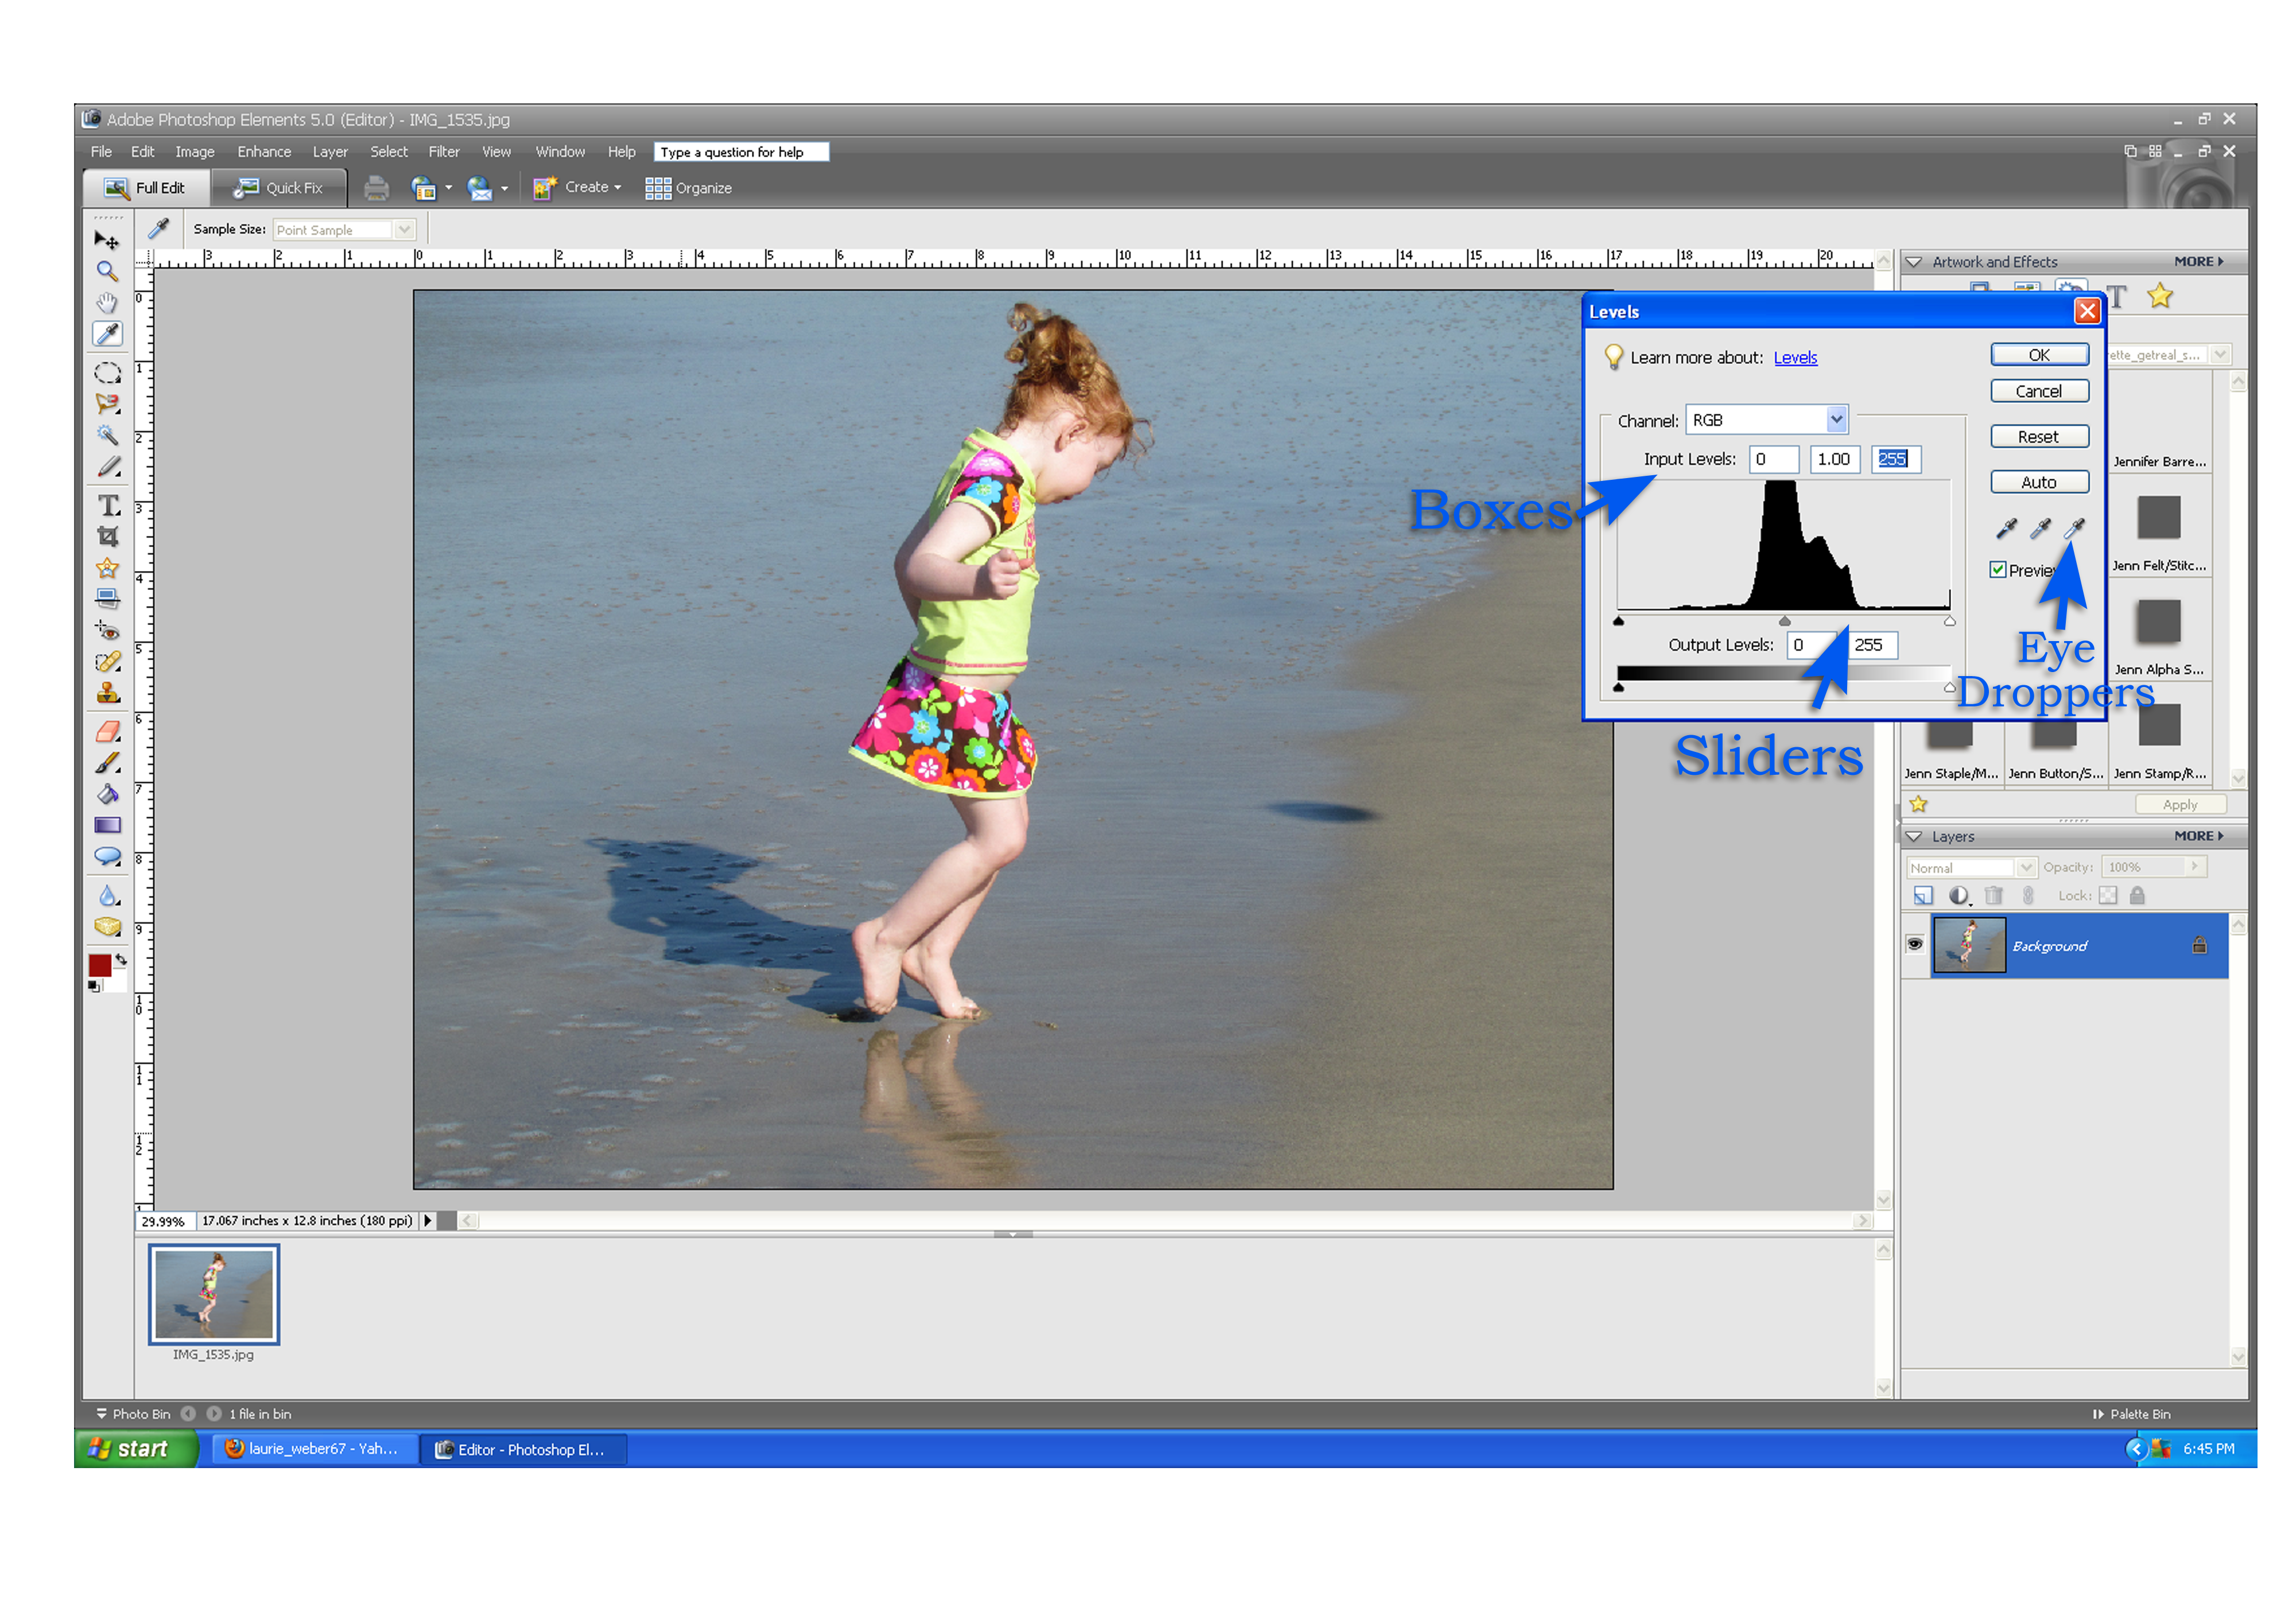
Eye Dropppers:
(This may be the easiest way to adjust your photo levels)
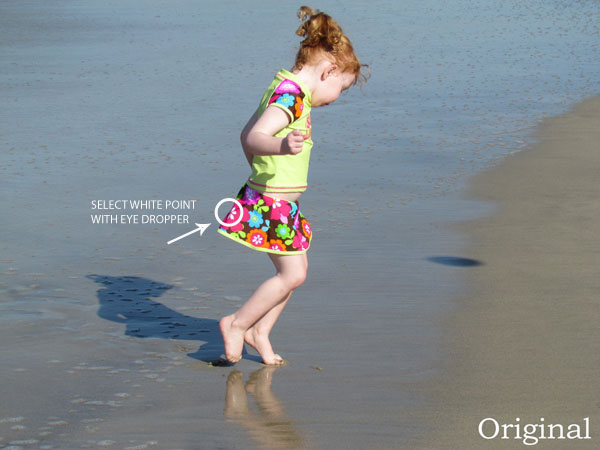
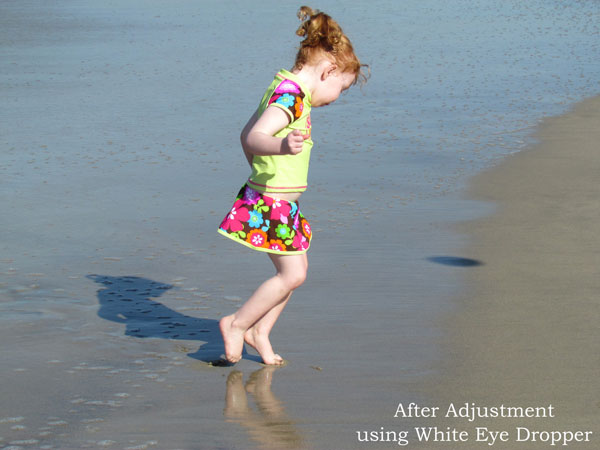
Click the white eyedropper and click on a spot in your photo that is suppose to be white. This should adjust the white and all other colors in your photo. The other eyedroppers, the black and gray, can be used if there is no white in your photo, and it will adjust your colors accordingly. If you are not happy with the result, just click reset and start again. If you want MORE information on using the eye dropper (and finding the white, black, gray points in your photo), be sure to check out this tutorial.
Sliders:
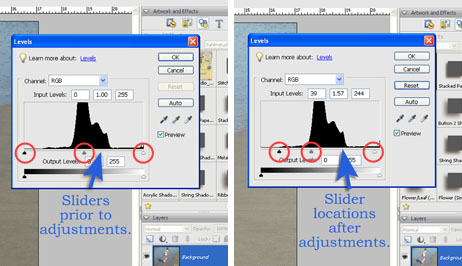
There are three (3) sliders you will be working with on the levels slider . 1) Start by selecting the white slider and slide it to the left. This will adjust the white or highlight areas. (Be careful though, if you slide it too far it will bleach the photo out.) 2) Select the the black arrow and slide it to the right. This will deepen the dark areas (or the shadowed areas). 3) Lastly, select the gray arrow and slide it left and right and notice how it adjusts the brightness, but doesn’t really effect the the highlight and shadow areas. We suggest you chose a couple of your favorite photos and play around with the sliders to get a feel for how they effect your photos. But, always remember, in the end, you are adjusting the levels to your liking.
Here is what the Levels Slider looks like: Before Adjustment / After Adjustment
* Note where the black, gray and white sliders are now, after sliding/adjusting.
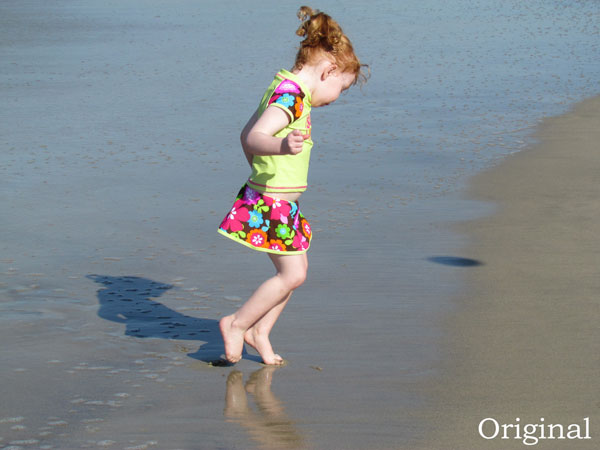
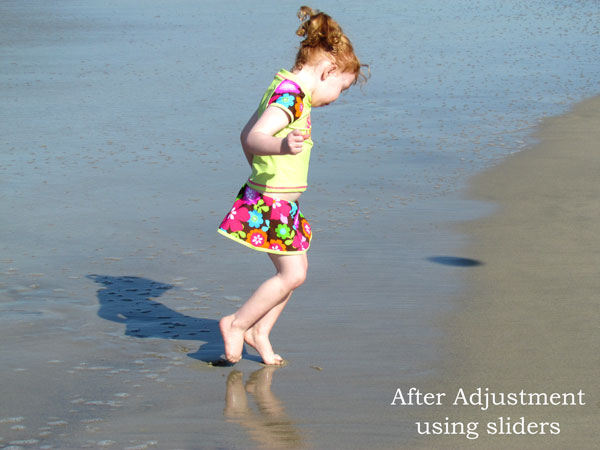
Here is the difference in the photos after adjusting the sliders:
The Results
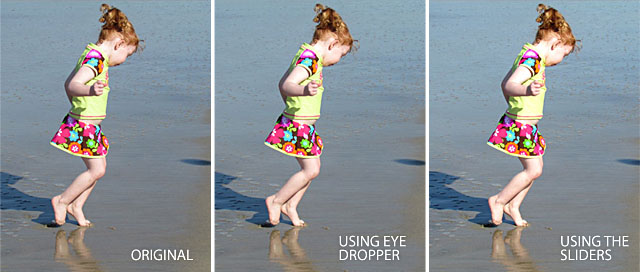
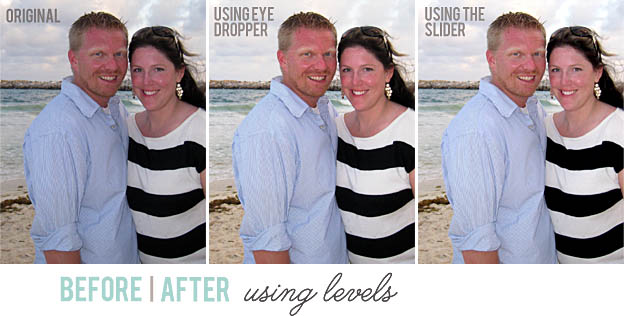
The final verdict is… that there ISN’T a better way to do it. They are both good tools. You just need to find which you like personally using better. Sometimes I find I like one way for a certain photo… and the next time I like the other way. The point is play around, have fun!!
Here’s a look at all the photos: the original, using the eye-dropper, and adjusting with sliders.
[pinit]

August 21, 2012 at 7:20 pm
Karen says:
Thanks for the tips. This will help a lot.
August 27, 2012 at 10:37 am
Beth says:
Anyone have any experience with iPhoto and using these tools? When I use the eyedropper my whites turn yellow.
August 27, 2012 at 10:59 pm
Julie aka MaggieMae says:
Thank you for this tutorial – it really helps with levels!!
September 6, 2012 at 12:17 pm
HeatherB says:
Krista – your tutorials are amazing! I keep coming back again and again for your Curves and Defog tuts and I’ll be coming back for this one as well! Thank you for sharing!