Using Textures for More Creative Photos
Posted on under Photo Editing Tutorials, TUTORIALS
Looking for a little something to spice up your photos and scrapbook pages?
No need to look any further. I have a fun and creative idea for you.
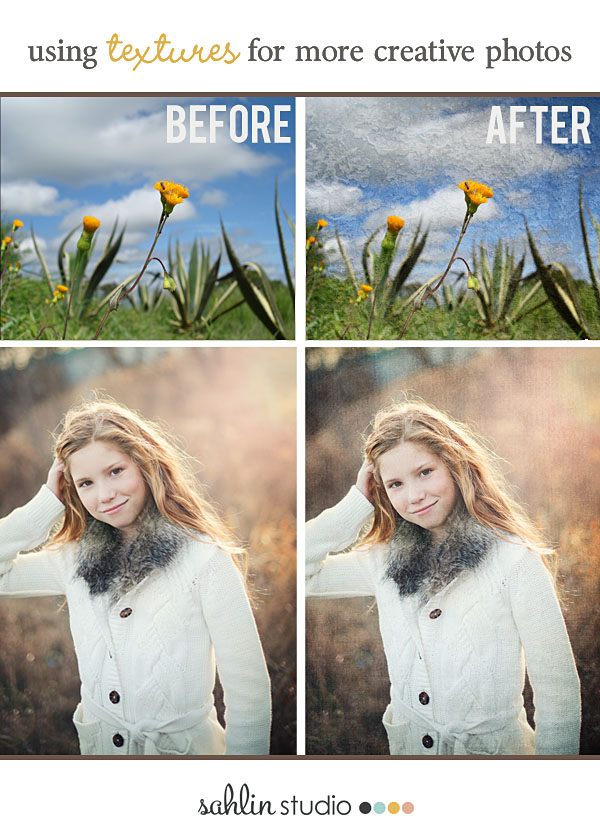
Photo Textures
I am going to give you a small sample of what you can do with a photo texture, but honestly there are so many possibilities. If you have some free time, you can take my few suggestions today, and then experiment with your own photos and layouts.
First of all, what is a texture? A texture is basically an image placed on top of your existing image that is layered to give dimension and character. The texture can be anything; a brick walkway, grassy lawn, or a metal door. The texture that you choose will depend on the feel that you want your photo to have. For example, if you are looking for a grungy feel, you might choose a rusted metal or an old brick wall.
Where to find textures? After a quick Google search, I found many sites offering free photo textures. I clicked the first one that looked interesting and was taken to Mayang’s Free Texture Library. This site has every texture your can think of. For fun, I downloaded a rusty metal background for my example (see below). One of my very favorite place for photo textures to overlay is from Florabella. You can find their textures and overlays here in the Florabella shop.
How to Use Textures
Step One: Adding your texture
1. Drag your texture on top of your photo
2. Size to fit
3. Change the blend mode of your texture (soft light / overlay)
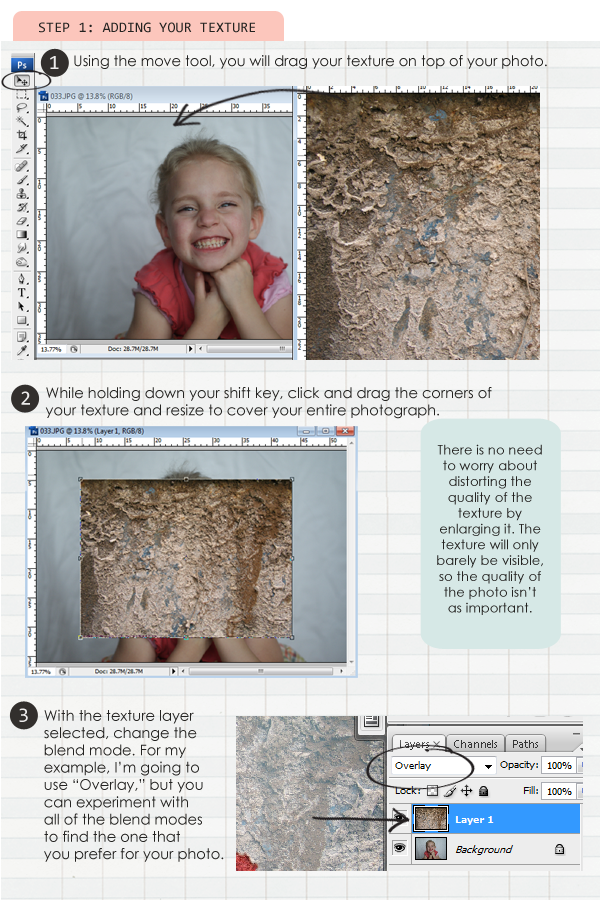
Your photo isn’t finished yet, so don’t panic. Right now the subject of your photo isn’t very visible and your texture isn’t very subtle. Here are some adjustments that I made to make my texture a bit less dramatic.
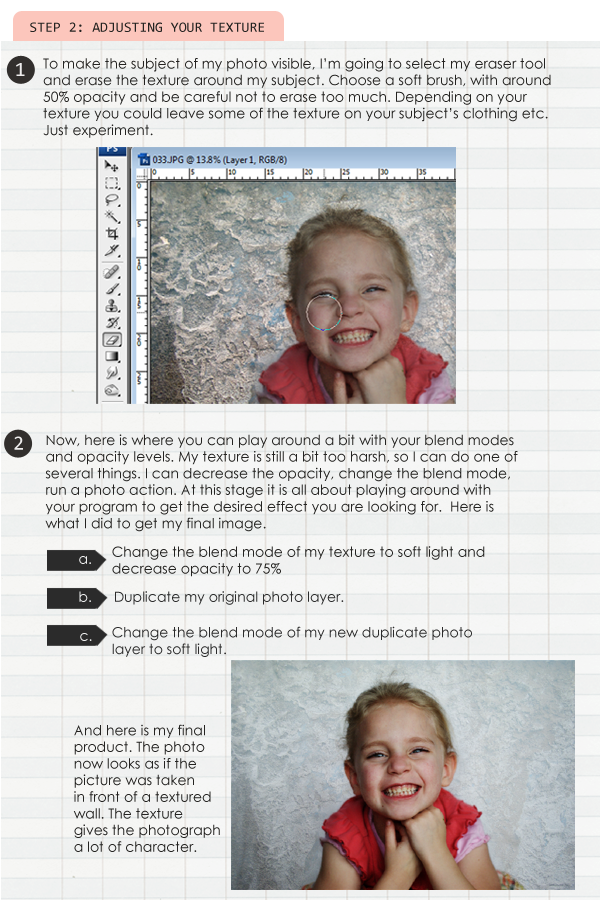
Step 2: Adjusting Your Texture
1. Using the eraser tool, erase parts of the texture from your original image for clarity.
2. Adjust the blend mode and layer opacity to get the desired effect.
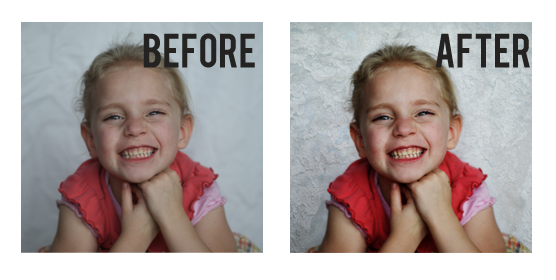
Here is a comparison of before and after my adjustments.
Example of Using Textures
You can use texture overlays in a number of ways to give your photos some extra character. Try using a beautiful subtle paper texture for a more classically clean look, OR try something fun… like a texture with a pattern or rough texture. These are all ways to to change the mode of your photograph as well. Check out some of these ideas:
Check out this photo with a slight vintage paper texture added.
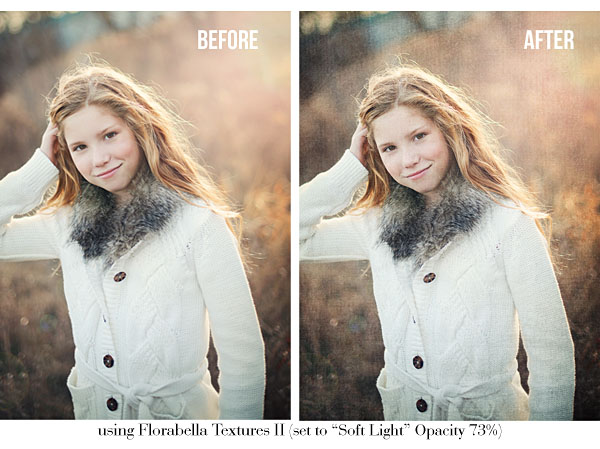
Check out the difference in this before and after photo, in which they used the Florabella Hazy Skies Cloud Overlay to the photo.

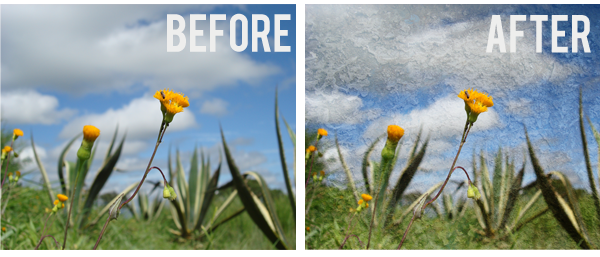
Textures are great to use with scenic photos too, because there aren’t the fine details you have when dealing with photos of people. In this next example, I didn’t use the eraser tool at all. It gives the photo a “painted” effect.
 (credits here)
So, when you have a little free time, give photo textures a try and see what you come up with. If you find that you created a masterpiece, please link us up on the comments section! We all need some inspiration!

August 4, 2013 at 3:30 pm
Tami says:
This is such a cool idea. I’m going to play around with it and see how it turns out.
Thanks for the tutorial!!