Tutorial | How to Use a Template… and a FREEBIE
Posted on under FREEBIES, Getting Started in Digital Scrapbooking, MONTHLY TEMPLATE, TUTORIALS
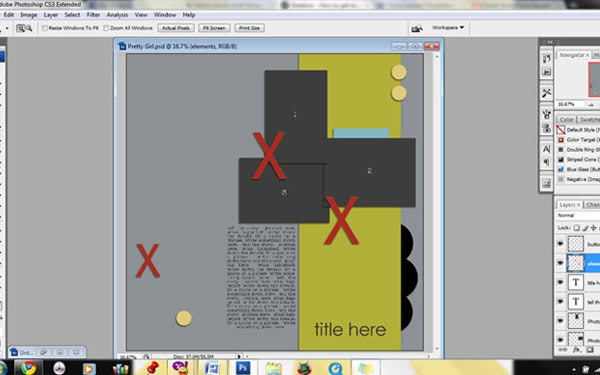
Today I want to share with you a great digital scrapping time saver – a TEMPLATE! A template is basically the “bones” of a layout, or a pre-designed page. It has layers that you clip your papers and photos on to, and layers that guide you where to place your elements and journaling. It is an amazing tool for new scrappers and old scrappers alike! I often use a template when my mojo has disappeared!
For those of you that are new to digital scrapping, I will give you step by step instructions on how to use a template. And for those of you that are already avid template users…just skip to the end of this post…there is a Sahlin Studio template for you to download for free!
The first thing you want to do is open up your template in your software program.
I’m using CS3 for this tutorial today, but this should also guide Photohop Elements users as well.
Once you open your template, go to File>Save As and give your template a new name. You don’t want to write over the original template, and this step avoids this from happening. Templates can be used OVER and OVER again. You can change its appearance by moving the elements around, changing the photos around, or even rotating or flipping the entire template. To do this, just click Image>Rotate Canvas and choose which direction you want to rotate it.
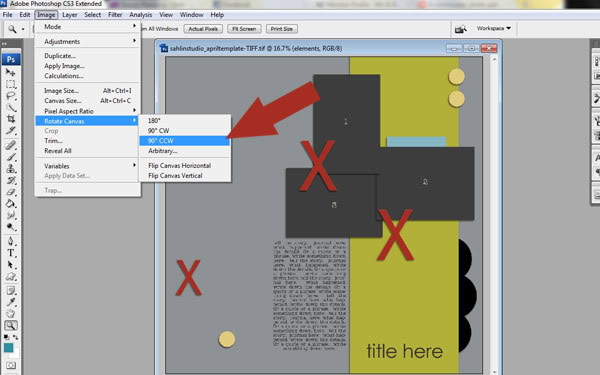
See how it gives the template a whole new look?!? You can make so many variations with one template!

For today, we are going to stick with the original design. I just wanted to give you some ideas on getting the most use out of your template.
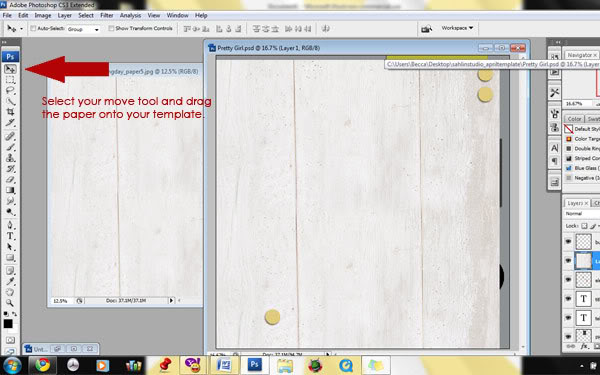
With our template open, let’s go ahead and open up a background paper first. When your background paper is open in your program, use the move tool to drag the paper onto your template.
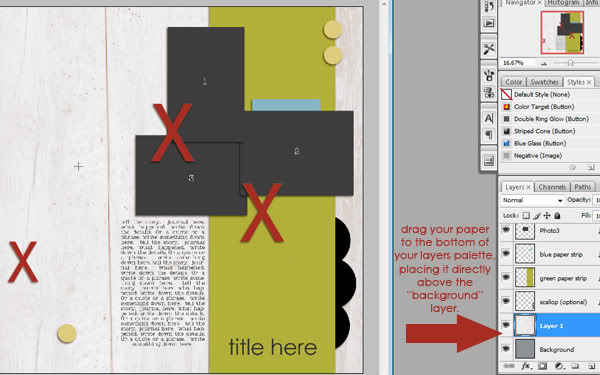
You will then drag your paper to the bottom of your layers palette (being sure to place it directly above the layer labeled “background”).
The next step is to clip your paper to the background layer. There are several ways to do this. I right click the layer in the layers palette and select “Create Clipping Mask.” Alternately you can use a shortcut Ctrl/Alt/G and it will do the same thing. Be sure you have the correct layer highlighted. Elements users will simply hit Ctrl/G.
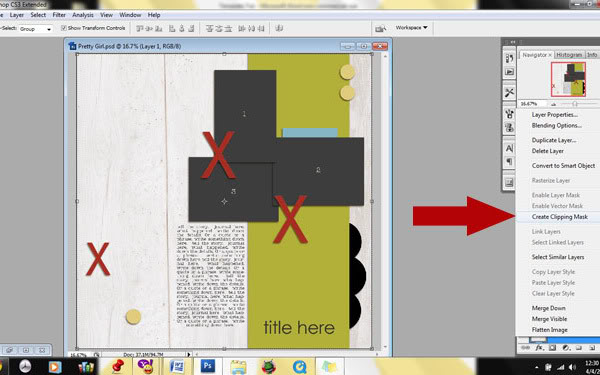
You will then right click the layer again, and choose “merge down.” You can see the merge down option in the picture above. Both CS and Elements users can click the shortcut Ctrl/E to achieve this step. Your new background will now be the paper you’ve chosen.
Next, I will open a photo and drag it onto my template.
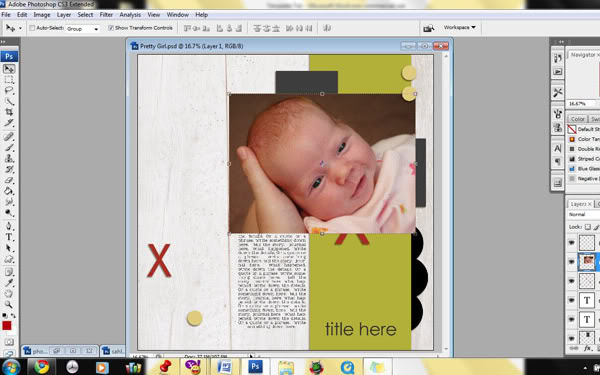
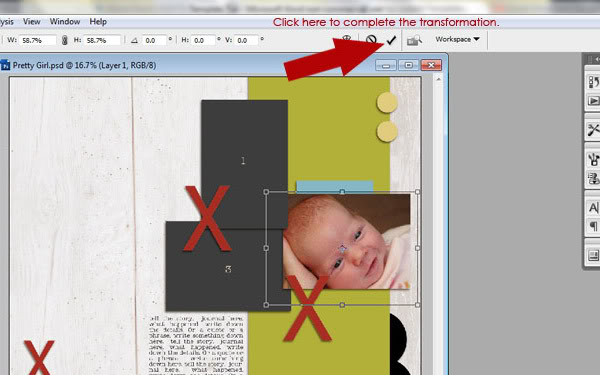
You will notice that my photo is bigger than it should be for the space in the template. We can adjust that. First we bring in the photo above the layer we want to clip it into. Then clip it just as we did before (Alt/Ctrl/G for PS and Ctrl/G for PSE). I will need to resize my photo to fit the frame into which I’ve clipped it, before I merge it down. Using the Crt & T to transform and move, this will resize my photo. To keep your photo in proportion, hold down the shift key as you resize it. Once it is resized properly, you can hit “enter” on your keyboard, or click the little check mark at the top of your screen to complete the transformation.
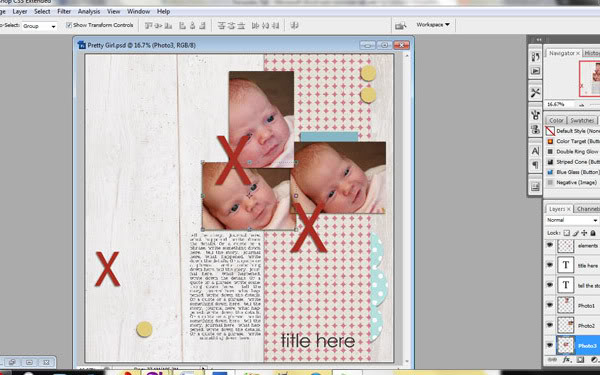
You will continue these steps to clip papers and pictures to all the other layers. Normally each template layer is labeled so you know exactly what to put there. Here is what I did with my paper and photo layers:
Now that my paper and photo layers are all done, I can move on to the fun part… EMBELLISHMENTS! The red x’s and dots are guides for elements. You certainly do not have to follow them, but it is helpful when first starting out. Here is my final layout after adding all the fun extras:


Check out more inspiration using this template:
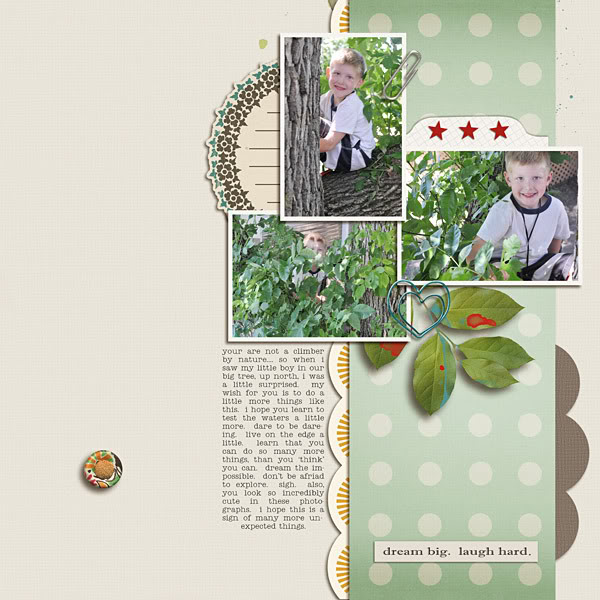
cnscrap
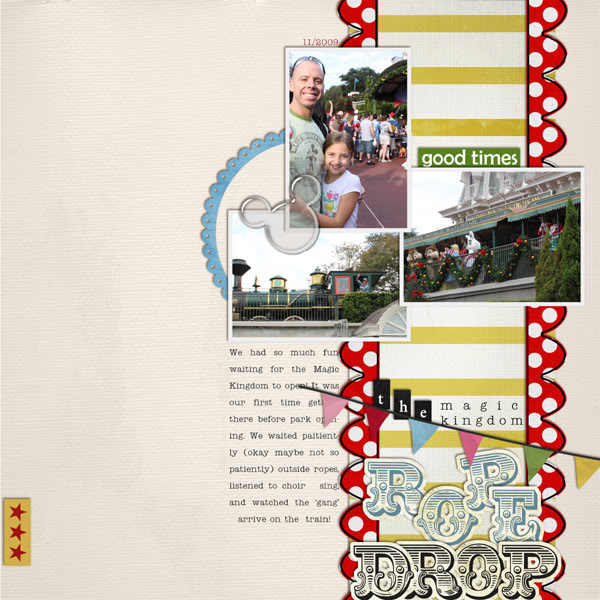
RebeccaH

All you have to do for a chance to win, is scrap a layout with the Monthly Template using Sahlin Studio products. Upload it to my designer gallery at the LilyPad and come back and comment on the blog post with a link to your layout! I randomly pick a winner each month to WIN a $10 gift certificate to the Sahlin Studio store! I can’t wait to see what you create!

April 7, 2011 at 3:37 pm
Ana.Paula says:
wowwwwwww amazing post!!! and let´s paly girls!!!
April 7, 2011 at 3:43 pm
Chanell says:
Thanks, Krista! It's fantastic.
April 7, 2011 at 10:55 pm
Chanell says:
Here's my page…
http://www.the-lilypad.com/gallery/data/500/Snacks_web.jpg
April 8, 2011 at 1:45 pm
CBH says:
Thank you so much for this post. I want to let you know that I posted a link to your blog in CBH Digital Scrapbooking Freebies, under the Page 5 post on Apr. 08, 2011. Thanks again.
April 8, 2011 at 4:47 pm
Pressed Petals says:
Krista…when I try to DL it's telling me that I need to install another program. Do you have a nother DL link? I SO want to play!
Thanks!
April 8, 2011 at 4:56 pm
sahlink (aka: Krista) says:
So SORRY!! Sometimes coding behind the scenes gets mixed up. ALL FIXED NOW!!
April 8, 2011 at 4:56 pm
sahlink (aka: Krista) says:
So SORRY!! Sometimes coding behind the scenes gets mixed up. ALL FIXED NOW!!
April 8, 2011 at 5:29 pm
Pressed Petals says:
awesome thanks!
April 8, 2011 at 7:10 pm
Pressed Petals says:
here's one more for ya!
http://www.the-lilypad.com/gallery/showphoto.php?photo=24717&title=sunny-day&cat=500
April 12, 2011 at 5:39 pm
Monica says:
Great template!! Thank you 😀
April 12, 2011 at 9:26 pm
Amber says:
Here's my page, thanks for a great template challenge!!
http://www.the-lilypad.com/gallery/showphoto.php?photo=24843
April 18, 2011 at 7:40 pm
MK says:
Great template, thank you!!! Also, for some reason, the designer catagories are not in the list for uploading, so I had to post in the members gallery. Just an FYI.
http://www.the-lilypad.com/gallery/showphoto.php?photo=25056&title=germany&cat=500
April 22, 2011 at 7:15 am
Gayle says:
I've been trying to upload my layout to your gallery at The Lilypad, but I can't seem to do it. (It doesn't give me an 'upload' option.) I've emailed them with the hope that they can tell me what to do. In the meantime, here is the link to my layout at Photobucket. As soon as I get The Lilypad issue figured out, I'll post that link, too. Sorry for the confusion!! http://s408.photobucket.com/albums/pp164/gaylemaupin/Scrapbook%20layouts/?action=view¤t=Coming-home-on-monorail.jpg
April 23, 2011 at 1:42 am
Gayle says:
Whew! I finally got it, but like another poster said I didn't get the option to upload it to your designer gallery. If you know what I should be doing, just let me know!
Here's my link…http://www.the-lilypad.com/gallery/data/500/Coming-home-on-monorail.jpg
Thanks for the terrific template! I've already used it a couple of times! 😀
April 27, 2011 at 9:30 am
Lilipuce says:
Thanks so much for the tuto and the template !
April 27, 2011 at 1:01 pm
lyza says:
thank you so much for sharing
April 27, 2011 at 5:32 pm
Hillary says:
Fun template! Here is my link: http://www.the-lilypad.com/gallery/showphoto.php?photo=25320&title=dirty-boy&cat=500
April 27, 2011 at 6:27 pm
Sus says:
I simply can´t get it uploaded in your designer gallery, I don´t have that option, but here is my page any way 🙂
http://www.the-lilypad.com/gallery/showphoto.php?photo=25321&title=let-b4s-eat&cat=500
I loved that template, thank you for sharing it
April 27, 2011 at 9:09 pm
Sarah says:
Thanks for the fun template! Here's my layout:
http://www.the-lilypad.com/gallery/showphoto.php?photo=25327&nocache=1
April 28, 2011 at 1:01 pm
joelsgirl says:
Thanks for the great template!
http://www.the-lilypad.com/gallery/showphoto.php?photo=25352&title=sous7bnot-a7d-chef&cat=569
May 1, 2011 at 9:43 am
joëlle says:
beautiful template, thank you very much
May 9, 2011 at 3:47 am
aupaysdelouise says:
Thank you so much
May 25, 2011 at 4:36 pm
malaika ♥ says:
thanks a million. ive been downloading templates but i havent been using them much because im clueless as to what to do with them. thanks for shedding light on this one.
August 30, 2012 at 7:50 pm
Heather D. says:
I just found your site -wow! Thank you for the freebie, but thank you also for the tutorial! I’ve often seen templates but never knew how to use them. I’m saving your tutorial for sure! THANK YOU!!!
August 31, 2012 at 8:49 am
Krista says:
I’m SO glad!! I remember back to when I first started… and realize the best way to learn is from others. So happy to share some info.
August 30, 2012 at 7:56 pm
Heather D. says:
Krista – can I put a link to your post on my site? Please let me know…I think this tutorial is fantastic!
August 31, 2012 at 8:49 am
Krista says:
Yes!! Absolutely!! I love when people share and link up to my site. Thank you!! MWAH!