Hybrid Halloween Treat Boxes
Posted on under Hybrid Projects
I don’t know about you, but I Looooove Fall! I’m getting excited about the leaves turning colors and the crisp cool air against my face. I love decorating with pumpkins and different colored mums. I love everything about fall except that it means winter is coming. Fall also means that Halloween is quickly approaching. I love orange and black together (nothing to being an OSU fan either…lol) I also decorate for Halloween, but fun and not scary. Okay, sometimes maybe just a little scary, but no gore!
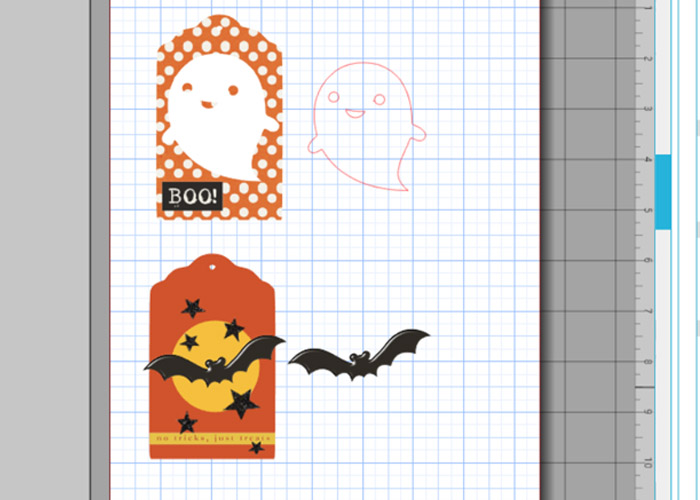
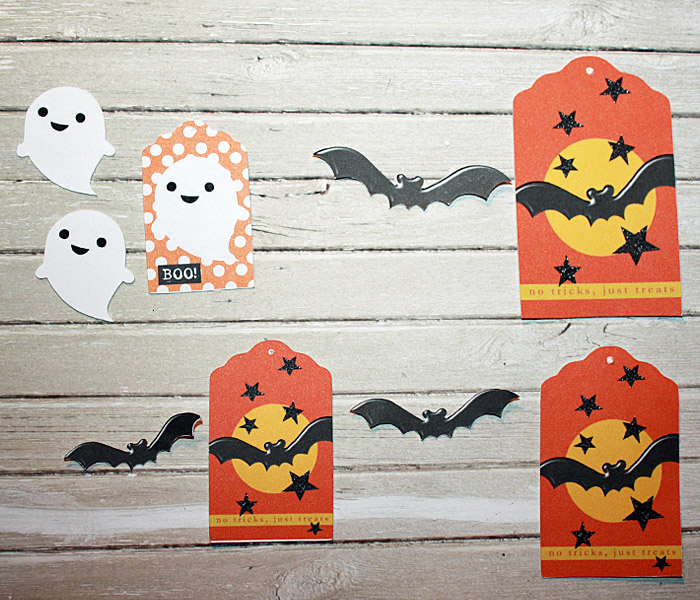
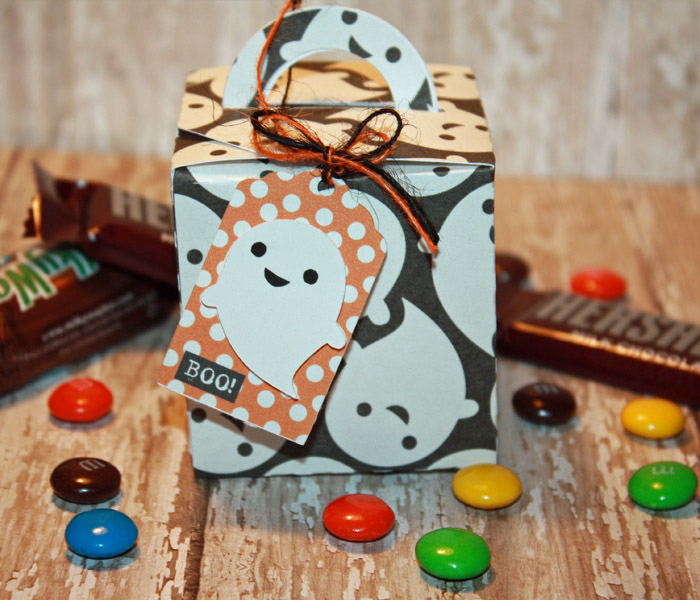
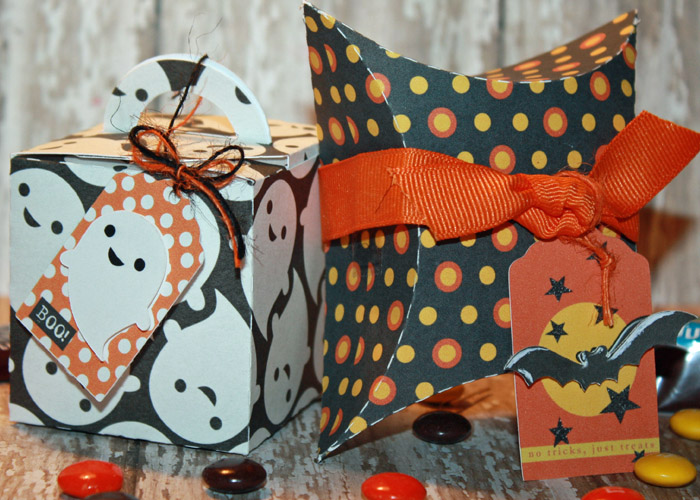
I have a couple of projects that I want to share with you. I love the little ghost! Wouldn’t these be fun to make for your child’s classroom party or for the neighborhood kids on Halloween night. I love giving out special treats on Halloween night and seeing all the costumes.
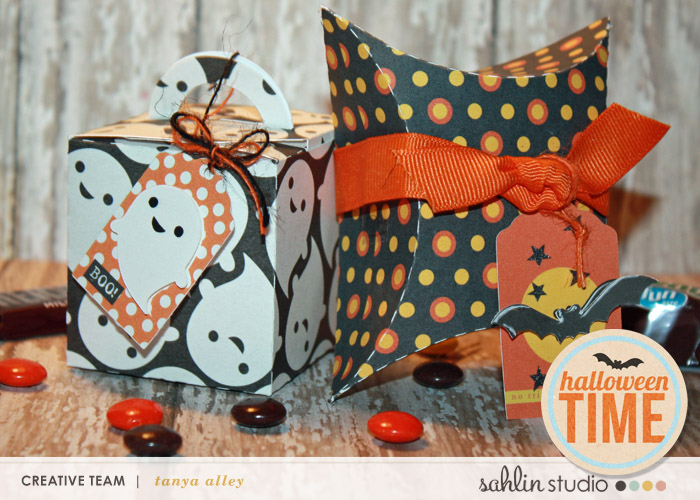
I used the kit, Project Mouse | Halloween by Sahlin Studio to create these fun treat boxes and tags. I also used my FAVORITE tool in my craft room, my Silhouette Cameo. I know, I’ve said that many times. I just can’t help it, I love it.
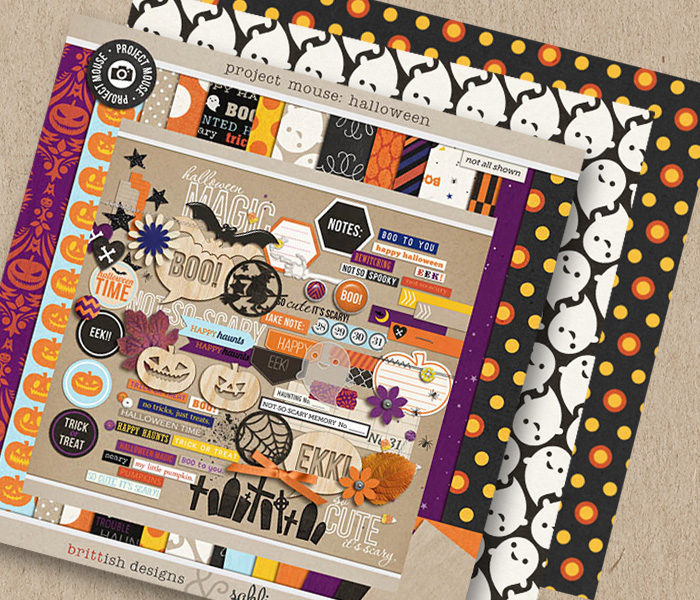
This kit has been some much fun to work with and have many other projects I would like to do with it. Maybe another blog post I will share more ideas. But for now….here is how they were created.
First I opened a box that I purchased from the Silhouette Online store. After it is positioned on my mat correctly, the next thing to do is add your patterned paper.
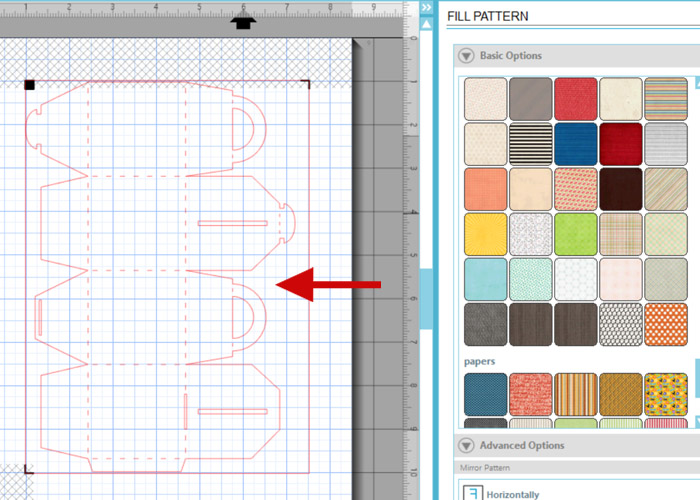
To add the paper, open the pattern paper icon at the top of the page, this will open all your patterned papers that you have saved in your library. For this project, I added the ghost paper. I just think they are so cute.
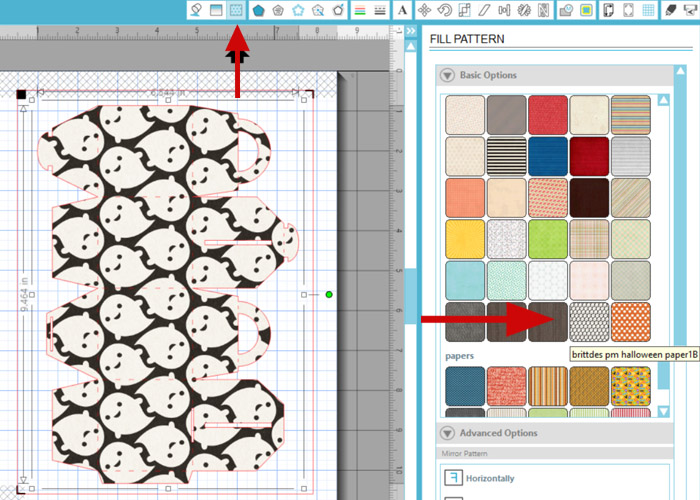
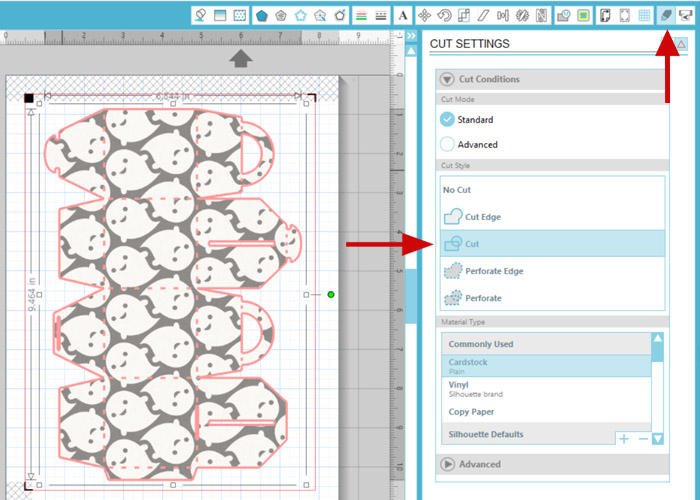
Next open the CUT SETTINGS menu by clicking on the cut icon at the top right. This file was already saved as a cut file, so I didn’t have to do anything here. It’s always a good thing to check you cut lines before sending to the machine. Sometimes when I am working on a project, I forget this step and ususally have cut lines on where I don’t want them to be…for example, inside a tag or on a card. UGH….I really hate when that happens, because paper and ink were wasted.
Make sure that your registrations marks are on before sending to the cutter.
Repeat the above steps for the polka dotted box.
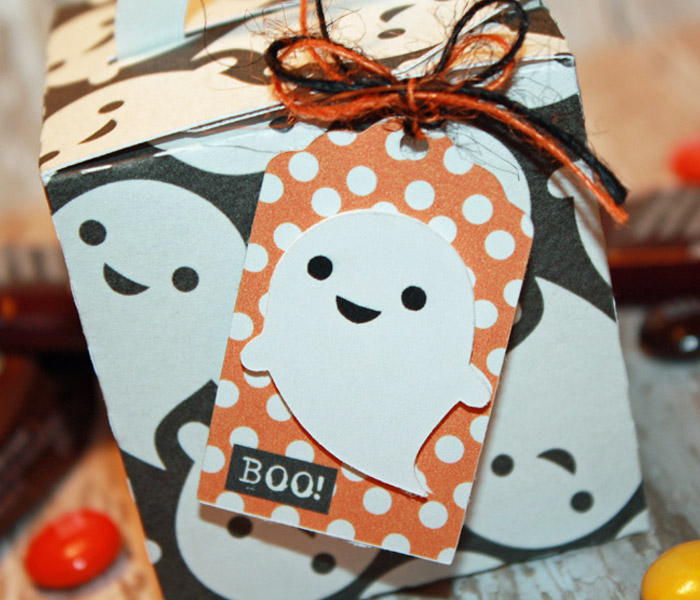
I also made cute little tags to hang off of the boxes.
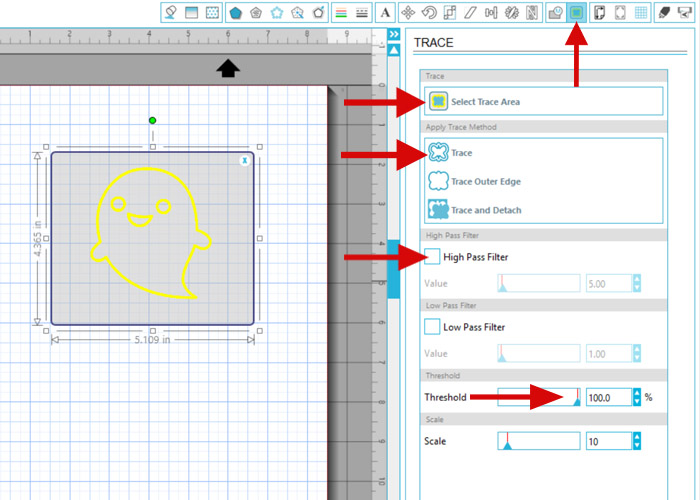
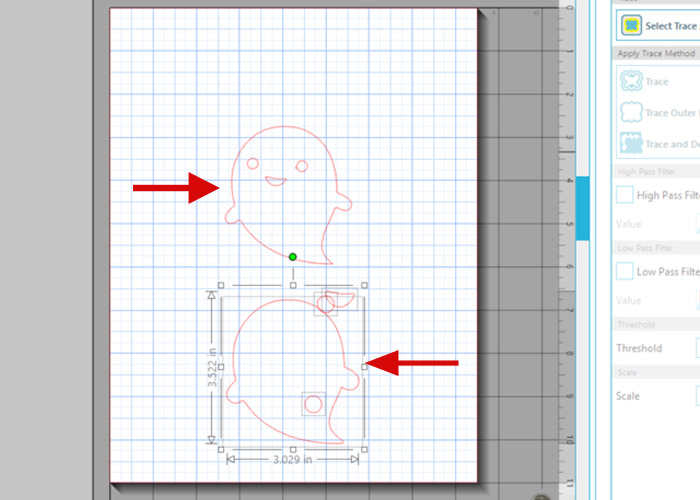
To make the tags, first open the ghost from the elements. Next open the trace menu. Now select the trace area/uncheck the high pass filter/move the threshold all the way over and selected the top trace method. This will give you double lines, I will show you how to get rid of those.
You will need to Release Compound Path. To do this go the the OBJECT menu at the top left of your screen. Now go to Release Compound Path. This releases all the lines.
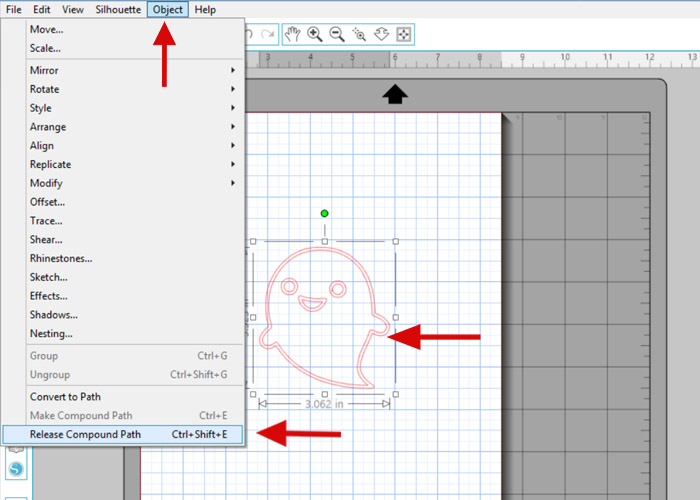
Now drag the extras to the side and hit delete. Oh, I almost forgot…..drag a box around the good image and group together. To get the moon, I just drew out a circle and filled it with the same yellow from the polka dot paper.
Next you will get all your pieces for you tags layered on the drawing area. Now it’s time to print and cut. Follow the same instructions that I used to cut out the treat box. Remember to check those cut lines.
HINT: I just recently discovered that you can move the registration marks over so that you have more space to print and cut. I was so excited when I tried it and it actually worked.

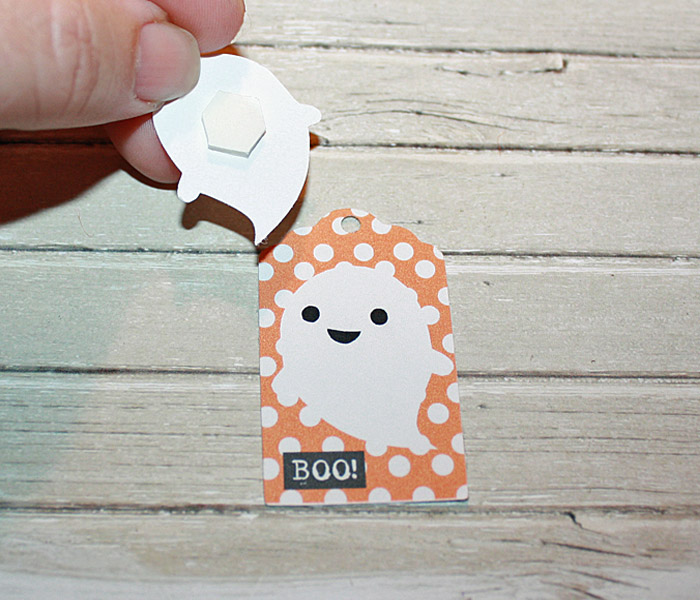
It’s time to put this project together. First assemble your boxes. Both boxes were easy to assemble. I used double sided tape, but there are many other options. Once the boxes are assembled, move on to the tags. You can see here that I cut out extra pieces. I did this because I love adding dimension to my projects. You do not have to do this, especially if you have quite a few to do.
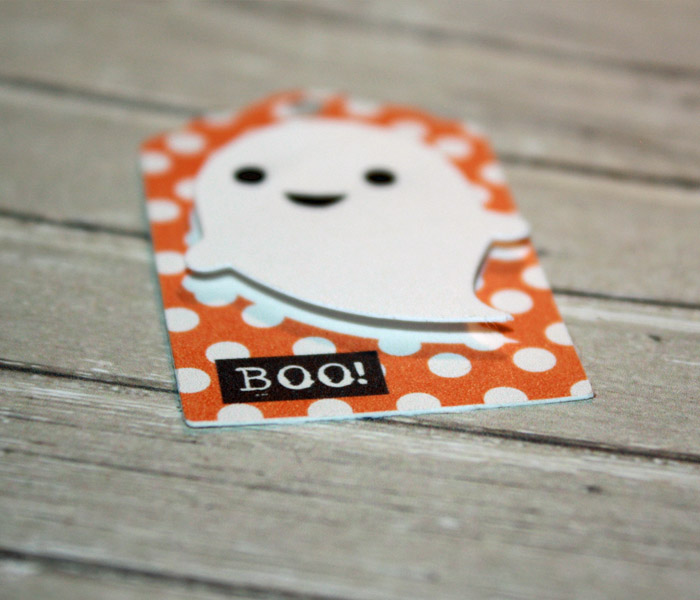
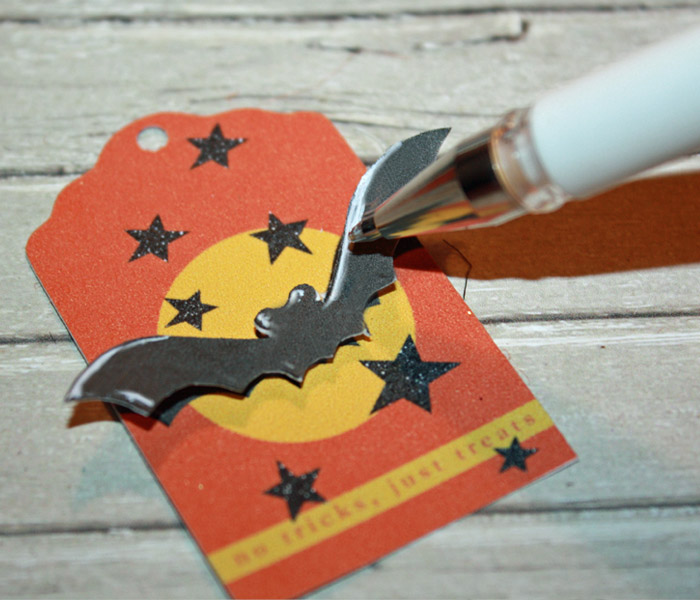
To add dimension, I simply added a pop dot and placed it on top of the ghost/bat that is on the tag.
You can see how it looks here.
I also used a white gel pen to go over the white marks on the bat. Again, for dimension. You can skip this if you choose to.
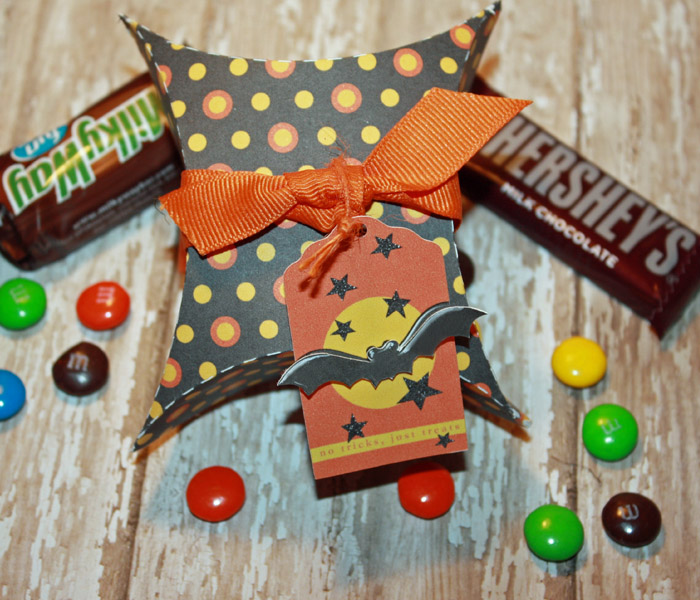
That’s it, you are done. Well sorta, add the candy and attach the tags……Now you are done. The only thing to do now is hand them out!
I hope that you have enjoyed my tutorial. I love creating fun things. I plan to be back before Halloween to share some more fun things with you!
Hugs, Tanya
Tanya has been hybrid crafting for about 10 years. She discovered digital scrapbooking when her children were young and had no space for crafting. With some online surfing she came across digital scrapbooking and later hybrid crafting. She loves creating and sharing those creations with you. Tanya’s all time favorite tool in her craft room is her Silhouette Cameo. Silhouette combined with digital kits makes for some really great projects.

October 11, 2015 at 9:50 am
Hannah says:
Do the papers just appear in your silhouette software after they have downloaded?
October 12, 2015 at 8:55 pm
Tanya Alley says:
Yep, they sure are Hannah. Here are the steps so that you will see them in your “Paper Library” File/Import to Library – find where you have it saved on your computer and just double click. It will show up in your “My Own Designs” folder. There drag it to “My Patterns Paper”. I hope this helps….
October 21, 2015 at 1:57 pm
Mary says:
This is so cute! You’ve really opened my eyes to what my Silhouette can do!
December 18, 2015 at 11:00 am
Plaid Christmas Gift Tags | Sahlin Studio | Digital Scrapbooking Designs says:
[…] I did a trace on all of my elements first. If you haven’t done this before, you can go here to see how it’s done. After I did that I created a simple tag and filled it with the papers […]