How to Create Cut Files from Pattern Papers or Templates
Posted on under Hybrid Layouts, Scrapbooking Tutorials
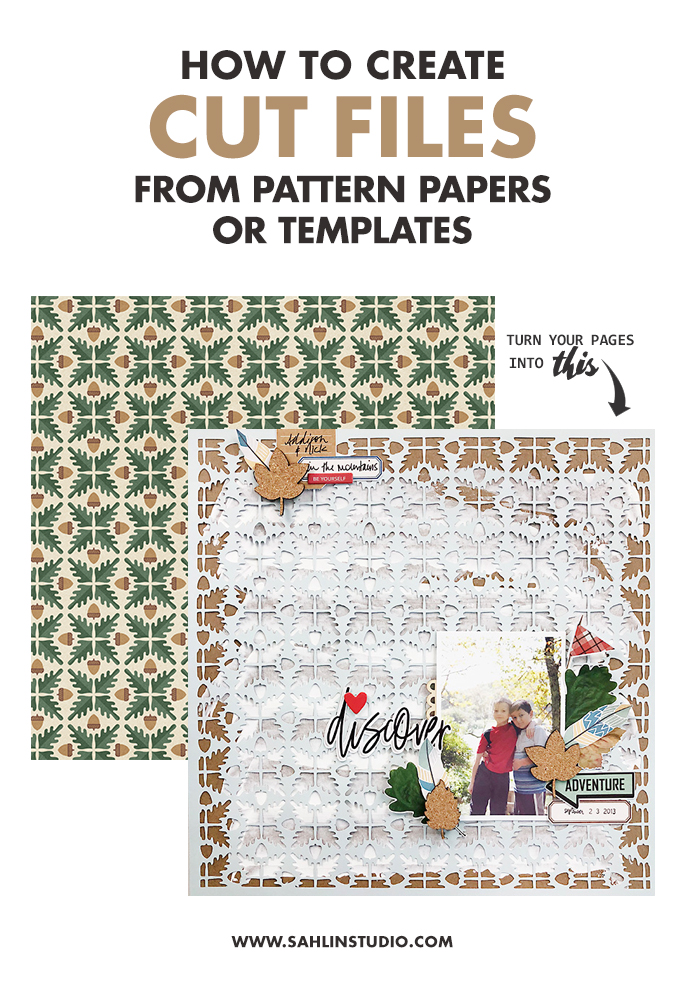
Hello Lovelies! It’s Theresa here, and lately I have been creating some really fun layouts using patterned papers and digital templates as CUT FILES! This is a really cool way to stretch your digital supplies and makes for some really beautiful layouts. So today I am going to share two different processes of converting both a digital paper and a template into Cut Files.
Using Digital Pattern Paper to Create a Cut File
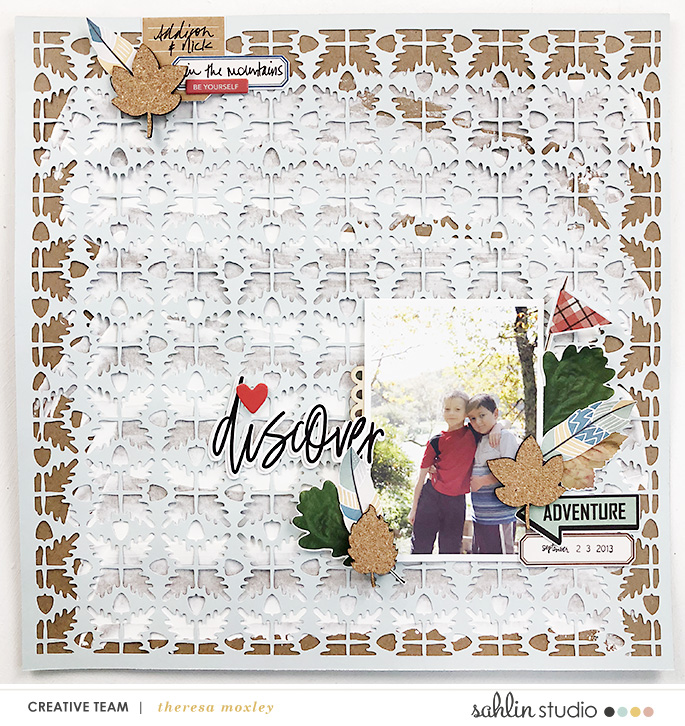
This is a recent layout I created using a patterned paper from the Project Mouse Wilderness collection. When using a patterned paper as a cut file, selecting a good paper can be the difference between success and starting over again. Be sure to choose papers that have a very definitive pattern repeat. I chose this one because it is very symmetrical and will cut a distinct pattern in the cutting machine!
Let’s go step by step in this process.
Step 1: Creating an Image with Contrast
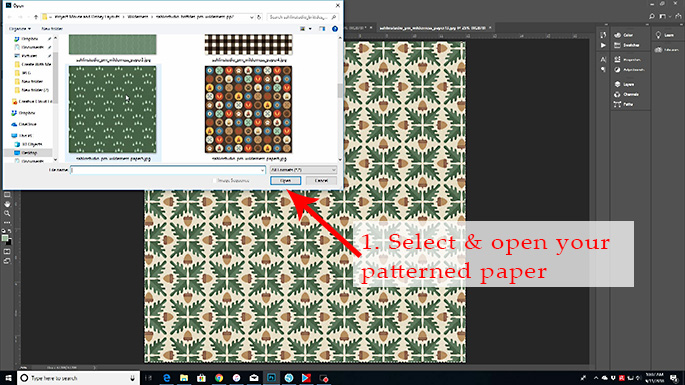
Open up your patterned paper in Photoshop. I am using the Creative Cloud (CC) version, but you should be able to do this in Elements as well. I am using a patterned paper from the Project Mouse Wilderness collection.
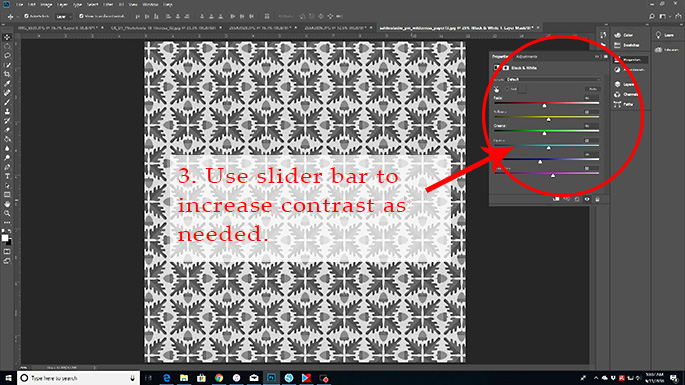
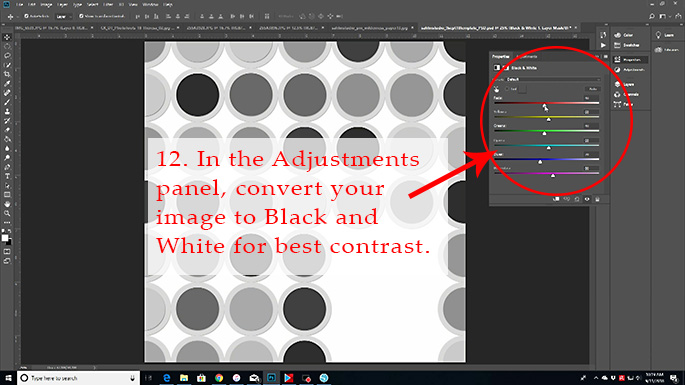
In the Adjustments Layer, click on the icon for Black & White. This is a sort of black and white filter that changes the colors of your image to black, white, and gray scale. We are doing this simply to create a stark contrast.
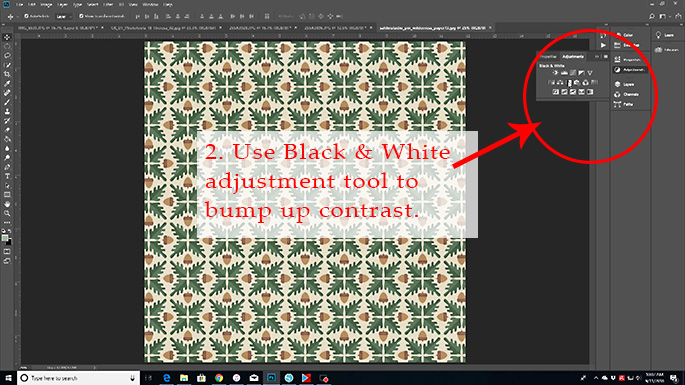
Also in the Black & White Adjustment layer, you will find slider bars for each individual color represented from the color wheel. Move the sliders as you need to in order to create as much contrast as possible. It does not have to be perfect, we just want a good contrast between the pattern and the background so the cutting machine will recognize the shapes.
Step 2: Create the Cut File
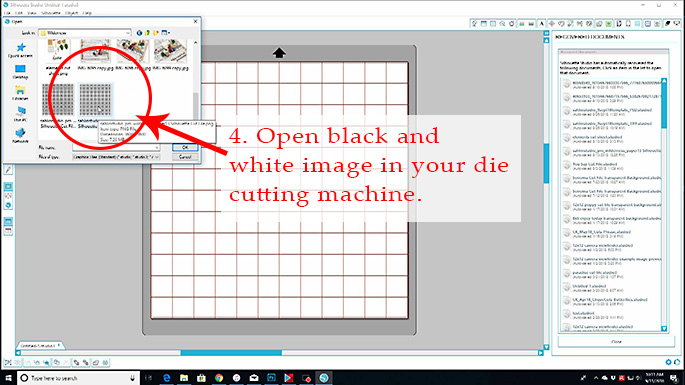
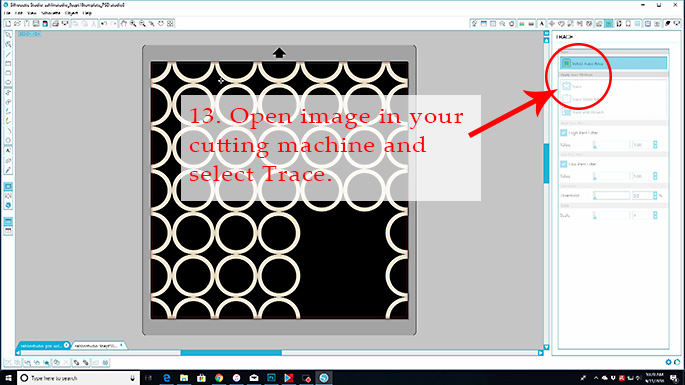
Once we have the image converted to Black & White, save your image as a new file, and then open the new image in your cutting machine. I am using the Silhouette Cameo.
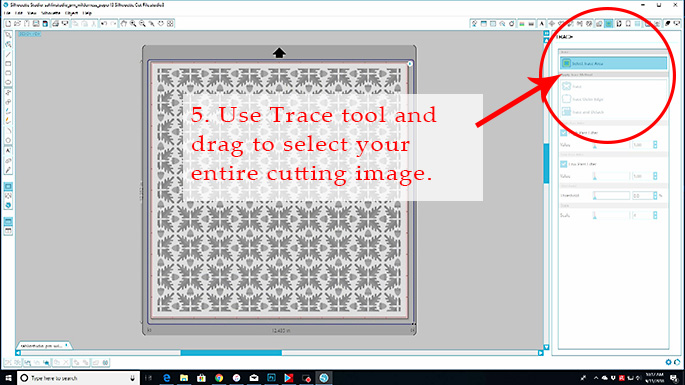
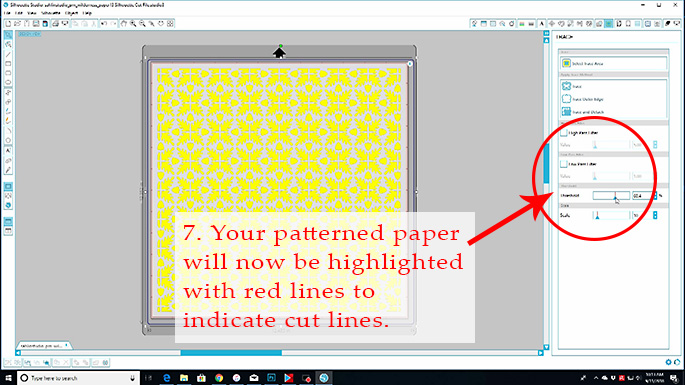
In your cutting machine software, select the Trace menu and click on the Trace button. Select the entire image by dragging across the entire canvas. I have also left a 1/4″ border on all sides, simply by grabbing a corner and dragging it to a smaller size on the sheet.
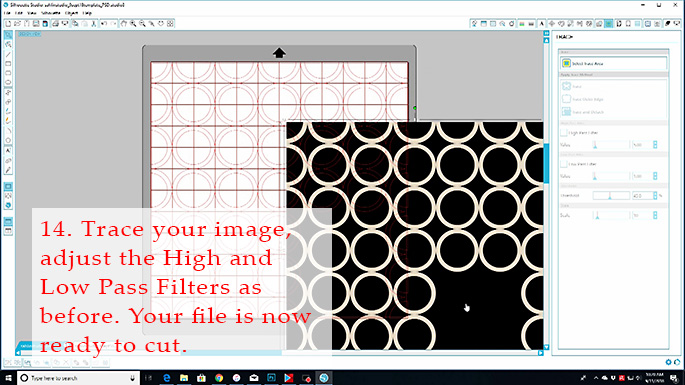
When you select your Trace you will probably see that some portions of your image are not fully highlighted. So first let’s turn off the High Pass filter. It may help a bit, but we probably still need to do a bit more tweaking.
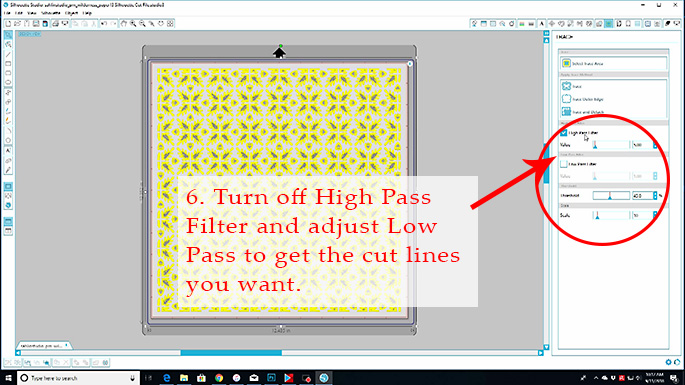
Also click on the Low Pass filter and bump that up a bit. Be careful to not bump it up too much, or else you will distort your cutting images. You should now have a set of red lines on your canvas that can now be sent to the cutting machine and cut!
Using Digital Template to Create a Cut File
Now let’s do the same thing, only with a Digital Template. I am using the September 2018 Monthly Template, and the process will look much the same.
Step 1: Creating an Image with Contrast
Open your template in Photoshop. I recommend opening the PSD format so you have the ability to manipulate layers as you wish.
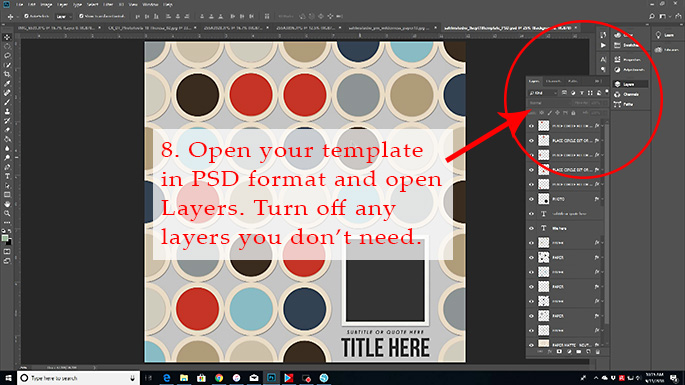
At this stage you will want to Hide or Delete any unnecessary layers, such as photos, text, or other layers that don’t need to be cut out. You can also at this stage recolor any layers if you would like. In the end you just want stark contrast.

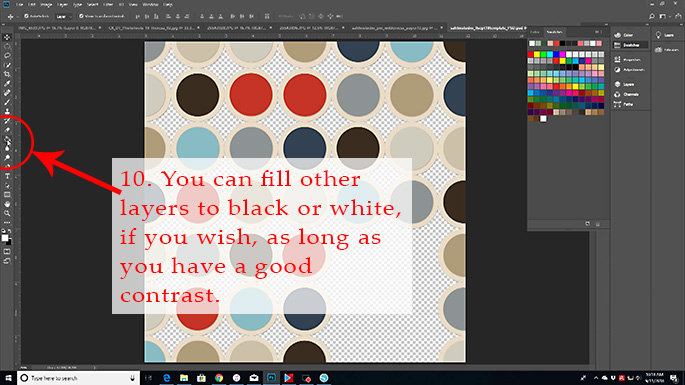
Still in the Layers menu and one Layer above the Background, add a new Layer and fill it with white or a contrasting color to your elements.
Once you have your Layers all set, Flatten your image. At this point you will want to be sure to Save your image as well, making sure to save as a New File so you don’t overwrite your original.
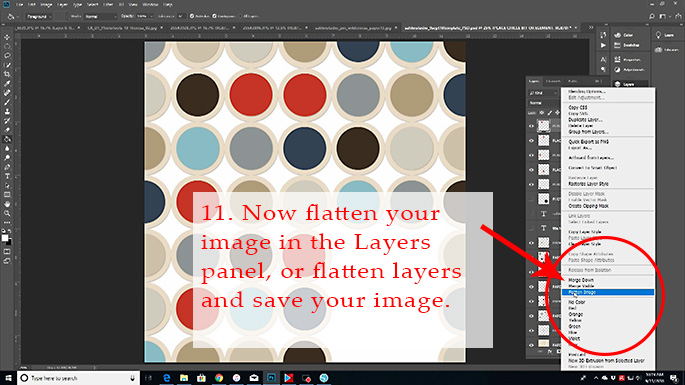
If you did not convert your Layers, then you will want to Convert the entire image to Black & White like we did for the patterned paper. Go to Adjustments > Black & White > Adjust sliders.
Step 2: Create the Cut File
Now you can open your saved image in your cutting machine software, and just like we did before, select the Trace menu.
Now your image is ready to Cut!
For this layout I cut my template from light blue card stock and then punched my circles using a circle punch. There are lots of ways you can fill your circles, but this one seemed to be a fairly quick and simple way to do it.

Video of Layout Process
I also have a tutorial video, if you love learning new tricks that way.
Thank you so much for joining me today!
Products Used in this post:
Sahlin Studio Simplify Patterned Papers
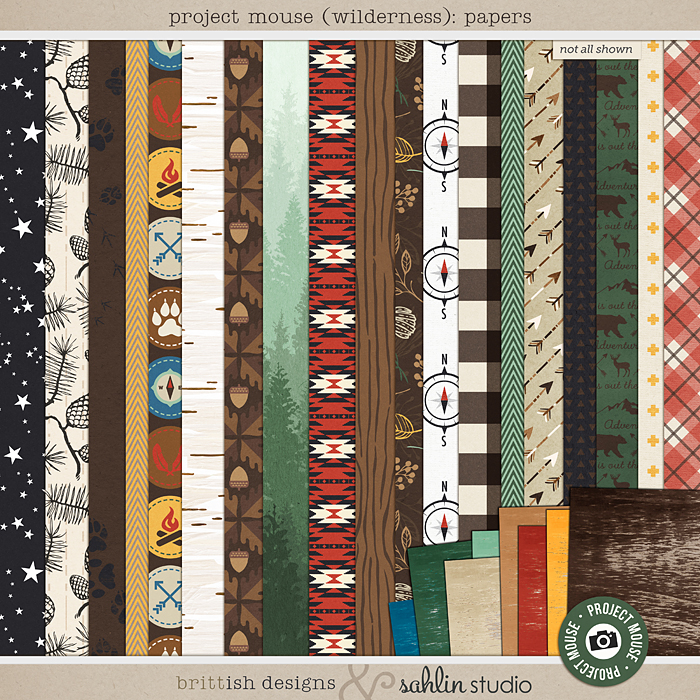
Sahlin Studio Wilderness Patterned Papers
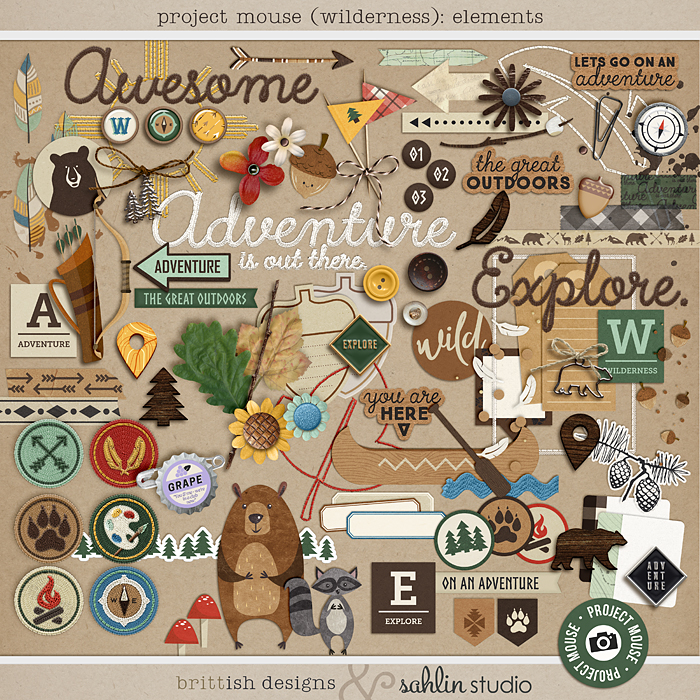
Sahlin Studio Wilderness Elements
Other Products in this post: Sahlin Studio Simplify Patterned Papers; Sahlin Studio Project Mouse Wilderness Patterned Papers; Sahlin Studio Project Mouse Wilderness Elements. Freckled Fawn (cork leaves, chipboard elements, rubber embellishments); Simple Stories (chipboard embellishments); Studio Calico (chipboard embellishments).
Hi, I’m Theresa of Larkindesign from Kernersville, NC where I live with my four kids, one awesome husband, two cats, a dog, and a bunny. And occasionally our cat brings us pet salamanders. When I am not calming chaos I am in my studio, playing with photos and colors and embellishments. This scrapbooking thing is my passion and I love inspiring others to feel the same way!

October 25, 2018 at 3:59 pm
Erika says:
Great ideas, both, Theresa! Love to see ways to reuse the thousands of digi supplies I have acquired over the years. Thanks for sharing.