Tutorial | How to Re-Color Using Color Overlay
Posted on under Scrapbooking Tutorials, TUTORIALS
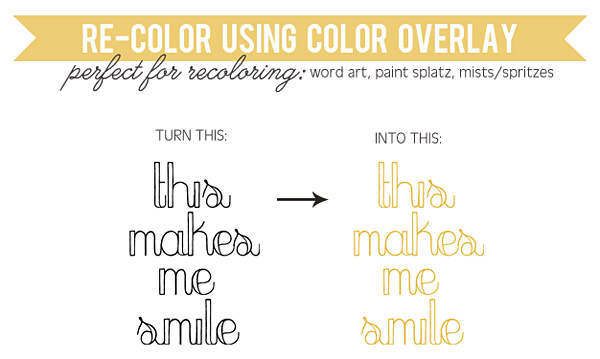
Would you like to know a simple trick that will go a long way in being able to customize color?

Have you ever browsed through the store, see an amazing product that you would love to have for a certain layout? The only problem is that it isn’t the right color. The product may even advertise, “Easy to Recolor!!” But you say, “Sure…if only I knew how to do that!” I’ve been there before and while this may be a basic skill for some readers, there are some that might not know this simple trick. So, today we are going to talk about how to recolor different elements, like word art, paint splatz, and many more using Color Overlay. I’ll use a few of my newest products for my examples.
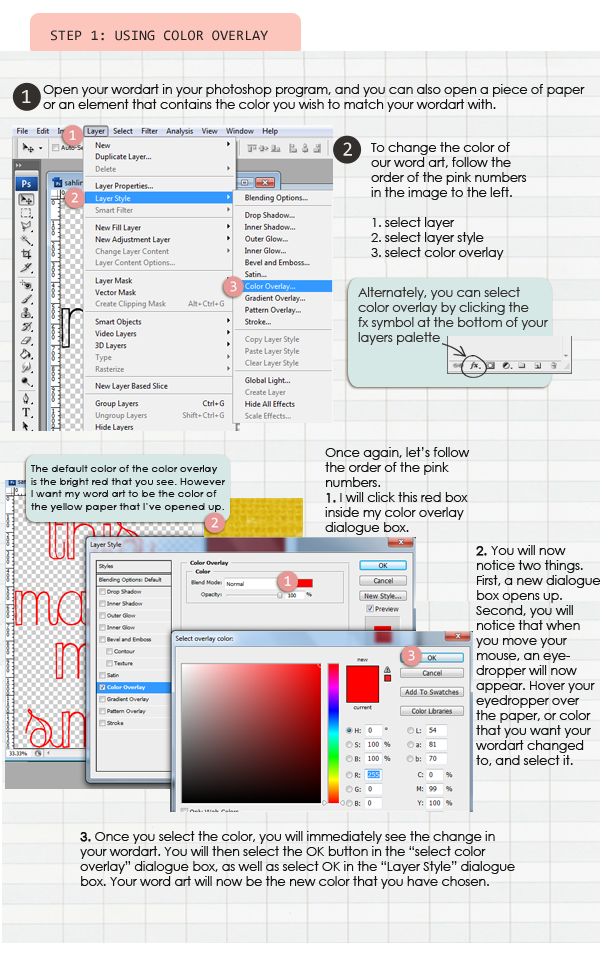
Recoloring Using Overlay
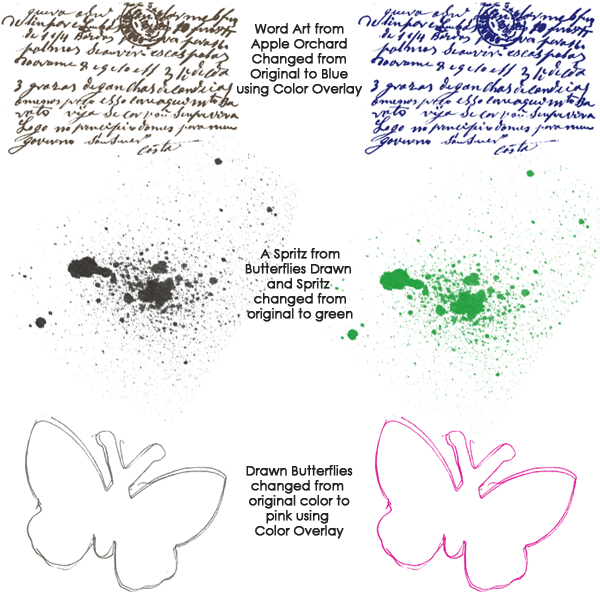
There are so many things you can do with the color overlay option. You can change the color of paint splats and spritzes. The possibilities really are endless! Here are some examples:

*psssst…you are getting a little sneak peak of an upcoming product in there!*
Recoloring Using the Paint Bucket
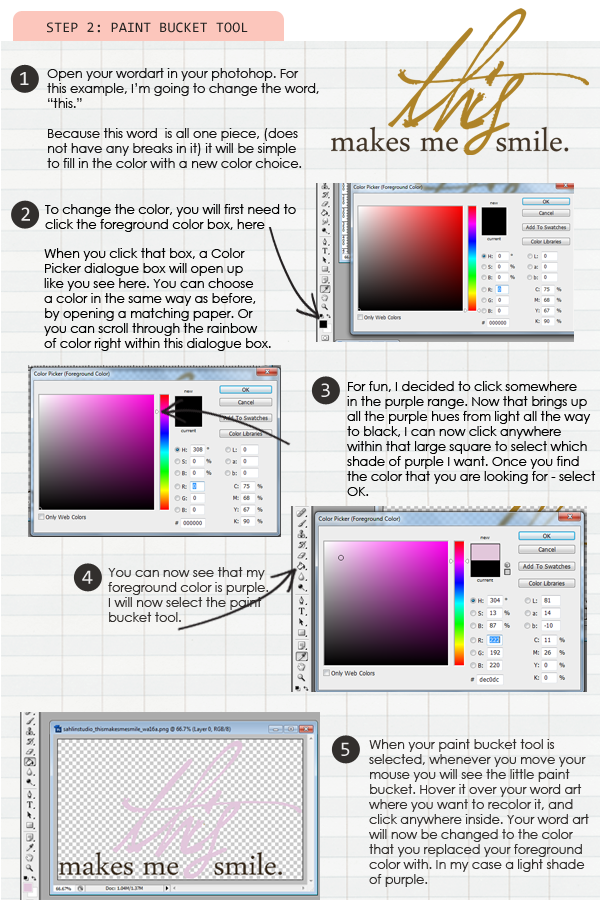
Now, I want to take it one step further and show how you can change parts of your wordart.
Take this piece, taken from the same word art pack, for example.

As you can see, this word art already has two different color parts to it. What if the color doesn’t match the layout that you are creating, but you still want the two-tone effect that is shown here. How can you change the word “this”, to a different color that will match your page? I’ll show you!
In addition, if you wanted the entire word art piece to be changed to purple, you would simply use the color overlay option as it would be much quicker than individually filling each letter with the paint bucket tool. The paint bucket tool is great for coloring pieces of an element, rather than the entire thing.
Easy Peasy?! I hope so!
If you have any questions, feel free to comment on this post and I can try to be a help to you!


May 16, 2012 at 7:48 am
Bronwen says:
Thanks!
May 16, 2012 at 8:09 am
Kelly Guertin says:
Thanks for the tutorial!! I have a alpha that came only in black and I need to change the colors to match the cordinating page kit, so this will be very helpful. One problem that I have is I am trying to make sure the colors in the alpha will cordinate well with the colors on the page kit, is there anyway to do this? I’m not sure if I can simply load an element from the page kit I have and save the colors in some sort of pallate to use to color my alpha. (Hopefully this question makes sense, I’m just starting to work with Photoshop CS5 and I don’t have the terminology quite right yet). Thanks for the help, and thanks again for the great tutorial.
May 16, 2012 at 3:40 pm
Krista says:
I’m SO glad this helped you. Yes, there is a way to select a specific color. But first of all… I’m going to ask if the alpha you are planning on using has a texture on it… or if it is just a flat color. If it has a texture on it, here is a better re-coloring tutorial for that: http://brittishdesigns.blogspot.com/2011/06/tips-from-britt-recoloring.html If you are looking to change flat color, re-read through step #2. Once you click the red color box, it will give you an eyedropper. You can click your eye dropper on any other color you have open in Photoshop (like an element or paper). Then it will make it that color. Hope this helps you!
May 16, 2012 at 8:25 am
Marlene Lehman says:
Thanks so much for the excellent tutorial! Just what I need.
May 16, 2012 at 9:48 pm
Heather says:
Awesome tutorial! Thanks Krista! (don’t forget to add it to your tutorials list! 🙂