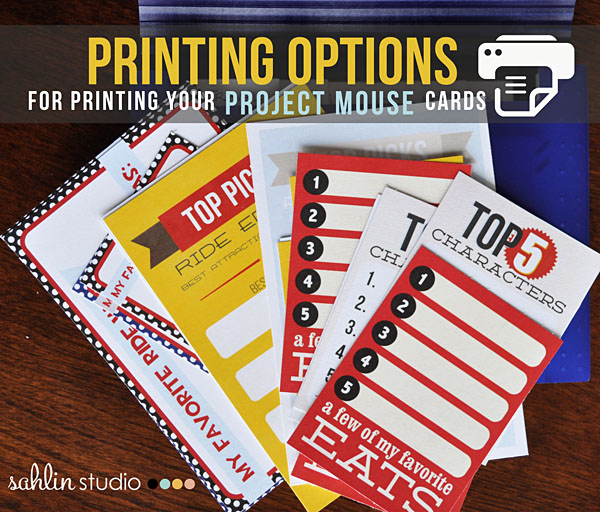
Printing Options for Project Mouse
Some of you have emailed or have asked questions in the comments about printing Project Mouse cards to use in your physical books or to take with you on an upcoming Disney trips… so, I thought I would tackle this topic in a blog post. When Britt and I started Project Mouse, I went on a search for what would be the best printing option for printing cards for my Disney Project Life album. I tried a variety of methods: 1) printing the individual cards from Persnickety Prints; 2) printing at a local office center, Staples; and 3) printing from my home computer. I got wonderful results with each of these options and would be pleased to use any of these printed cards in my book… It’s just more of a question of which method works best for you.
It can be a scary thing to do something new and out of the ordinary. Some of you are either a traditional paper scrapbooker learning to use digital products to print for your Project Mouse, OR you are a digital scrapbook looking to print off pieces for your physical Project Mouse. Either way, the process of printing off digital “pocket style” cards is such a simple one. I thought I would give a few tips that I’ve learned on my journey to help you document yours.
Persnickity Prints
My first option I chose was to print the Project Mouse cards at Persnickity Prints. I thought it was such a genius idea for a printing company to offer printing for these great 3×4 “Pocket Styled” cards! So I set to work on my very first print order.
Persnickety Prints offers 3 different printing options: 3×4 Photographic Print, Project Life 3×4 Card Stock & Project Life 3×4 Photographic Print, as well as giving you many different paper options like: glossy, metallic, pearl or matte. PLUS, you can have them trim your cards to have rounded corner right away as well. You can read more basic information such as printing sizes, general costs and printing process for their Project Life cards here.
MY REVIEW >>>
ORDERING PROCESS: I found the ordering process for these Project Life Cards on the site a bit confusing. After I uploaded the card images, it took me awhile to find all of the different choices for the 3×4 card options and to figure out what the prices were for each finishes. But after a little fiddling around for a little while, I did find where I could select from the multitude of 3×4 card options. One quirk I notice each time I added a Project Life 3×4 Card Stock piece into my cart, was that the prices of the other items already my cart kept changing. I’m not quite sure why this kept happening and it very well could’ve been my fault entirely, but it was a bit puzzling. I ended up leaving those out of my cart all together (as it made for the lowest price). After I completed the order, I was thrilled for the convenience of online shipping, AND that it would be sent right to my house. SHIPPING: Shipping through Persnickety Prints is a flat $5 fee. I suppose there are pros & cons with this, it is a little more spendy if you only have a few cards to print, but if you wait for a larger order and print more in bulk it would be worth it. On the Persnickity Prints website it mentioned it would take 2-3 days to arrive. WOW!! I thought that was a super fast turn around time. But the actual shipping time took about 5 days to get to me. It could have just been the timing of when I ordered though. I placed my order on a Wednesday morning, and received the package on the following Monday afternoon. PRINT QUALITY: I was extremely pleased how they packaged the prints, and the prints themselves were printed with wonderful quality. OVERALL: I was pleased that I could easily order online AND have the prints arrive on my doorstep. But some aspects that I found i didn’t like were: the shipping time (when I’m anxious to complete a page the time it took to wait seemed like forever), as well as the shipping cost (this is only a good option if you have a larger order to print).
COST: The cost is around $0.24 – 0.39 per card, + plus a $5 Shipping and Handling fee.
My Order: $12.79 for 27 – 3×4 & 4×6 cards
Printing At Local Staples Print Center
Then I remembered that local office center had a printing center, so I thought I would give this option a try as well. I really wanted to look for good inexpensive option to print off larger quantities of Project Mouse Cards, and also, for printing my Project Mouse Autograph cards to take on our trip.
MY REVIEW>>>
ORDERING / QUALITY: While it isn’t quite as convenient as ordering from your computer and having it arrive at your doorstep, there were a few great perks to printing at Staples. When I got to my local Staples Print Center, I asked if they could print a sample page of one of the sheets so I could see the quality of how their printer prints. (I wanted to find this out BEFORE I had alot of them printed off.) They had no problems with providing me with a sample print. I gave them my small zip drive (with my Project Mouse print sheet documents (jpgs) files) on, and they were able to bring them right up on their computers for printing. When they gave me the print, I have to admit I was speechless. I could not believe that their copier/printer could create such beautiful prints. WOW!! The print quality turned out just as beautiful as photo lab for these Project Mouse Cards. The color was vibrant, and it had a smooth waxy like texture that I thought was really cool! (Just a note: Don’t be afraid to ask you copier/print center to print you off a sample. Not all print centers are alike, and I’m sure the print qualities could very so it doesn’t hurt to ask to see the sample before you order a stack of them)
COST: The cost to print is by 8.5 x 11″ sheet. So basically it is for however many cards you can fit on an 8.5 x 11″ sheet of paper. I found you can get either (6) 3×4 cards OR (3) 4×6 cards on one 8.5 x 11″ sheet.
My local Staples was $0.89 / print sheet, if you supply your own paper the price $0.49 / print sheet.
I thought this was a great price. Plus, I already had a few different weights of paper at home to use OR they sold the reams of paper right in their store for purchase. (I liked the use your own paper option, because it made the overall prints cheaper and I knew I would use the paper again for different projects at home).
PAPER WEIGHT:
When printing at an office print center, you get to choose the weight of your paper. For my main Project Mouse cards, I liked to have a little heavier of paper weight, but not TOO bulky. I personally chose a 65lb weight paper for my basic cards. When it came to the Project Mouse Autograph Cards, I knew I wanted a heavier paper. Both my kids and the characters would be handled they cards quite a bit and I wanted them to hold up, so I chose a 110lb weight paper for the autograph cards.
Here are the reams of papers I chose (both from Staples)
Staples® Card Stock Paper, 8 1/2″ x 11″, White – 65 lb. weight
Staples® Card Stock, 8 1/2″ x 11″, White – 110 lb. weight
MY ORDERS: I came here two different times: The first time I printed Project Mouse Cards: Cost: $19.17 (which included ream of paper, and printing cost for 67 CARDS – (3×4 & 4×6 cards) The second time I printed Project Mouse Autographs Cards: Cost: $10.39 for 30 – 4×6 cards + 12 – 3×4 Cards (I used paper I had at home).
EMAIL YOUR FILES:
Before I left the staff mentioned that I could email them the files and with instructions and they could have them ready for me when I came in. While I did love this feature, I didn’t use it because I wanted to bring my own paper that I had purchased.
Printing At Home
I found that printing at home was just the most convenient, and my personal FAVORITE way to print. Sure, it may be a tiny bit more expensive, but it is SO convenient to print off just a couple cards when you need them VS. taking a trip to the local office center or waiting 5 days for an order to come back from the printing place.
MY REVIEW >>>
QUALITY: In comparison I was extremely happy when I compared my home printer prints along side will the photo lab OR local Staples prints. To be honest, I found my home printer to have the BEST quality of print and color, but it did lack the smooth, glossy feel that the other two print options had. Paper BUT… the print quality did NOT start out that way. I have found that paper makes a HUGE difference in printing. When I first began printing off a few Project Mouse cards I used the basic 65lb weight card stock paper (from Staples). After printing, I was horrified to see terrible prints of the cards. I was stumped. I’ve seen many digital cards printed and they looked so beautiful. So I did a little research into using different paper and gave one a shot. It made all of the difference! WOW!! Printing using a Presentation or Photo Matte paper turned out such fine cards to use in my Project Mouse album.
Papers I Use:
Epson Ultra Premium Presentation Paper MATTE (8.5×11 Inches) – for Project Mouse Cards
HP Premium Photo Paper, Glossy (4×6 Inches) – for Photos
How do you print on your home computer? ***Stay tuned for an article this week on “HOW-TO Print Project Mouse Cards on your Home Printer” I will be going over supplies of what I use, the printer I have, creating your very own print sheets and more tips for printing at home.
I hope this helps give you a few different options for printing YOUR Project Mouse cards. If you have a particular way that you have like in project your cards, share with us in the notes below. Have fun!!

March 25, 2013 at 7:44 pm
Christy says:
This is a great, in-depth comparison- thank you for taking the time to share all the detail on it!
March 25, 2013 at 7:55 pm
(ms.) Michael says:
Thank you so much for sharing all of your printing research! What a lot of work!!!
I might have missed it, but may I ask what kind of printer you use? Time for me to replace mine and based on your review I’m learning more toward a printer than a print service for individual work.
p.s. I adore all of your work!
March 28, 2013 at 9:17 am
Krista says:
Thanks!! I’m so glad this article helped you. I did a “Printing at Home”article, were I talk about my printer and papers and such. You can find it here: http://sahlinstudio.com/how-to-print-digital-project-life-or-project-mouse-cards/
March 25, 2013 at 9:37 pm
Kacie says:
Thank you for all of the wonderful details that you have provided about printing these awesome cards, all of those details are just what I needed to help me figure out how to see this project come to fruition. Thank you again for such a wonderful product!
March 25, 2013 at 10:12 pm
Raelynn says:
Thank you for this great information!!
March 25, 2013 at 10:28 pm
Amber says:
This is such great information! Thank you!
March 26, 2013 at 10:19 am
Candie Schaal says:
Hi,
Thanks so much for posting this. I have an HP laserjet printer so I was wondering if I should use the epson ultra premium presentation paper?
Thanks for the help.
Candie
March 26, 2013 at 2:11 pm
Jane says:
Thanks so much for this. It really helps, I have an Epson Photo R1900 printer. I use the epson ultra premium presentation paper and I love it. If you’re going glossy I have had problems with that paper not slipping in the printer since it is so slick, altho the results are wonderful. Thanks for the suggestion on the HP Premium Photo Paper, Glossy. Another option I’ve had good luck with is Ilford Galerie Smooth Gloss. I can’t wait to see your “How To Print Project Mouse Cards on your Home Printer”.
March 26, 2013 at 2:26 pm
Jane says:
Guess I need to correct my post as I’ve reread it. :-). I meant to say I HAVE HAD problems with the Epson ultra premium glossy paper slipping in my printer BUT the matte has been wonderful. I will try the HP glossy paper you suggest and hope it works better than the Epson. Again, I still really like the Ilford Galerie Smooth Gloss. Sorry for the typos in my earlier post.
March 26, 2013 at 8:20 pm
Virginia says:
I ended up doing a blend. I used a 30% off print services at Office Depot for the heavy ink cards and then I printed my own “less ink” cards at home.
March 28, 2013 at 8:45 am
Krista says:
What a brilliant idea!! That would sure save on the ink of your machine!
March 27, 2013 at 7:55 pm
HOW TO Print Digital Project Life or Project Mouse Cards | Sahlin Studio | Digital Scrapbooking Designs says:
[…] your Project Life, Project Mouse or pocket style cards. Be sure the check out the article I wrote here for a look at a few different printing options. Out of all of the options I tried for […]
March 28, 2013 at 9:28 am
(ms.) Michael says:
Thank you so much! You are so generous with your talent and knowledge! I will go back and read and bookmark! How exciting!
April 3, 2013 at 1:39 pm
Elena says:
Maybe something from a blog post I wrote awhile back might spark or help some scrapbookers: http://saniasmiles.com/2013/02/lesson-1-printing-tips-from-a-photo-pro/
June 21, 2013 at 2:58 pm
Jen says:
Quick question about Staples. Did they arrange them on the pages for you or did you have that set up before going?
June 22, 2013 at 11:31 am
Krista says:
Jen, I had the cards I wanted to print before I went to Staples. It made the process super easy. You could do that too OR use the printables included in the sets.
January 18, 2014 at 12:20 pm
Kyla says:
Thanks so much for this info!!
I am looking into purchasing the Project Mouse kits for our trip to Disney in 2 weeks and I love the idea of printing off the autograph cards ahead of time.
When I go to download the files and unzip them, are they PDF’s/JPG/png?
Thanks so much for any info 🙂
January 20, 2014 at 1:40 pm
Krista says:
Ooohh…. I am so excited for you!! You are going to have a blast.
These do come with individual PNG files, as well as printable full sheets (JPEG).
February 19, 2014 at 1:30 pm
Holly says:
Thank you for this information! I was afraid to buy “digital” scrapbook cards, but with this information I think I will give it a try! I love your Mouse designs, they are the cutest ones I have seen so far!
February 20, 2014 at 8:13 am
Krista says:
I’m so glad!! You are going to love them!! Thinking of these digital product like “clip art” will open up a whole new world for you!!
September 16, 2014 at 5:03 pm
Janice Roberts says:
Thank you for posting this! I’m going to get these printed at my local staples
September 17, 2014 at 3:15 pm
Krista says:
YAY!! Good for you! Hears to scrapping lots!! Have fun.