How To Jazz Up Your Project Life with Embellishments
Posted on under Hybrid Projects, Project Life, Project Mouse
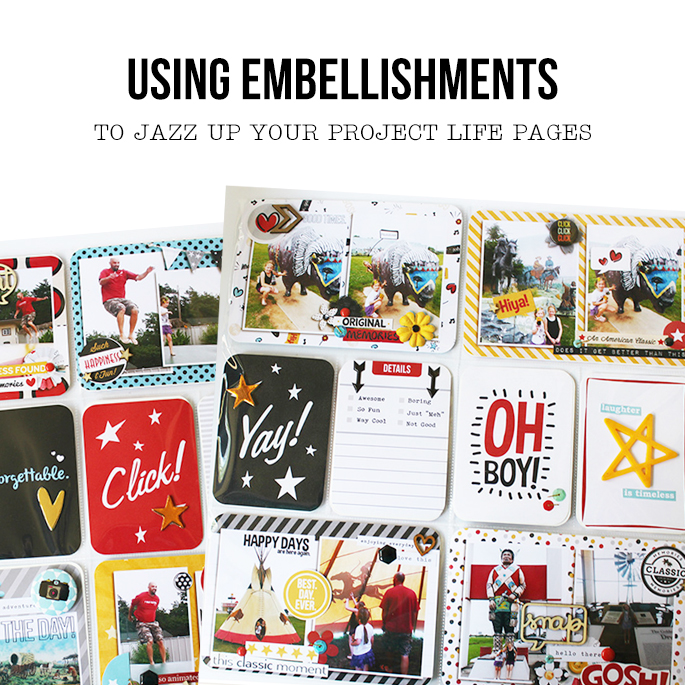
Recently, I have been challenging myself to use up more of my stash, and it created a really fantastic outcome… it added the perfect pizazz to my pages. Today I wanted to talk to you about how you can jazz up your Project Life pages. “How do I do this?” you ask? You can achieve this by adding a few embellishments to your cards for a little POP! It is a fun way to merge digi with paper supplies, plus it adds depth and dimension to the cards, and it also makes them unique to you!
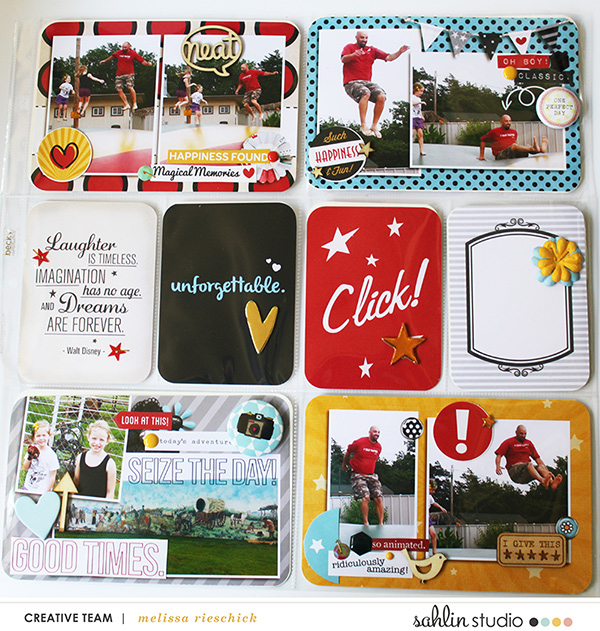
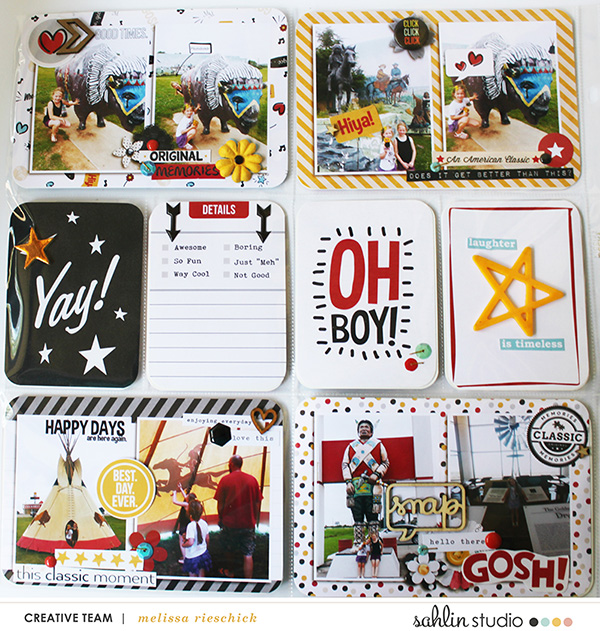
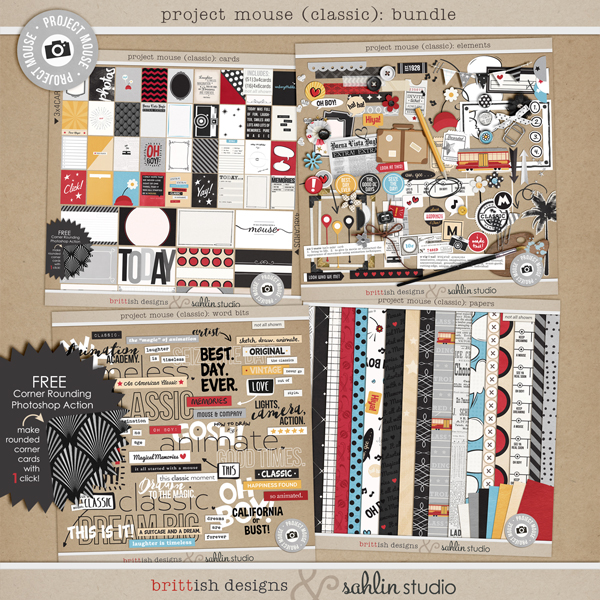
I was going to document photos of my brother’s family when they were making their way from Illinois to their new home out West. They had some fun adventures and a joyful collection was the perfect way to capture it… so I decided on using the Project Mouse(Classic): Bundle. I printed and cut out the digital journal cards and elements.
Gather together your assortment of embellishments. I had a stockpile of flair, stickers, acrylic and wood veneer. I get my embellishments from a variety of places. My main sources are Freckled Fawn and Studio Calico. I subscribe to the monthly embellishment pack from Freckled Fawn and I am always pleased with the variety they give. I also order supplies from other online suppliers; my three favorite places to order from are Scrapbook.com, A Cherry on Top and Paper Issues. I get the majority of my acrylic dots from My Mind’s Eye or Studio Calico. In the below picture with the pile of embellishments, nearly all of those are from Studio Calico and Freckled Fawn. The flair comes from all over. There is a lot of Studio Calico, Freckled Fawn, and My Mind’s Eye flair in there, but there is also flair from an independent seller/maker that a friend of mine orders from. My friend gave me a big bag of flair! 🙂


Now for the fun part… Dressing up your journal cards!
Take a Look
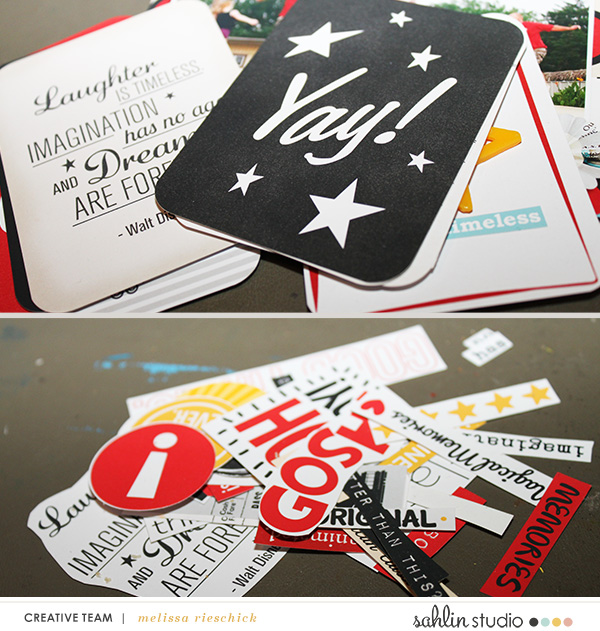
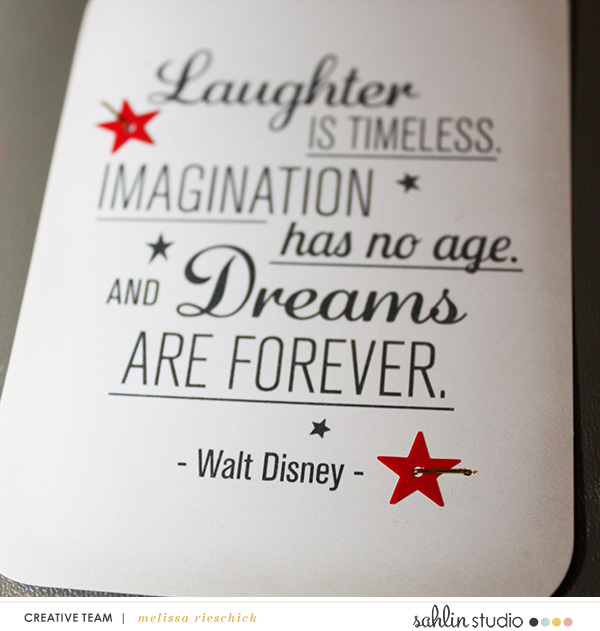
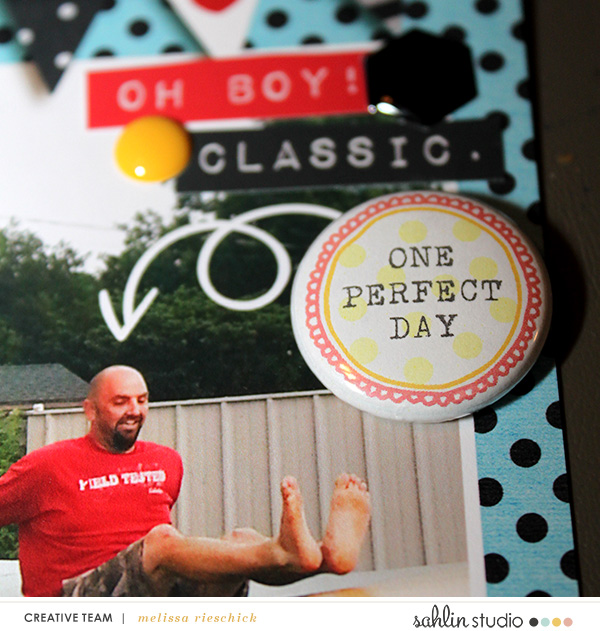
On this card I replaced one of the white stars with a fun, chipboard star from Studio Calico:
It didn’t cover it perfectly, but it worked out really well and looks pretty awesome. I did the same thing on one of the cards below. I also added a chipboard heart to a different card. Both chippies are from Studio Calico.
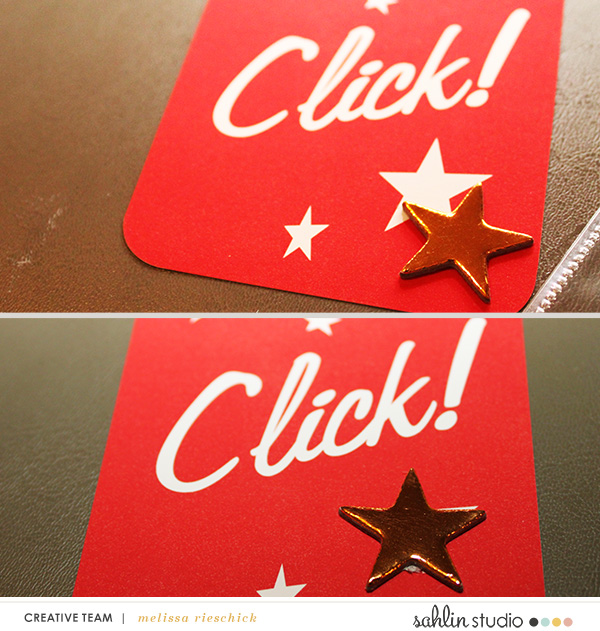
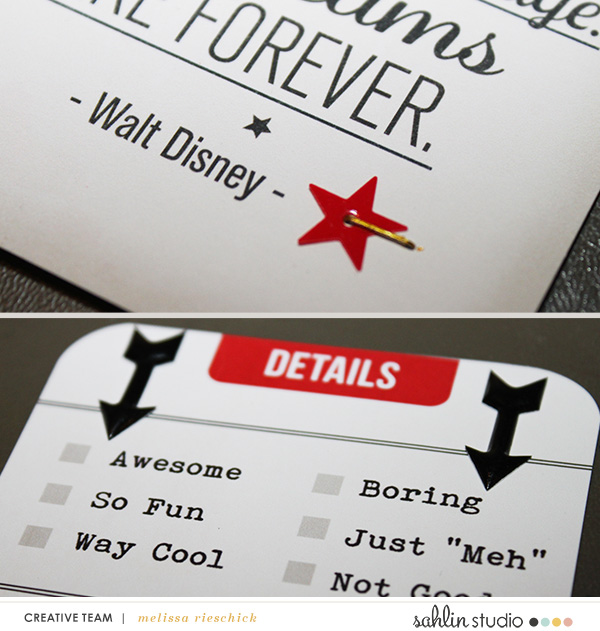
On the next card I stapled on some red sequin stars from Studio Calico, using gold staples from American Crafts, to add a pop of color to the card:
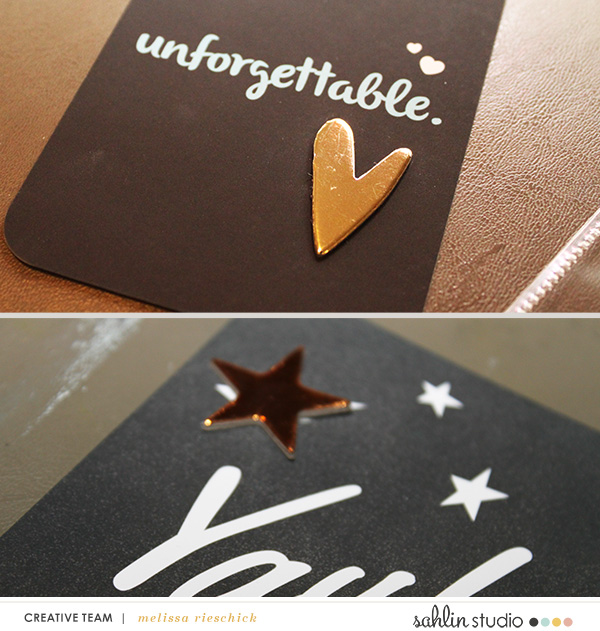
And here is a closer look at the sequins, as well as a card I added enamel arrows to (from Freckled Fawn), so the journaling will be highlighted:
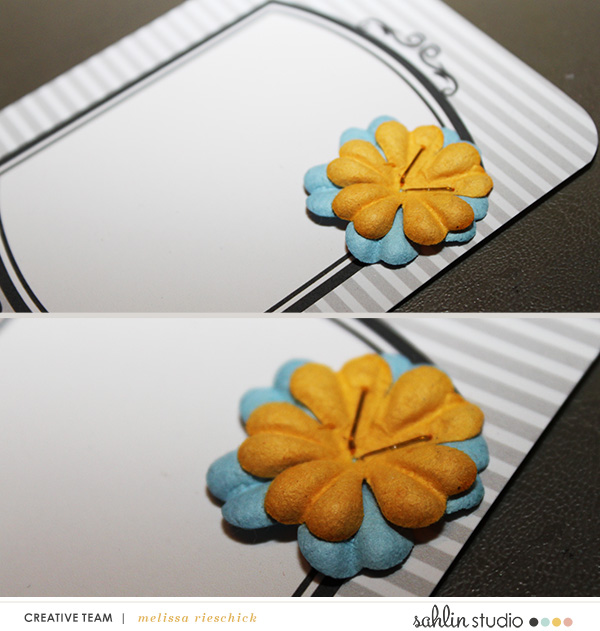
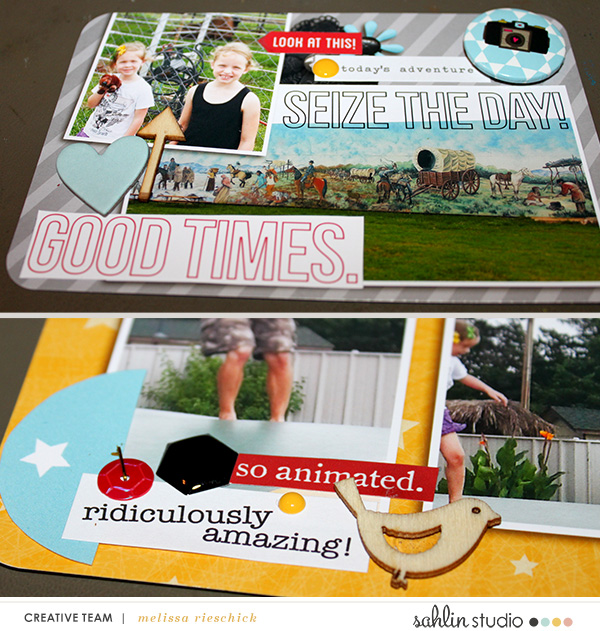
For the other journal card I decided a layered flower using some of my Prima flowers would be a fun way to give the card some color. Normally I would use an enamel dot or a brad for the center of the flower, but I decided to tie in the gold and copper hues by stapling the flower down:
I added sequins to another card as well (again from Studio Calico), but on the very last card I made my own title card. This is something I do sometimes when I am using a themed collection and need a more general card. I used word art from the kit and added a plastic star from Freckled Fawn to the very center:

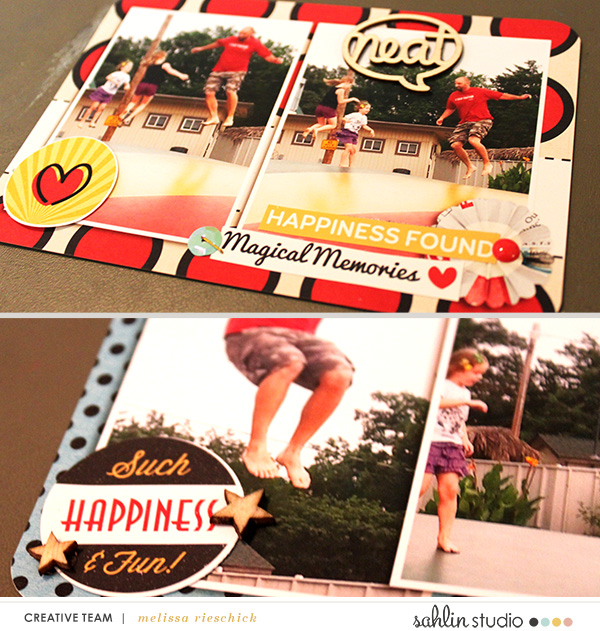
As always, I used my eclectic layering to dress up the 4×6 cards. The majority of these were created using papers from the kit. I also added digital flowers and other elements to the cards, in addition to the photos, prior to printing the cards. Using the cut out elements and traditional elements made the cards come together very quickly:
Look at this one, I added a fun digital arrow to the photo!
Or here, I have a word art stamp on one photo, but at the bottom of the card I used the stamp on paper, printed, and cut it out. It is fun to see them used two different ways on one card:
And here are the other cards:
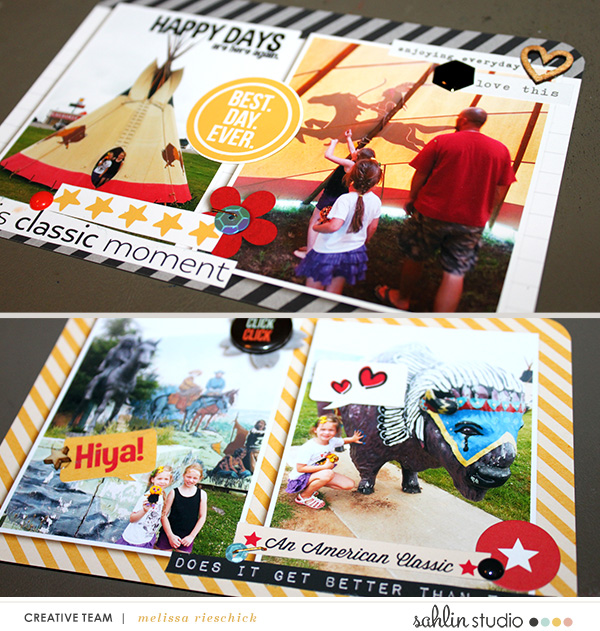
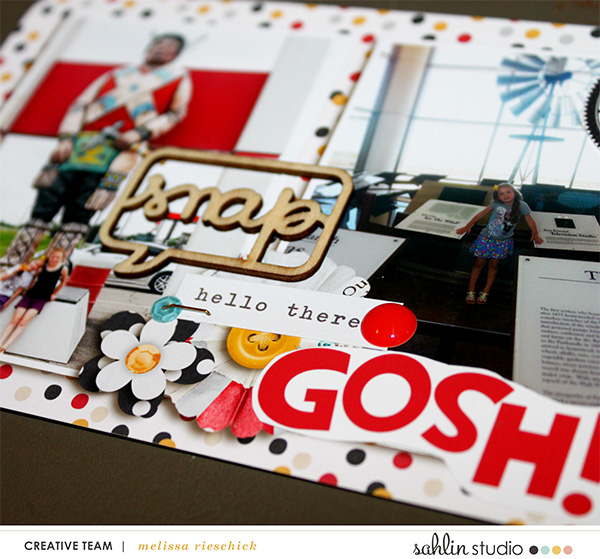
Last but not least, here are the finished pages:
How fun and colorful are those pages? I hope I have inspired you to play around with your journal cards and see how much fun it is to jazz them up!
Project Using:
I live on the Texas Gulf Coast with my boyfriend of 10 years, our chihuahua Zoe, and our cat Morgan. I work full time and when I am not working I like to watch shows on Netflix and scrap. I also love to read and read a book in about 2 or 3 days since I only read a couple hours in the evening. My passion in scrapping is Project Life pages, in particular hybrid Project Life.

June 30, 2016 at 3:19 am
CraftCrave | DigiFree | CraftCrave says:
[…] How To Jazz Up Your Project Life with Embellishments – 1 freebie(s)? […]