Four Ways to Alter Misted Products – Butterflies: Drawn & Spritz
Posted on under Scrapbooking Tutorials, TUTORIALS
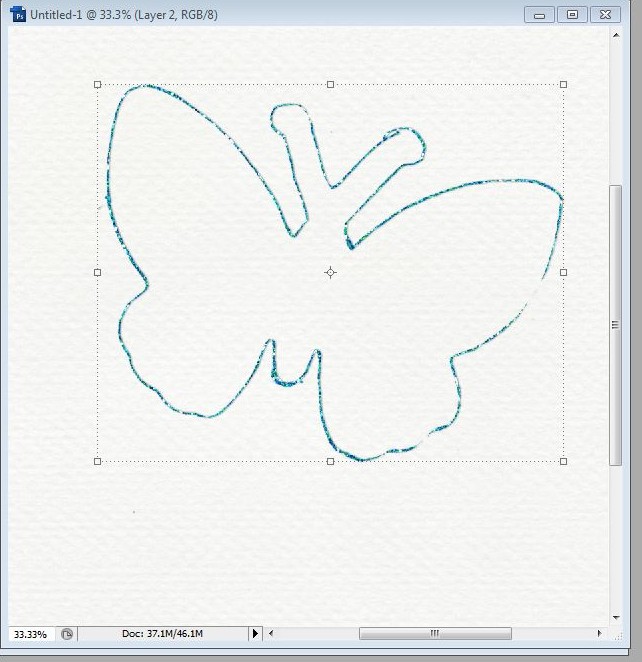
Remember these too-cute-for-words butterflies added to the Sahlin Studio store a few weeks ago? The ink-misted, sprayed, and hand-drawn ones? I’m going to show you even more ways to use these already-versatile bits on your pages. Maybe the misted look isn’t quite right for a particular page, or you want to jazz things up a bit. Here’s three ways (plus a couple bonus tricks at the end!) to quickly and easily change the whole look and feel of these butterflies – or any other misted or drawn elements!

Add Some Glitter
Here’s a perfect way to put those glitter .asl styles you didn’t quite know what to do with to good use. If you aren’t sure what styles are, or how to install/use them, Studio Flergs has an excellent tutorial here. The Daily Digi also has a post about scrapping with styles. This little technique also works great with any other style (think chalk, plastic, acrylic, silver/gold, and more – although some will work better with drawn elements and some with misted/spritzed ones). Make sure your butterfly layer is active, and click on your glitter style in the Styles palette to apply it. I found that glitter styles worked beautifully with the misted butterflies, and ended up super realistic. The effect on the drawn butterfly is much more subtle, but sometimes a little sparkle is all you need.

Create an Instant Ombre (or Gradient) Effect
Layering spray ink to create an ombre (graduated color from light to dark) effect is a huge trend right now in the paper scrapping world. Combine spritzed butterflies with a couple simple Photoshop effects and you can snag the same look for your digital page in a fraction of the time.
First change the Foreground/Background colors to whatever colors you choose – I’m using a red and light pink. The effect will fade from the foreground to the background color, so for a graduated ombre effect I suggest selecting the foreground as your darker shade and the background as a lighter shade of the same color. Next, double-click on the butterfly layer to bring up the Layer Style window, and select Gradient Overlay. Your screen should look like this:
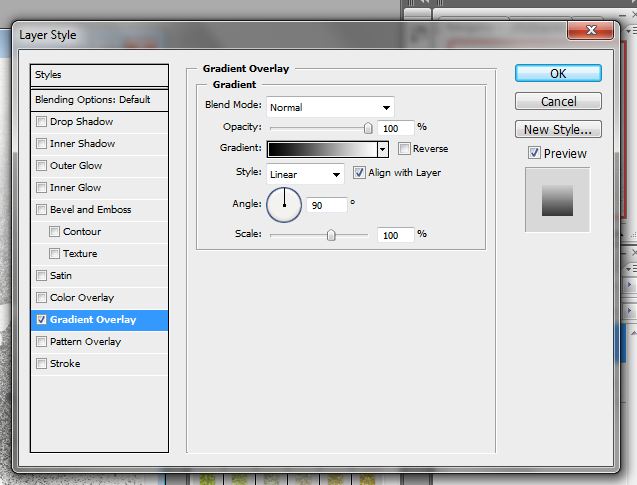
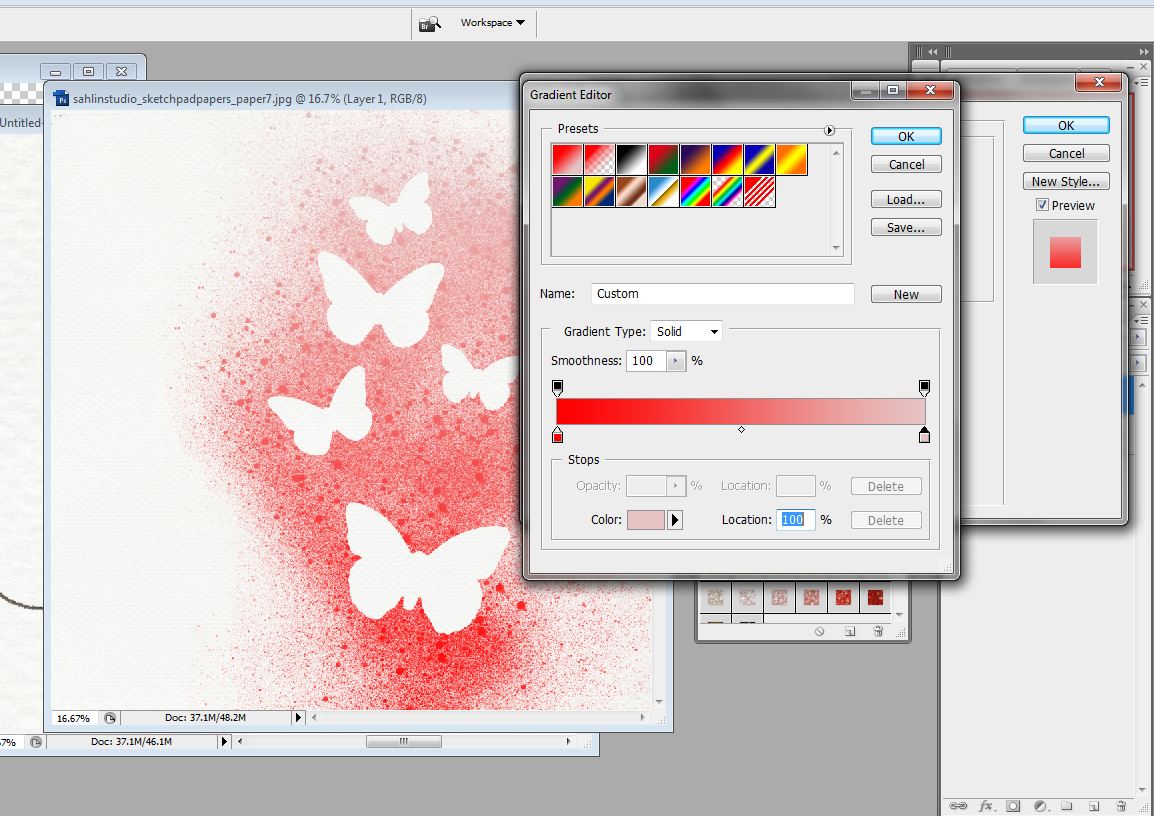
Now click in that black-to-white gradient box, and it will bring up the Gradient Editor. The first preset should be your newly-selected Foreground-Background colors. See how my first preset option fades from red and pink? Select that option. My spritzed butterflies now magically fade from dark red to light pink. You can play around with the sliders if you want, I left everything default. Click OK to save your options.
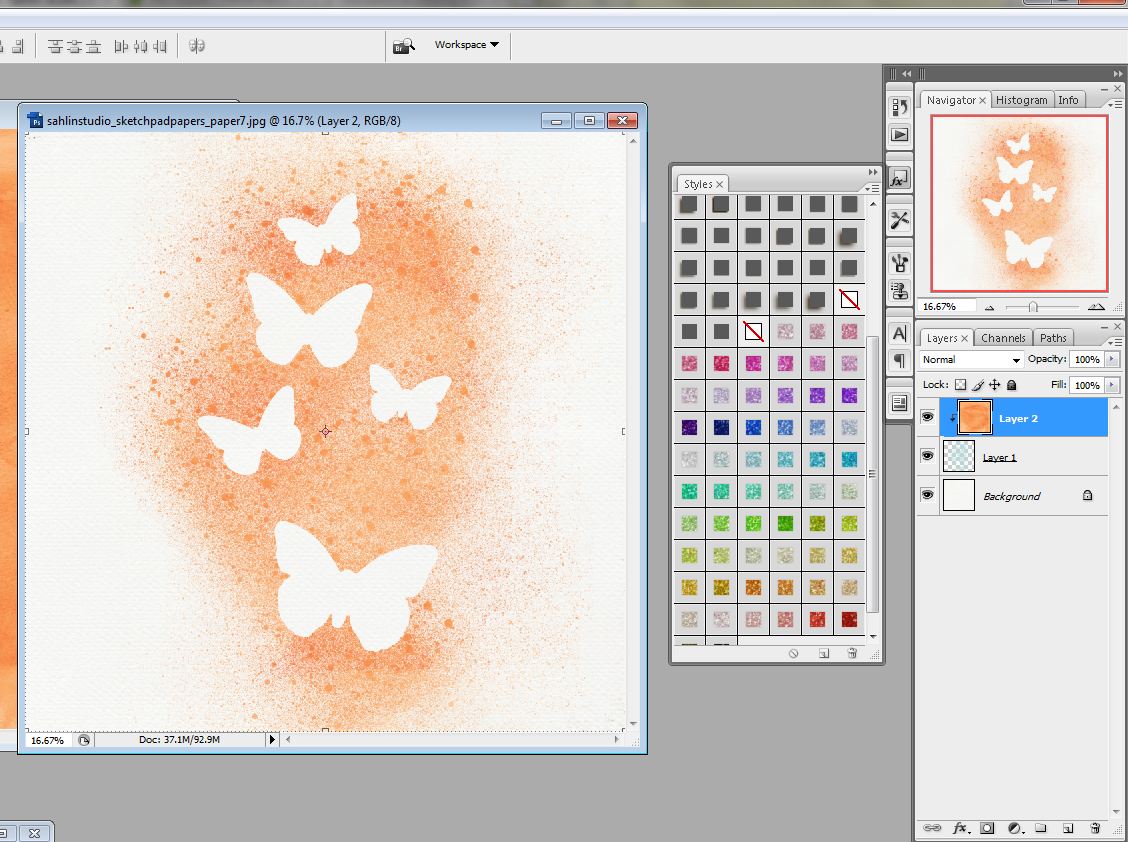
You could even use different color in your gradient effect. See how this looks?

Change the Color
Maybe you like the misted or drawn look as-is, but the color doesn’t work for your layout.
Here’s two quick ways to change the color to perfectly match your page.
This first technique works best with mostly solid-colored papers. I’m using one from Sahlin Studio’s Watercolor Papers pack. Drag your paper on top of the misted or drawn butterfly, and clip it (CTRL-ALT-G in Photoshop, CTRL-G in Elements, Command-G on Mac). Here’s how mine looked with the orange paper clipped to both a misted and a drawn butterfly:

Choose this second technique when you want to match a color in your photo, or in another element. Here is a tutorial, How to Recolor Using Color Overlay tutorial here. For quick instructions: Remember how we brought up the Layer Style window earlier? Double-click on the butterfly layer in the Layers palette. Select the Color Overlay option. Click in the color box to change it, unless you want bright red (the default). Now click anywhere on your photo/element/paper/etc. to select your color. I clicked in the blue “laugh” text on a word bit from Sahlin Studio’s Word Bits element pack. Hit OK a couple times to save your choices.
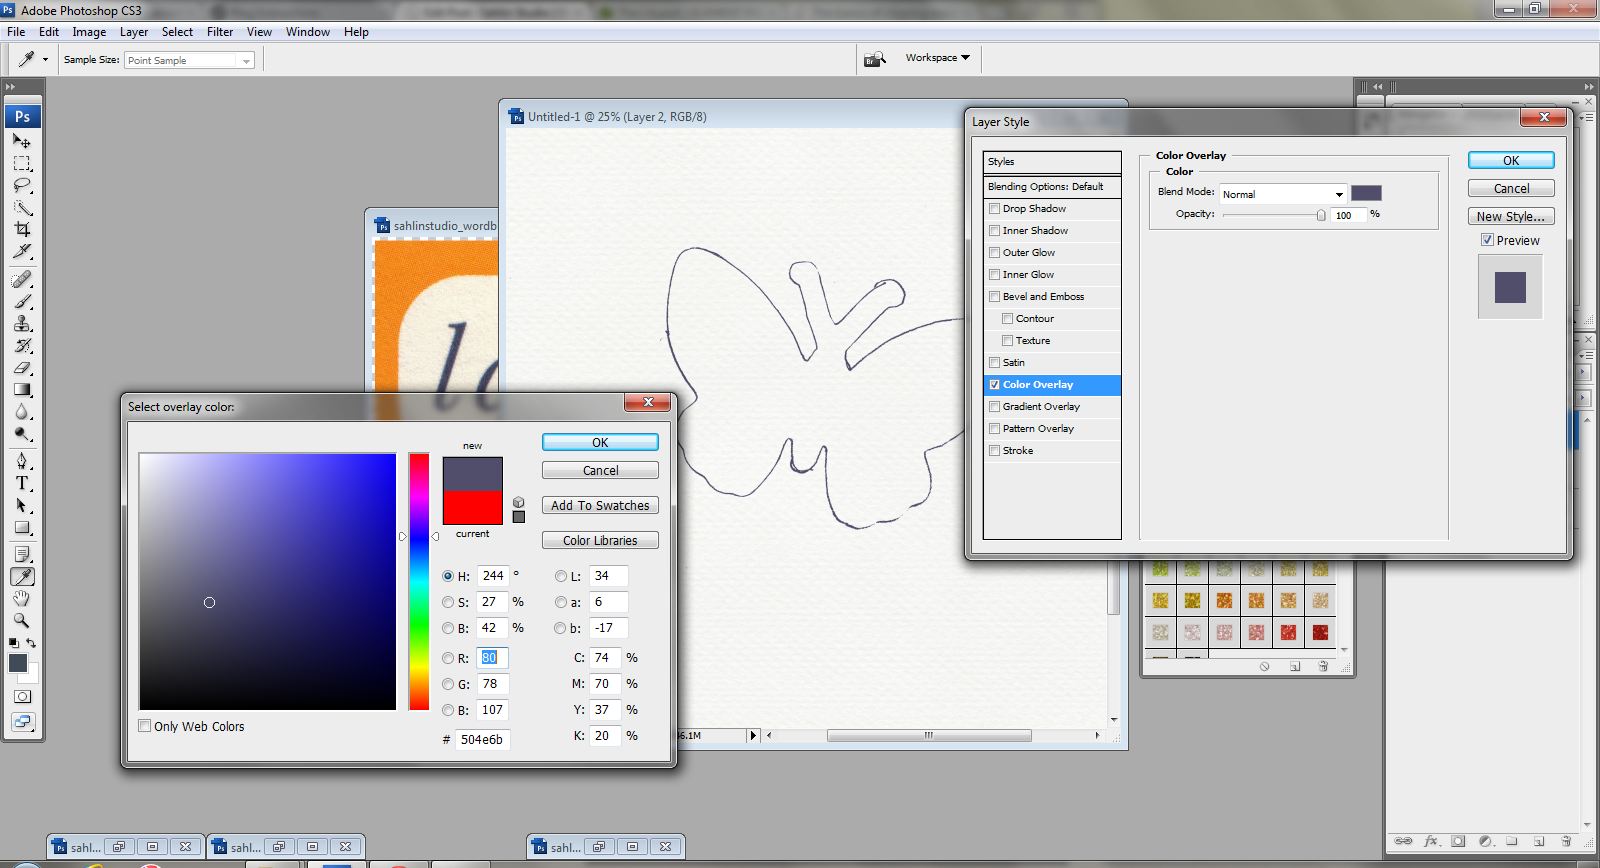
Here is the misted butterflies, changed to a lovely dark blue color that coordinates perfectly with that word bit!

Clip a Pattern Paper

I hope these ideas get your creative juices flowing. One of the beauties of digital scrapbooking is being able to reuse our supplies in so many different ways. Play around with your program’s options. In the Layer Style window, try playing with Pattern Overlay on misted elements to create unique looks. On drawn elements, try adding a Stroke to thicken them so it looks like they’re drawn with a marker instead of a pen or pencil. You could even combine techniques! Don’t be afraid to test new-to-you options and have fun! As always, we would love to see any pages you create with any of these techniques. Link us up in the comments!

June 20, 2012 at 10:33 am
Julie says:
The glitter styles and the clipping are easy—but I still stumble on adding gradients, so thanks for the pointers! Do the gradient instructions for us PSE users, too?
June 21, 2012 at 10:13 am
Cathy says:
Great tips!
June 22, 2012 at 10:38 am
Jennifer B. says:
Thanks so much!
June 22, 2012 at 9:18 pm
Nicole H says:
OMG! Thanks so much for posting/sharing this tutorial!!! I have wanted to start using my glitter styles and changing colors, but wasn’t sure how. And the patterned papers clipped to the misting looks AMAZING! I can’t wait to try this – with the butterflies I just got from Sahlin Studio
June 23, 2012 at 5:22 pm
Kristine says:
Thanks so very much, this is beautiful. I can’t wait to try it later tonight. It is so versital. Have a wonderful day!