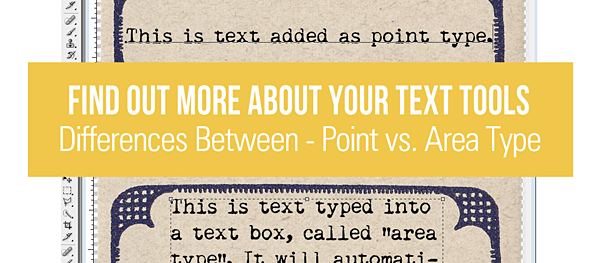
Type Tools: Point vs. Area Type
Posted on under Scrapbooking Tutorials, TUTORIALS
When you type your journaling or title, do you click on the page and start typing (called point or character type), or do you draw a text box first (known as area or paragraph type)? What’s the difference? In today’s short-and-sweet tutorial, we’ll look at how each method works, and when it might be best to choose one over the other.
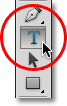
Before we start, make sure your Type tool is selected. You can also press T on
your keyboard to select this tool. Both ways of adding text begin here.
Point Type
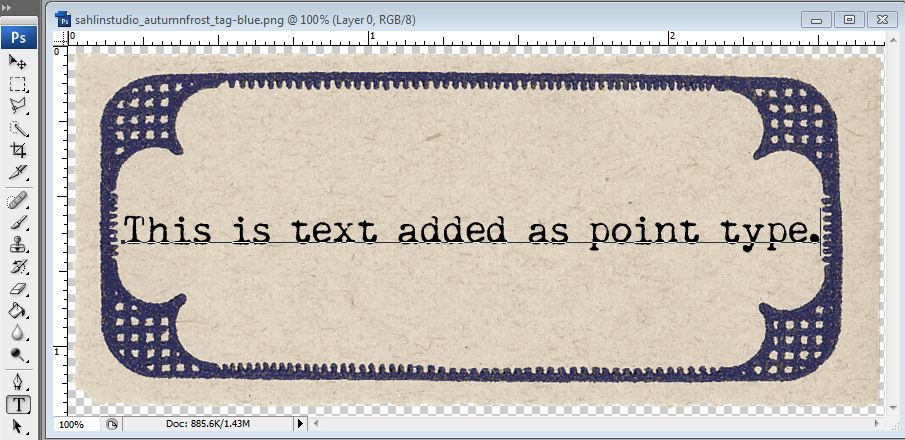
Point type is pretty straightforward – just click anywhere on your document and start typing. Your text will keep going on one line (even right off the edge of your page!) unless you manually hit Enter/Return to insert a line break. This is a good choice to add a single line of text on a journaling strip, date tag, or for a title.
You can, of course, type multiple lines with this method, but it’s awkward to get your text to line up correctly, and if changes need made later, you’ll need to work around all the manual line breaks. There is no way to automatically reflow point type if you decide you want a longer, narrower block of text, or a wider, shorter block, after it’s all typed out.
Area Type
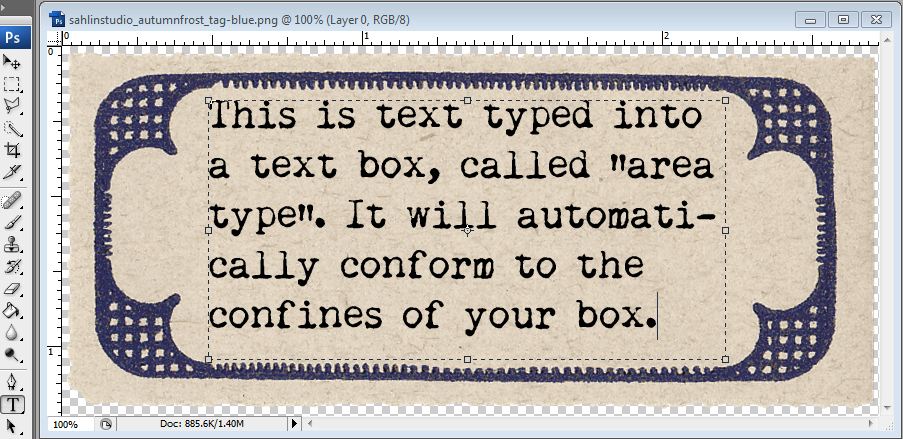
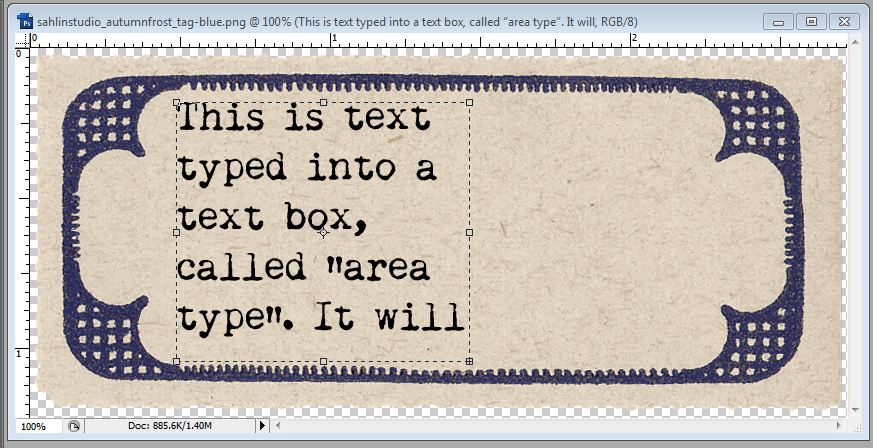
To use area type, you need to first draw a text box. Start by choosing the Type tool, then click-and-drag your mouse to create a text box, similar to using the Rectangular Marquee tool. Once the box is created, you can start typing. Your text will automatically wrap around to the next line when it nears the edge of the box, no need to add manual line breaks.
One nifty thing about text boxes is that they can be resized. Grab one of the “handles” on the corners or sides, and drag until the box is resized to your liking. The text will automatically reflow to fit.
If, after resizing your text box, you run out of room for all the text, you’ll see an overflow symbol in the bottom right corner of the text box. Here’s a close-up (it looks like a plus sign inside a square):
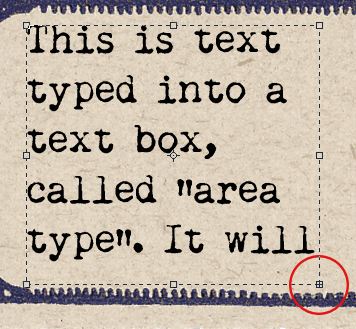
Either adjust your text to fit within the box parameters, or resize until you can see everything. Area type is a good choice when you want your text to fit in a defined area, like a journaling card, or when you have more than a line or two of journaling. It’s easy to adjust your text area later, if you change the placement of your journaling on the page or decide you want to add or remove some journaling.

January 12, 2013 at 4:54 pm
ss-blogteam says:
Hah… very interesting! I’ve always been a point gal and I must try the other way! Thank you! 🙂
January 14, 2013 at 10:22 am
libertycoach says:
Fantastic little tutorial. Great length and super helpful! I didn’t know this and could really have used this tip earlier today when working on my P365.
Shall be using it next time. Thanks everso! :0)
January 20, 2013 at 9:24 am
Liz says:
I found out about the text box about 3 years ago, and it has made a world of difference! Thank you for posting this so that others can know about the flexibility of the text box.
January 22, 2013 at 7:44 am
Krista says:
Isn’t it a good trick!! Sometimes it can be the tiniest piece of information that can make a world of difference.
January 25, 2013 at 3:36 pm
Scrumptious says:
I’m the opposite – it never occurred to me I could just click and start writing! My fingers are in semi-pain most of the time so every movement of the mouse counts, and not having to drag out a text box for a single line of type is going to be a savings that really adds up!
January 27, 2013 at 10:28 am
Krista says:
Isn’t that a neat little trick? Glad this helped you.