The Secret World of Digital Brushes
Posted on under Scrapbooking Tutorials, TUTORIALS
With trends like art journaling and mixed media fast becoming popular in the world of scrapbooking, replicating those techniques digitally can be a daunting thing. However, this is where the humble digital brush will come into its own and help create some fun and interesting aspects to any digital project. So over the next few months we will look at some tips and tricks of how to utilize your brush cache and expose some easy ways to inject that extra little something into your digital projects using this clever little tool.
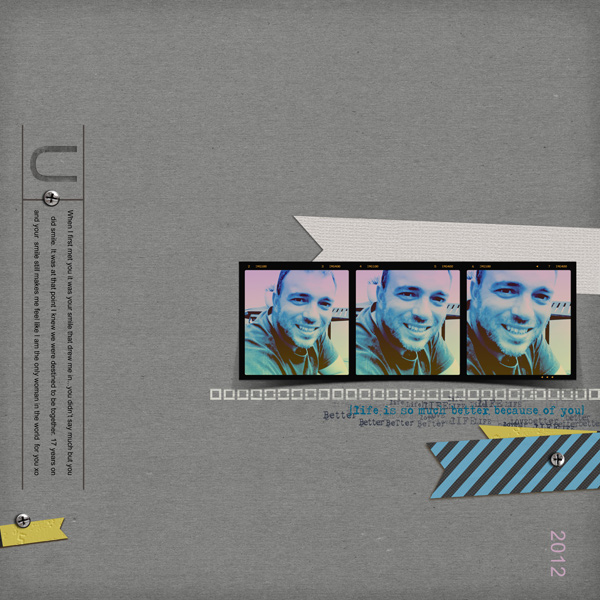
Here is a page created using papers and elements from the Grunge Kit by Sahlin Studio. It works perfectly as is… documenting the memory, telling the story. But it needs a little something extra. Using a virtual brush stroke you can add extra texture and stamped elements to resolve it even more and finish the project off.
Part 1: Stacking / Layering brushes to create simple yet effective visual content.
Minimal layouts tend to rely heavily on a good photo or theme to support and carry off all that white space. One nifty little trick to creating minimal yet visually eye catching projects is to use digital brushes and stamps. The choices are vast, ranging from Cloud Sets to Grunge Borders and is only limited by your imagination. Many digital scrapbook stores stock “Brushes” and are usually located in the Tools section. There are also many sites that offer fun and interesting digital brushes as free downloads. Some sites worth checking out are Brusheezy, Texture Mate and DeviantART.
Step 1: To add depth and texture to a project, select brushes from the brush palette.
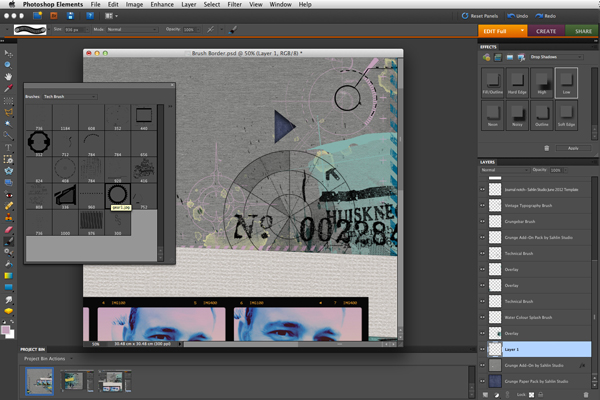
Tip: Open individual layers for each brush for ease of editing or deletion if need be.
Step 2: To create an original and interesting background, try stacking and overlaying different brush designs.
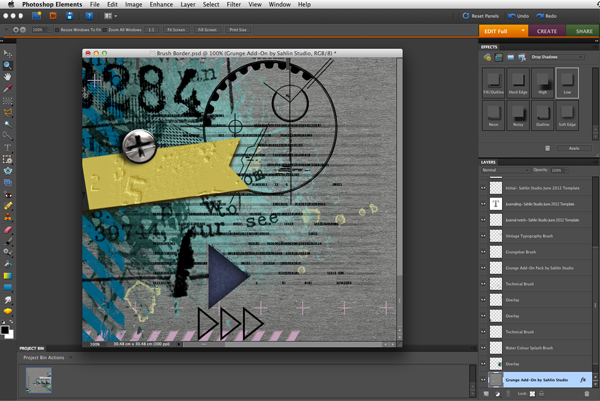
Tip: Change the color of each brush to tie in with the colored elements or photo.
AFTER Using Brushes – After adding a selection of brushes to the project it enhances the overall design and injects interesting visual content. What do you think?
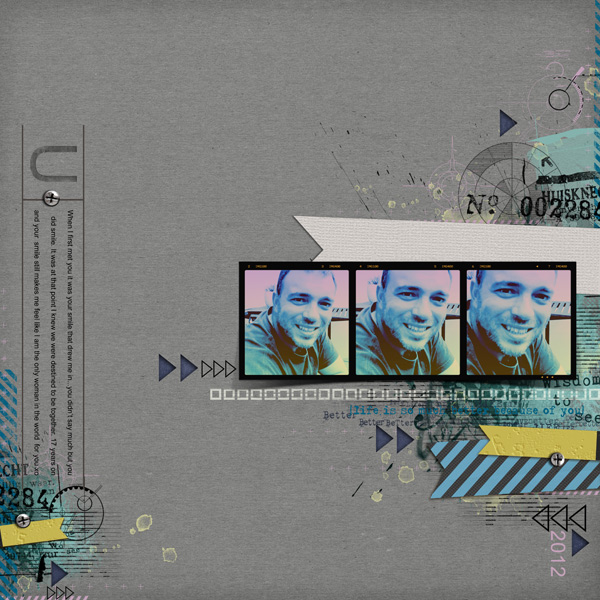
‘Ur Smile’
Credits: Sahlin Studio
Grunge Add-On Pack
Grunge Word Art
Instaframes Pack
Tech Brushes by Obsidian Dawn
Dripped Stains No:5 by Anna Aspnes
Try downloading some fun digital brushes and have a go at adding texture, pattern and imagery in your projects. By simply pairing them with digital elements & paper packs already in your stash you can create fantastic projects. Hope you enjoyed this quick introduction and simple technique of using and applying brushes and maybe you too might give them a go in your next project.

February 8, 2013 at 10:28 am
Su Hall says:
Brushes sure make a difference! And, they are so versatile! Thank you for this!
Su
February 13, 2013 at 11:53 am
Kristin says:
Thanks so much for this! I’ve used both design and photo programs quite a bit (as an amateur) and never quite understood those brushes or their usefulness until now! I’ll be having fun with some experimentation 🙂
February 17, 2013 at 10:37 am
Beginning Digital Scrapbooking | Grease Girl Gets Crafty says:
[…] example, I’d never used the brush function as a way to add design/texture, but after getting an article about digital brushes in their newsletter I’ve been having tons of fun! I used digital brushes that I downloaded […]