Easy Tips For Taking Better Photos With Your Phone
Posted on under INSPIRATION, Photo Editing Tutorials, TUTORIALS
Hello all! Brenda here to talk to you about how I take/edit my phone photos. I will be completely honest and say that I do rely on my phone for so many of my photos. I have a good camera. It gets pulled out and used quite a bit, but having a camera in my pocket is so much more convenient. Just because I am using a phone does not mean that I can’t have good photos though. A little thought for light and angles makes all the difference between a “snapshot” and a good photo.
Taking Photos:
My favorite way to take photos is to get on my kids level. A lot of times that means laying down on the ground, or sitting in the dirt. It is really worth the extra effort (and sometimes a little dirt or sticker on my bum) to really see what they are doing. Their expressions, toys, surroundings really shine this way.
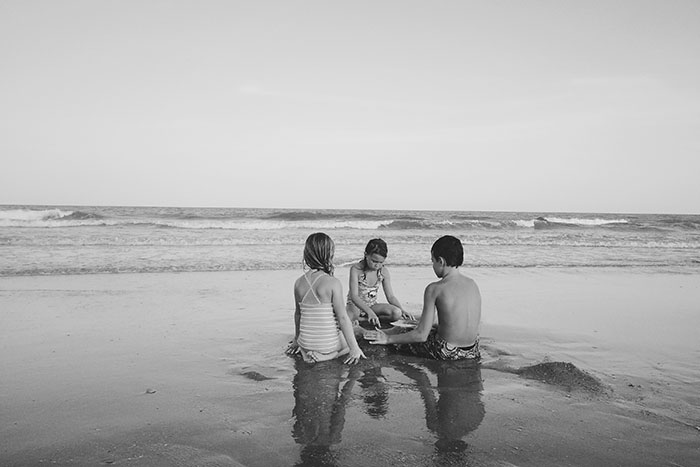
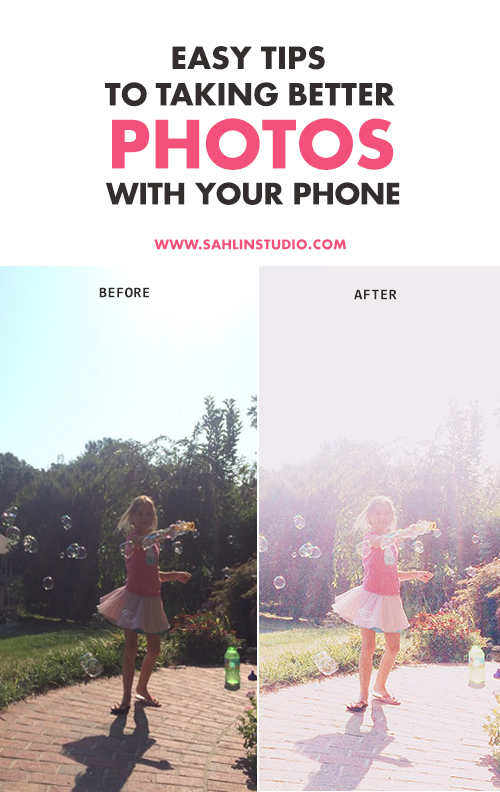
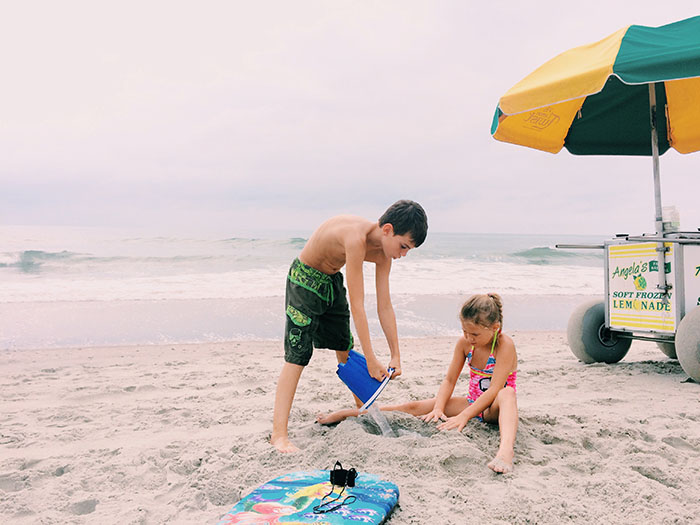
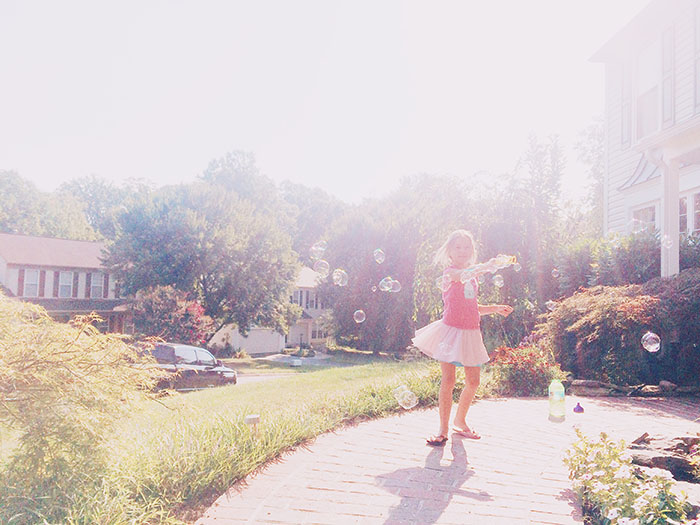
Dramatic lighting is another great thing I love to use when using my phone. It takes a photo from “just a photo” to “how’d she do that?” status. Using dramatic light helps to draw your eye to certain features in the photo. You can grab a shot with incredible sun flare or deep shadows quite easily with your phone. This is again where your use of angles and light really play a big part. My favorite way to play with how the photo is lit is to touch and hold on the part of the photo you want in focus then slide the little sun on the side of the box up or down. In the photos below I held my finger over my daughter(s) and slid the little sun up. It brightened up the image so much more than just the “auto” lighting you get from the camera. For the very first image in this post, the b&w beach one, I held my finger over my children and slid it down making the image darker. It helps to create the mood you want in the image when you customize the amount of light you are allowing for the photo.


Now that you have that shot. You know, the one that you worked hard to get just right, let’s edit that baby to add your own flare. If I look at my Instagram feed, I can easily see fairly consistent color and light. i.e…I go one or two ways with my photos. Really light and airy (usually with flare) or darker and moody. It really depends on the time of day and the subject as to which one I choose. Although a lot of that was planned in taking the photo, some of it is the edit. I am going to show you how I edit for both below.
Editing:
I always start out in VSCOcam. I like the crop and basic edits with this app. My photos never loose quality when cropped in VSCOcam either.
This edit is darker with a bit of a matte look. This is honestly my favorite. I like the light bright photos, too, but this style speaks to my heart for some reason.
sooc:
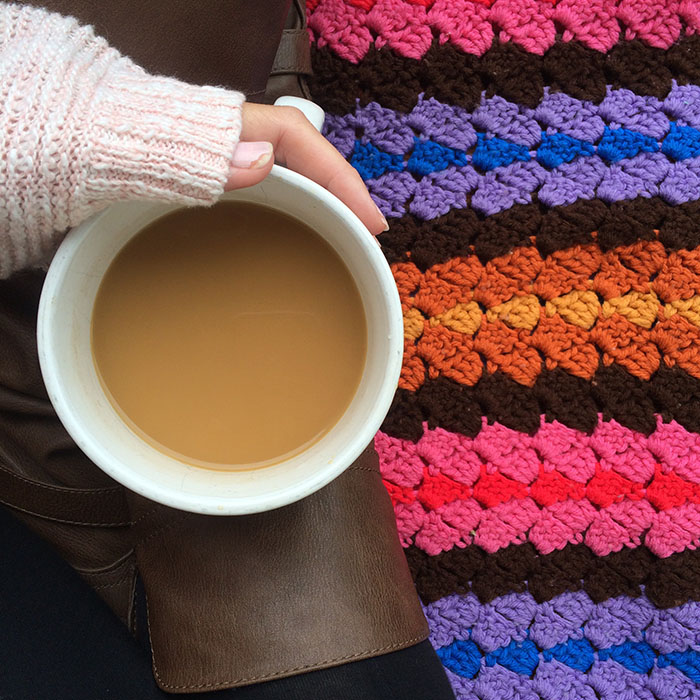
1. the light is good here so all I did was open it in VSCOcam, up the contrast, add a little fade and sharpen. Over that is filter 05 as is (clicking the filter twice will allow you to lessen the effect).
rotate, contrast +1, fade +2, sharpen +1, filter 05 (from the legacy pack).

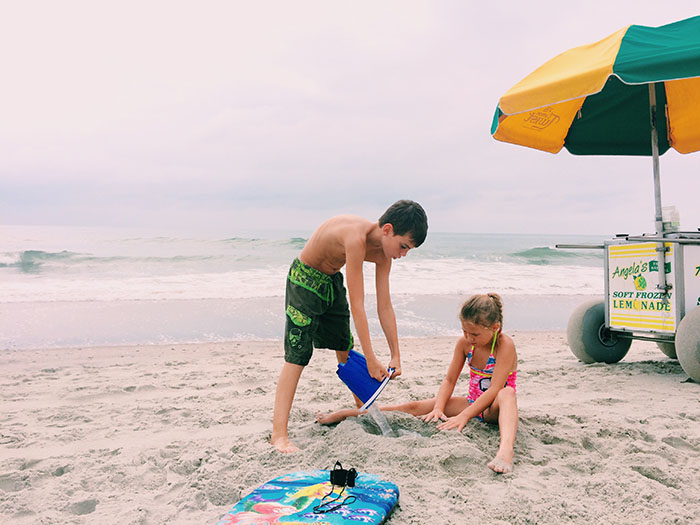
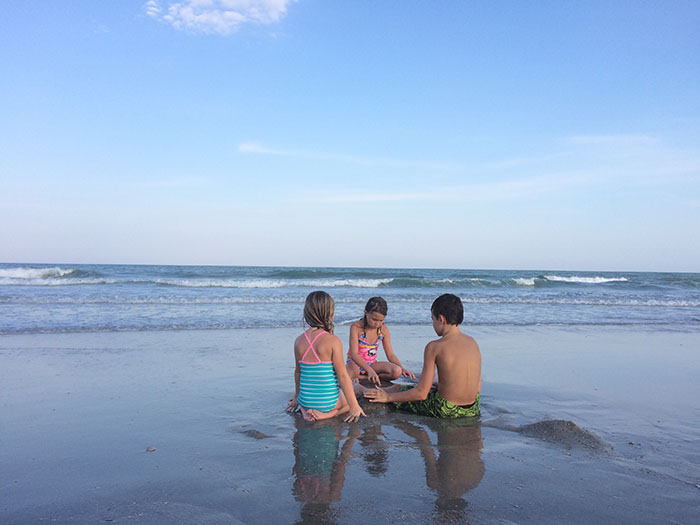
This next one uses VSCOcam + Pictapgo. Not quite a truly “moody” shot but not bright by any means. It was overcast and windy the day I took this and the way I edited it definitely helps me to remember that.
sooc:

All I did in VSCOcam was highlights and a preset.
highlights +5 and C1 preset (from the vibrant pack)
After opening in Pictapgo I applied P 160nc (from the replichrome pack) and lowered the effect about 50%.

This image is a little more complicated. When I shoot a backlit image, sometimes it requires more fixing to get the subject to stand out.
sooc:

In VSCOcam:
shadows tint +4, temperature +2, saturation +1, contrast +4, C6 preset, fade +2, fade +2, sharpen +1, exposure +6
It seems like a lot but once you get acustomed to the way the app works, it really only takes a moment or two.
And of course I couldn’t leave out the black and whites. These are my soul. Most of my family prefers color images but I would edit all of my photos to black and white if I could.
sooc:
fade +3, vignette +4, sharpen +1, crop to 2×3, preset 03 (from legacy)

Extra images and settings:
Here are a few more images and their settings. I didn’t do the before and afters for these but wanted to show you a few more.
Motion is fun to capture as well. I just touch and hold on my subject and follow them with the phone for a second before snapping. It gives you the feeling up movement in the photo.

vsco | #04 (legacy pack) & contrast +1, fade +4, sharpen +1, saturation +1, temperature +1 then pictapgo | preset 400h at half strength

vsc0 | #04 & exposure +1, contrast +2, sharpen +1, temperature -1 then pictapgo | 400tx

vsco | #07 & exposure -1, fade +4, sharpen +1 then pictapgo | 400h

vsco | #04 & exposure -1, contrast #2, fade +5, sharpen +1
final note:
The thing to remember is that you should take or edit your photos in a way that makes you want to keep coming back to them. I like to use my photos to trigger moods as well as memories. That is best done by taking the time to set up the shot and paying attention to detail when editing. I hope that this has helped you a little when it comes to taking photos with your phones (or your big cameras even). I’d love to see what you do with these little tips, too! Feel free to visit my Instagram page. If you want to know how I did an edit, feel free to ask.
Lastly, here are the links to VSCOcam + Pictapgo. I find these to be the top editing apps that are also easy to use.
I have been scrapping since 2005 when my first child was a year old. Since then I have dabbled in paper, digital, hybrid, project life and mini books. I love them all and use each regularly. When I’m not scrapping, I love to take photos, drink coffee and take my kids on little mini adventures around our “new” home in Virginia.

October 16, 2015 at 1:53 pm
Claudia B says:
Awesome edits! Did you catch the new update on VSCO app? They dropped the cam from the name and got new features. I especially like the new clarity tool 🙂
October 17, 2015 at 3:59 pm
Brenda Smith says:
Oh yes! I love the new Clarity feature. I didn’t realize they dropped the “cam”. I’ll have to remember that. Thank you!
October 21, 2015 at 1:29 pm
Mary says:
Gorgeous photos! I’m in awe that they are from your phone. Off to the app store!